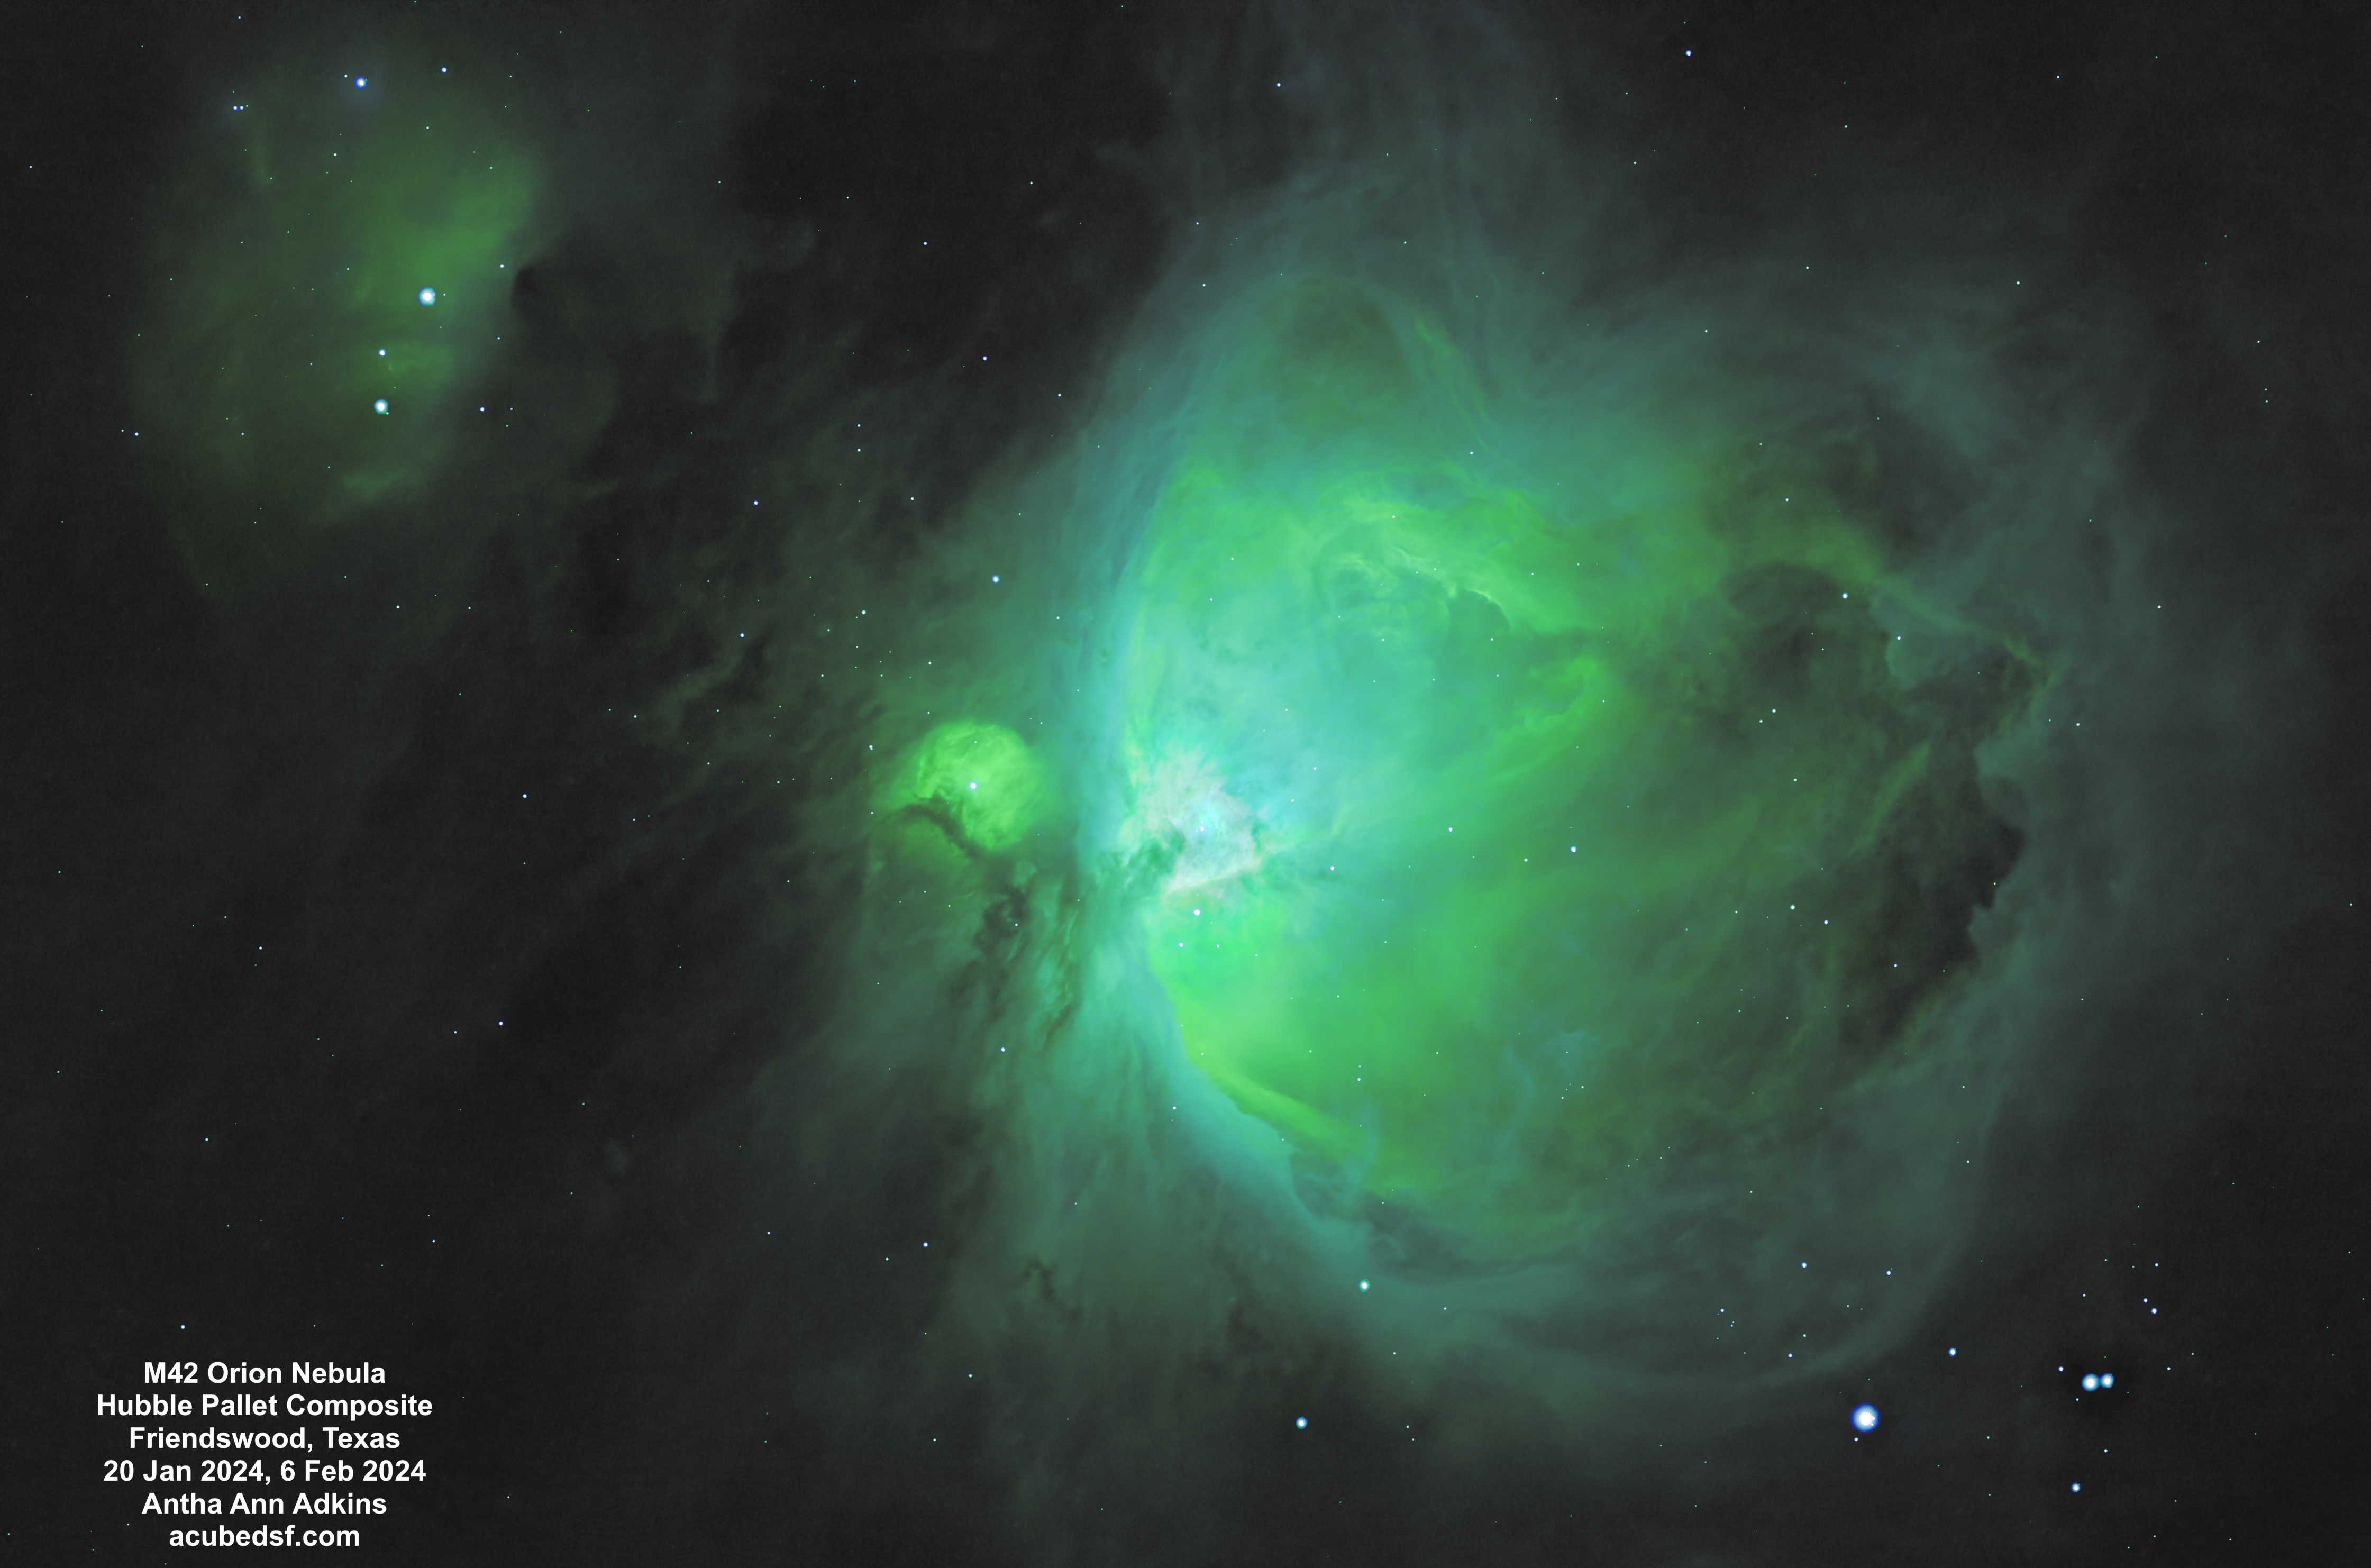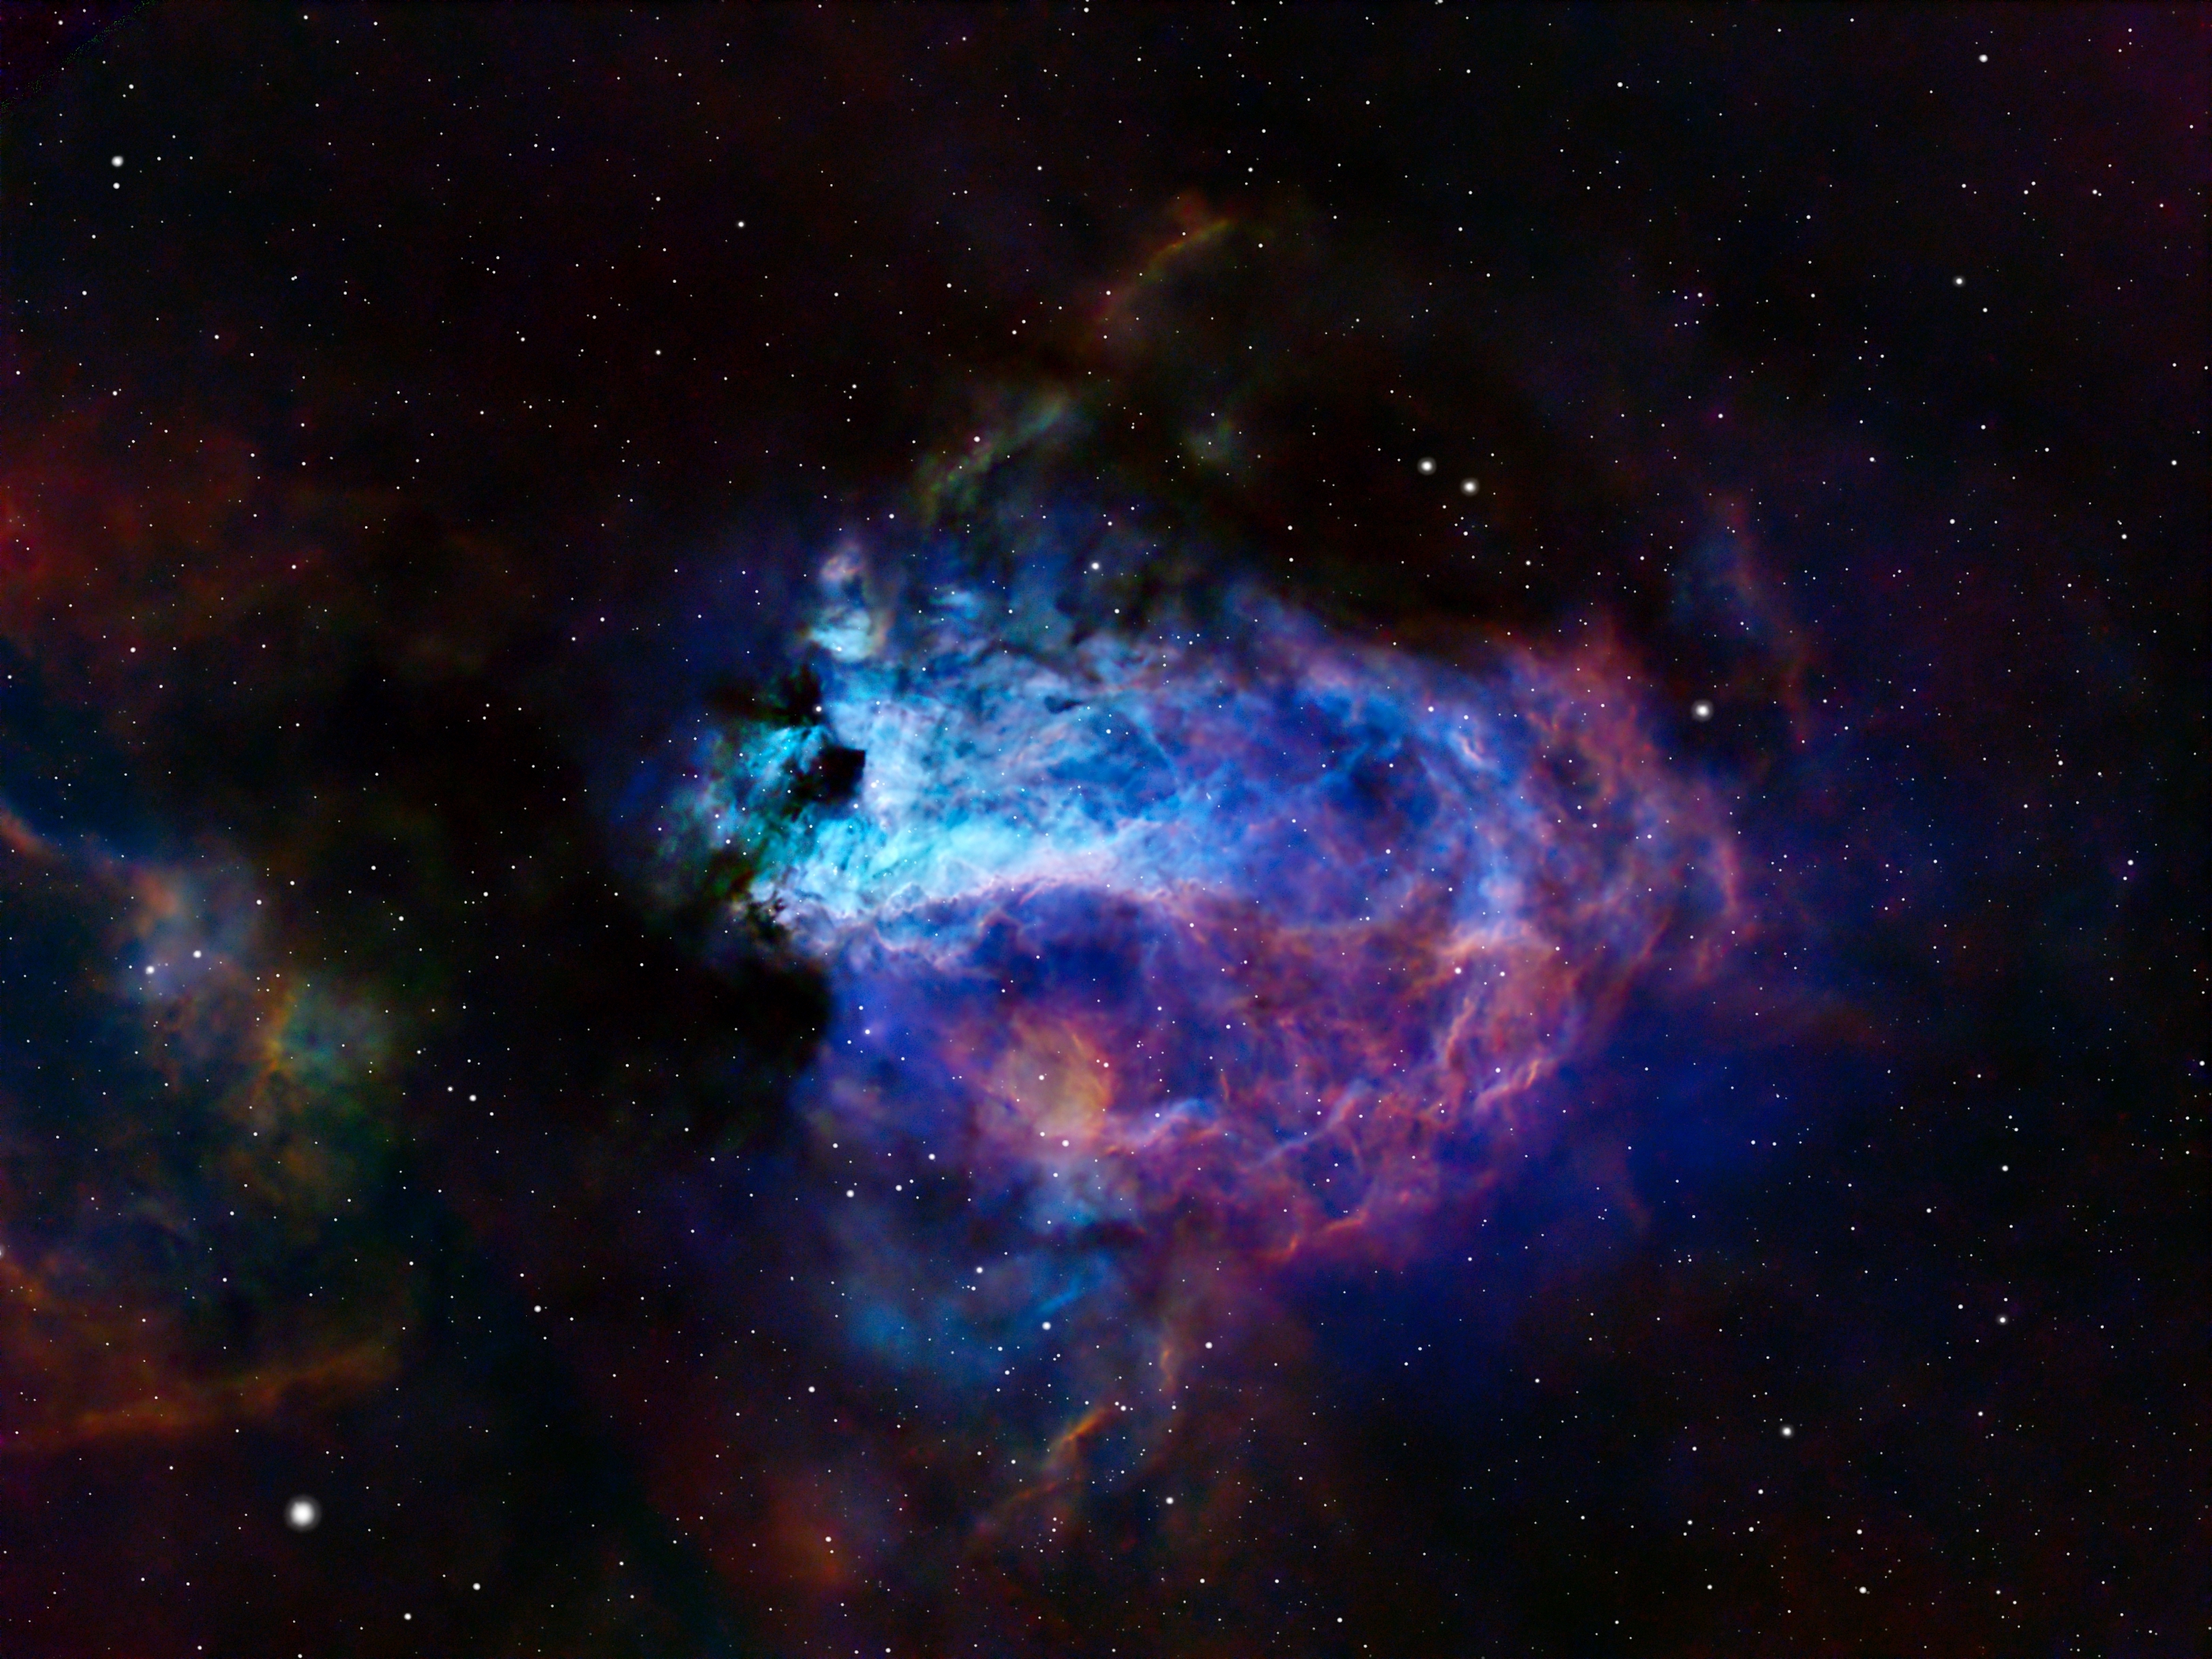
I call this image The Blue Swan with the Golden Egg. Can you see the blue swan sitting on a purple nest with a golden egg?
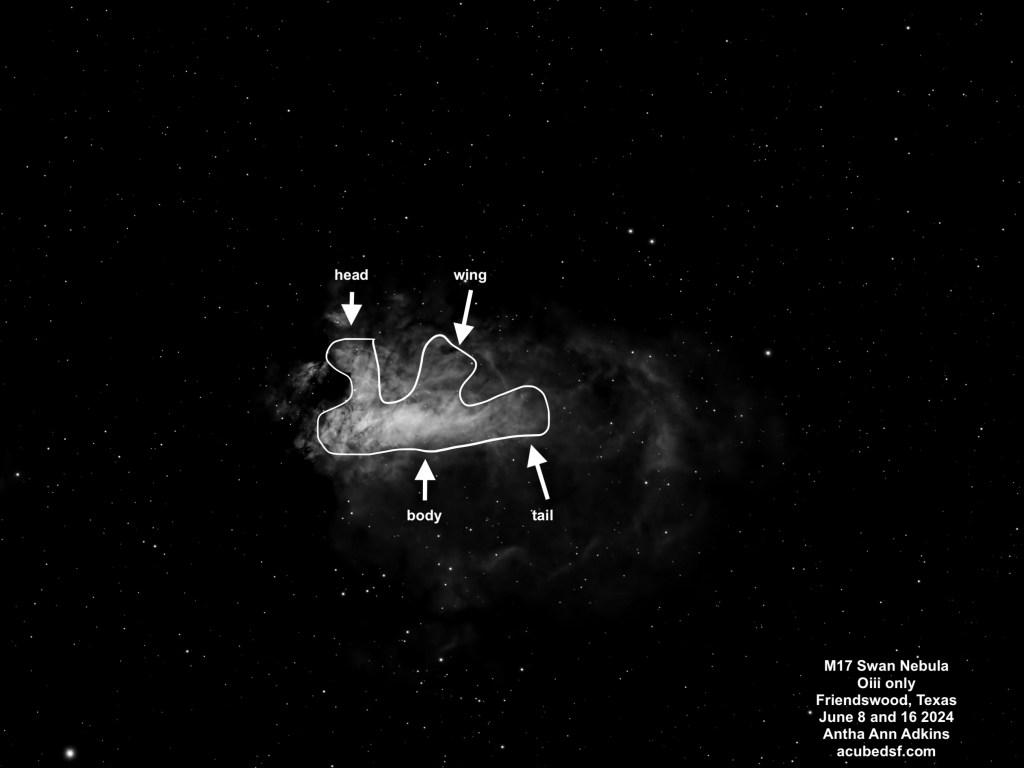
M17 is an emission nebula with many names, including the Swan Nebula. When I saw the Oiii narrowband images, I finally understood why it is called the Swan Nebula, and I’ve oriented this image so that the swan is “floating” with its head up. If you see the two dark spots near the center of the frame and the brightest part of the nebula, the lower one is the swan’s neck. The largest portion of the bright part of the nebula is the swan’s body, the neck comes up past the dark spot, and then the head is above it. I’ve included a single frame, below, where it the swan is more obvious because the rest of the nebulosity is hidden, and I’ve sketched in the swan on top of it. Howard Banich has some lovely hand-drawn sketches of this nebula in a Sky & Telescope article.

M17 is a large star-forming region. It’s been the home for three star-forming events, but the stars created are mostly hidden behind the molecular cloud. The massive stars it made emit UV radiation that excites the hydrogen gas to form the emission nebula. It’s located in the Milky Way, approximately 5500 light years away, and the brightest portion has an apparent size of 10 arc min, so it is approximately 15 light years across. The region of gas around it is larger, with an apparent size of about 30 arc min, so it is approximately 48 light years across.
I have learned a lot about narrowband processing while working on this image, and I’ve gotten a lot of useful pointers from the folks at the astrobin forums.
I initially made four different color maps using NBColourMapper, with the following color assignments and results:
| Palette Name | Natural | Hubble (SHO) | Canada France Hawaii Telescope (HOS) | Extra |
| H-alpha color mapping | Red (0) | Green (120) | Red (0) | Red (0) |
| Oiii color mapping | Turquoise (180) | Blue (240) | Green (120) | Blue (240) |
| Sii color mapping | Orange (20) | Red (0) | Blue (240) | Green (120) |
| Result | Mostly red, not much color contrast | Blue Swan with Green/Yellow nebula, more color contrast | Yellow Swan with Pink/Purple Nebula, more color contrast | Pink/Purple Swan with Yellow/Purple nebula, more color contrast |
My Hubble SHO pallet was extremely green and looked nothing like the classic Hubble images which tend to be very blue and yellow/red. Apparently mostly green images are not considered attractive (it’s not easy being green) and don’t have the desired contrast. After getting feedback on the astrobin forum and watching a lot of videos, I learned that the general technique for narrowband color mapping is to first normalize the images using LinearFit so the different bands are all equally bright. This loses the relative signal strengths of the different bands, but means that the dimmer bands aren’t overwhelmed by the stronger ones.
After color mapping the three linear fit data sets and running NBColourMapper, I used Dynamic Background Extraction to remove the background color bias. I liked what it did with the background more than Background Neutralization, which I also tried.
For color calibration, I tried using SPCC in narrowband mode. This seemed to want to push the nebula back to the original colors – very green for SHO and red and gold for HOS (which I actually liked). This makes sense, but I didn’t end up using the resulting images. I tried using ColorCalibration. This brought out the reds and golds in the SHO image, but it ended up with extreme colors in the nebula.
I got more astrobin advice and watched some Adam Block videos. Not only does Adam provide excellent explanations of the effects of various tool settings (the “why” as well as the “what”), but he also talks about his image processing philosophy, which in this case was eye-opening for me. He shared his philosophy of thinking about how he wanted the image to look when it was done before he started processing it which I found extremely useful. He gave me a different and better way to think about narrowband astrophotography image processing. I looked at my original narrowband data and decided what I’d like to try to do is bring out the details that are in the Sii data. Following a similar philosophy to what he did in his example, I used PixelMath to map the narrowband data to RGB, emphasizing the red and the blue and dialing back the blue and the green when there was red to emphasize the red Sii details with the following settings:
- R = 2*S
- G = 0.4*H+0.6*H*(1-S)
- B = O+2*(1-S)*O
I finally achieved the blue I’d been looking for!
After narrowband mapping, I stretched the nebula using ScreenTransferFunction and the HistogramTransformation, then used a new to me tool, High Dynamic Range Multiscale Transform (HDRMT), which “flattened” the image so that I could see details in both the nebula core and in the surrounding faint nebula. I finished by using Curves, working on the c curve to emphasize the reds a little more (after the PixelMath mapping, I didn’t need to do much in Curves).
With this color mapping, the stars turn out over-blue. I processed them separately and converted them to be only white, then added them back in.
This has taken me a couple of weeks of learning and experimenting, and I think it was worth it. I ended up with an image that makes me think “isn’t the universe beautiful?”
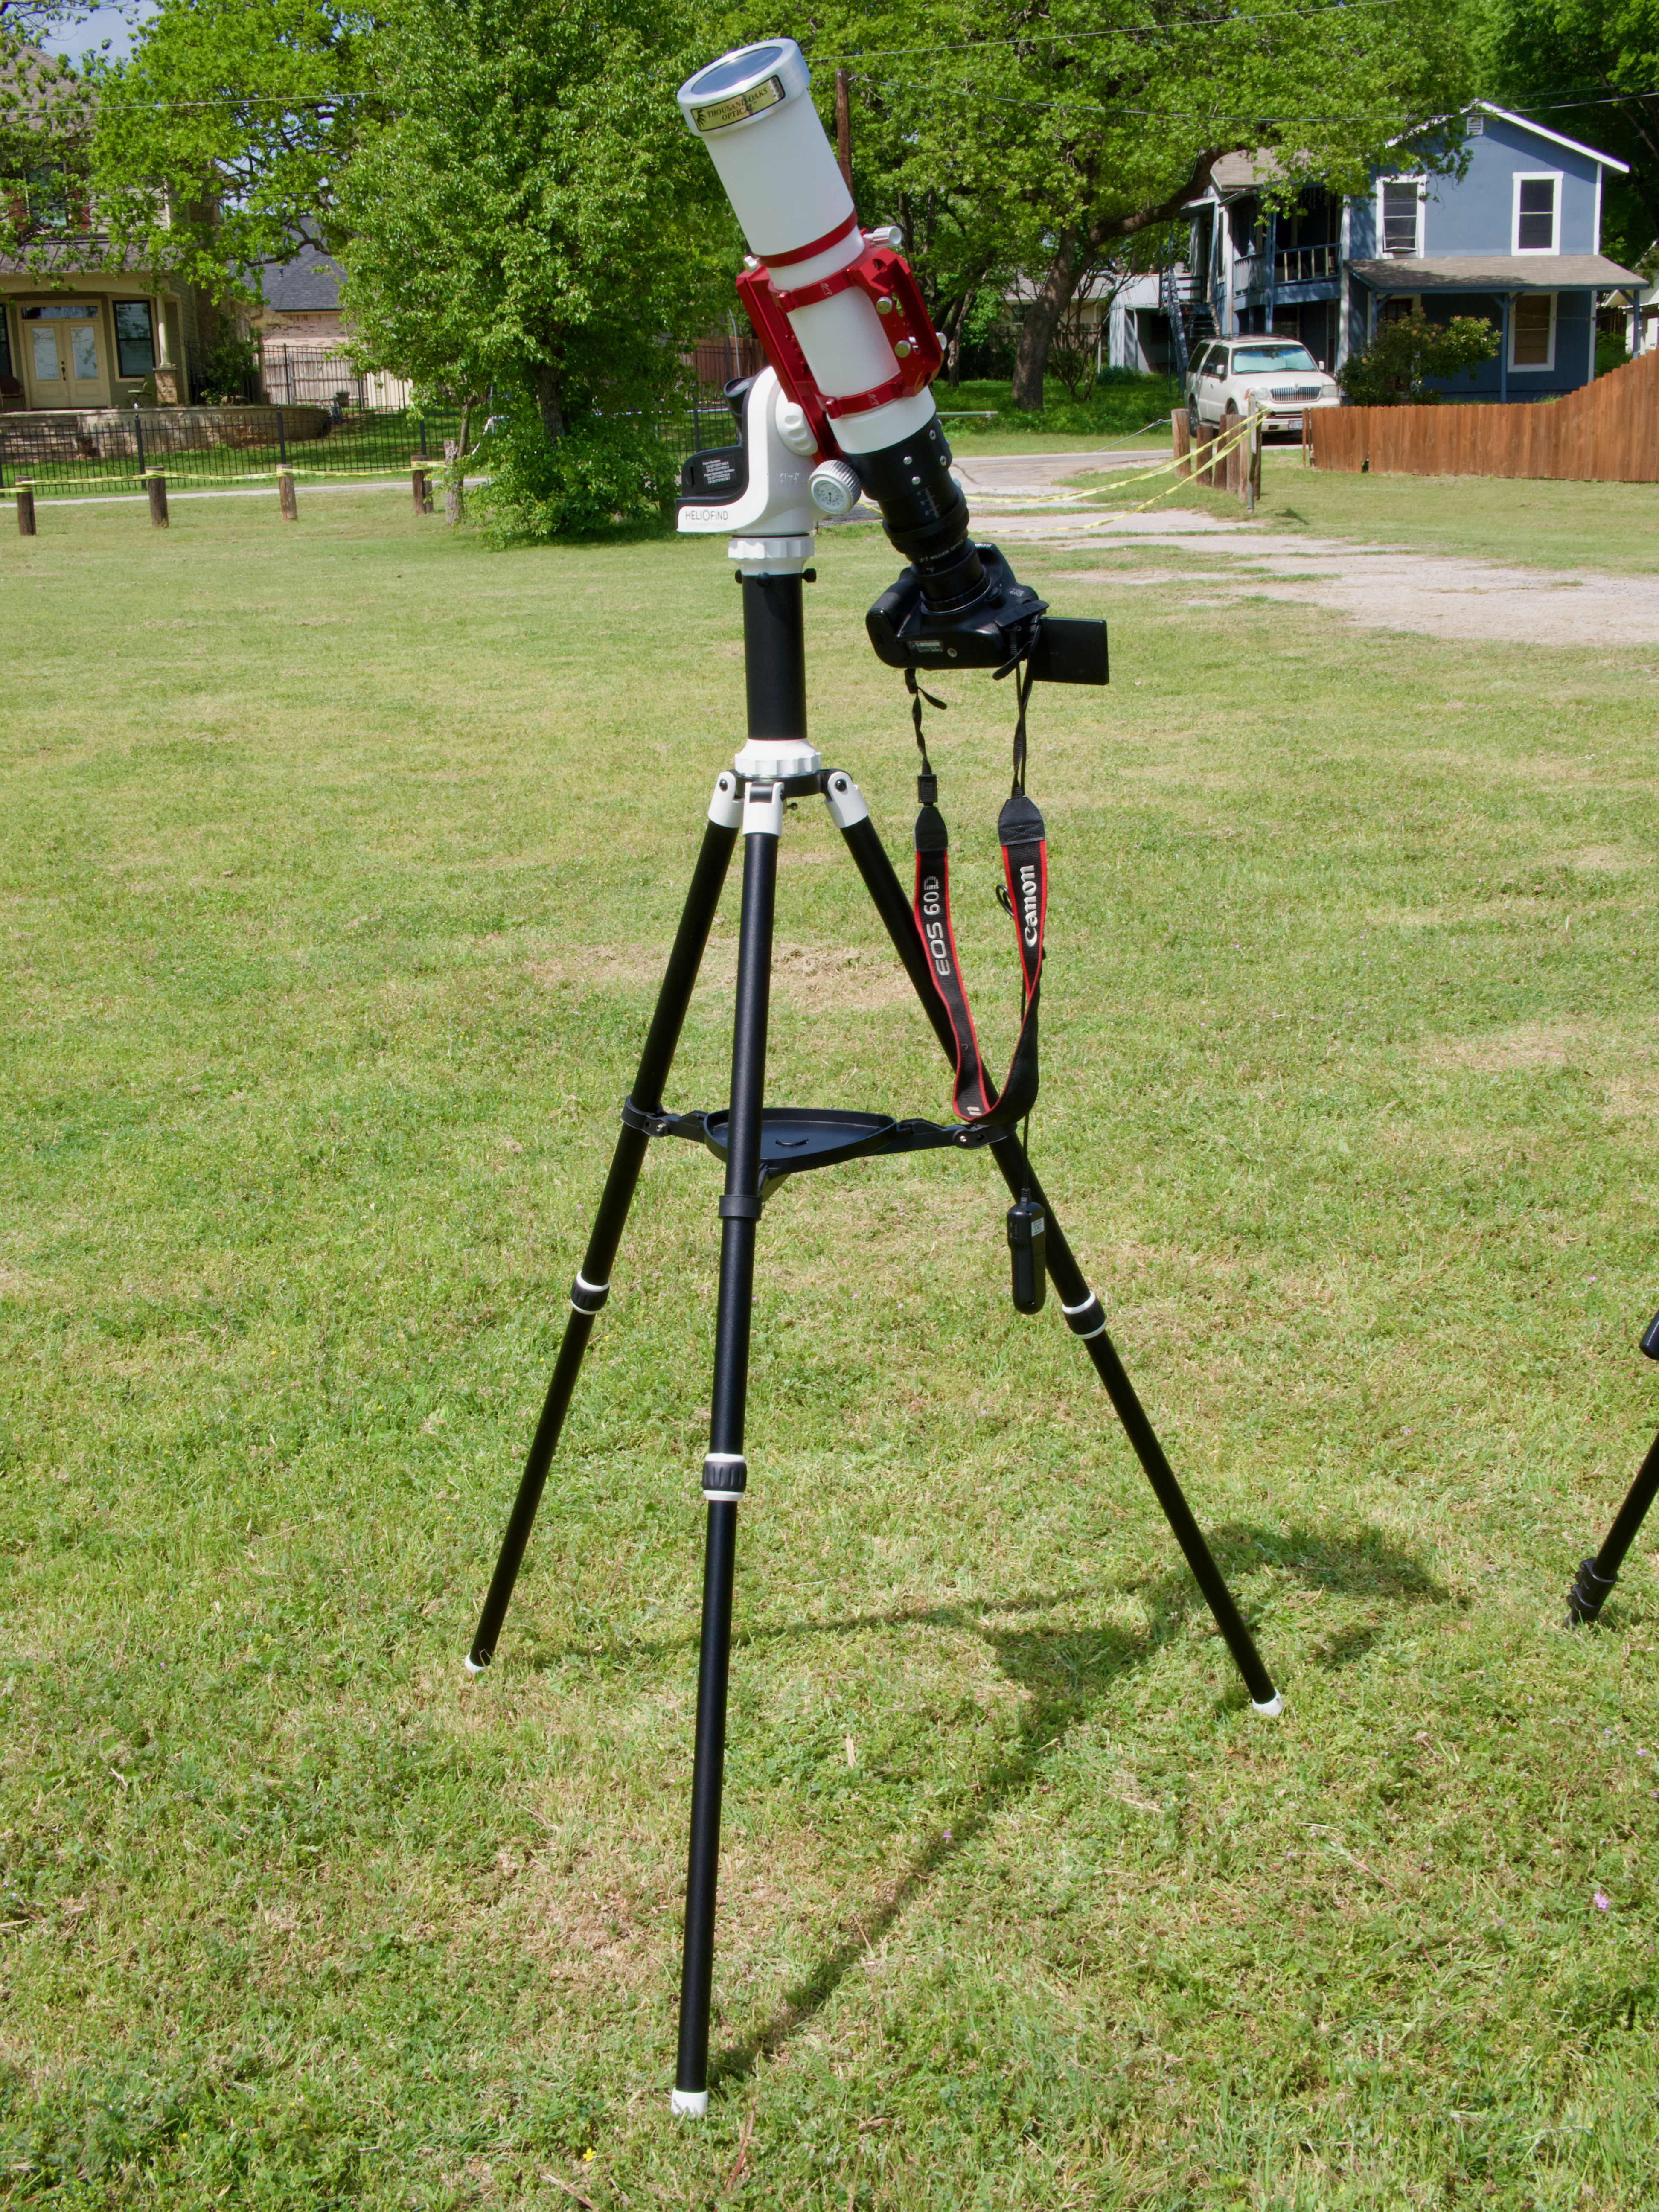
Camera geek info – Narrowband:
- Williams Optics Zenith Star 73 III APO telescope
- Williams Optics Flat 73A
- ZWO 2” Electronic Filter Wheel
- Antila SHO filters
- ZWO ASI183MM-Pro-Mono camera
- ZWO ASiair Plus
- iOptron CEM40
- Friendswood, Texas Bortle 7-8 suburban skies
Frames:
- June 8, 2024
- 58 60 second Gain 150 Ha lights
- 30 0.05 second Gain 150 Ha flats
- 17 60 second Gain 150 Oiii lights
- 30 0.05 second Gain 150 Oiii flats
- 30 0.05 second Gain 150 flat darks
- 30 60 second darks
- June 14, 2024
- 28 60 second Gain 150 Sii lights
- 30 0.05 second Gain 150 Oiii flats
- 30 0.05 second Gain 150 flat darks
- June 15, 2024
- 77 0.05 second Gain 150 Sii lights
- 30 0.05 second Gain 150 Sii flats
- June 16, 2024
- 85 60 second Gain 150 Oiii lights
- 30 0.05 second Gain 150 Oiii flats
- 30 0.05 second flat darks
Processing geek info:
- PixInsight
- BlurXterminator
- NoiseXterminator
- StarXTerminator