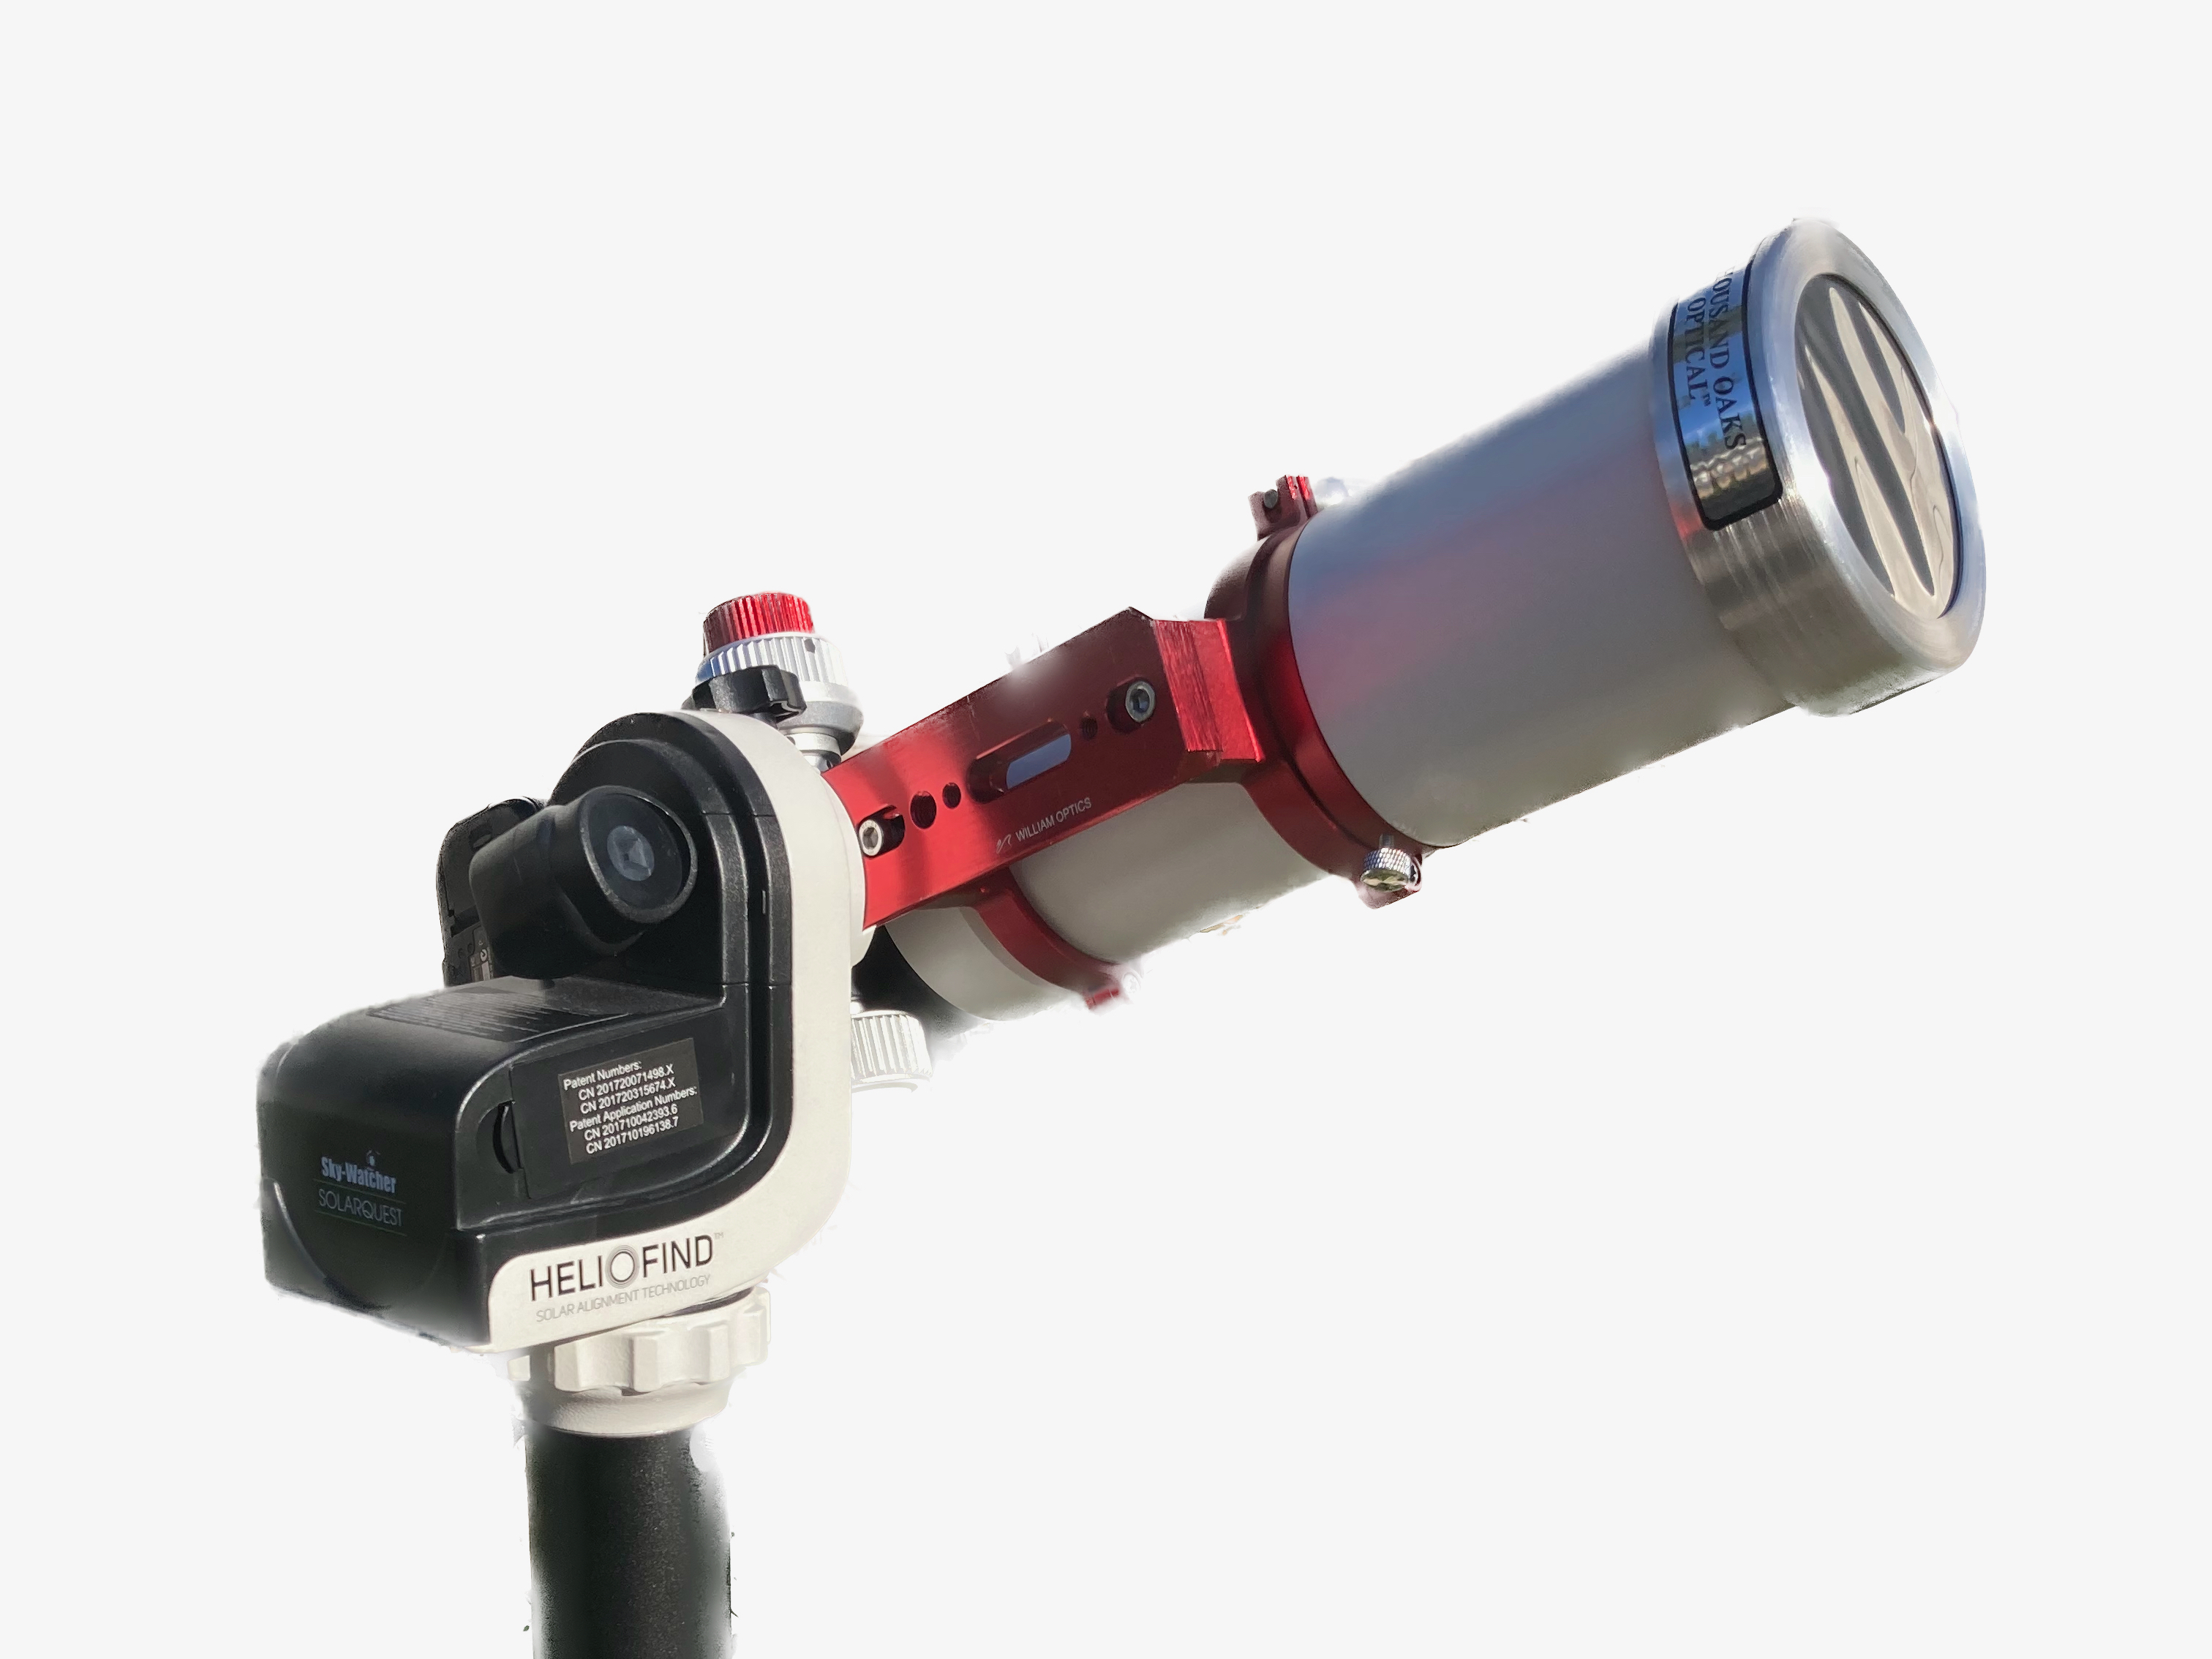
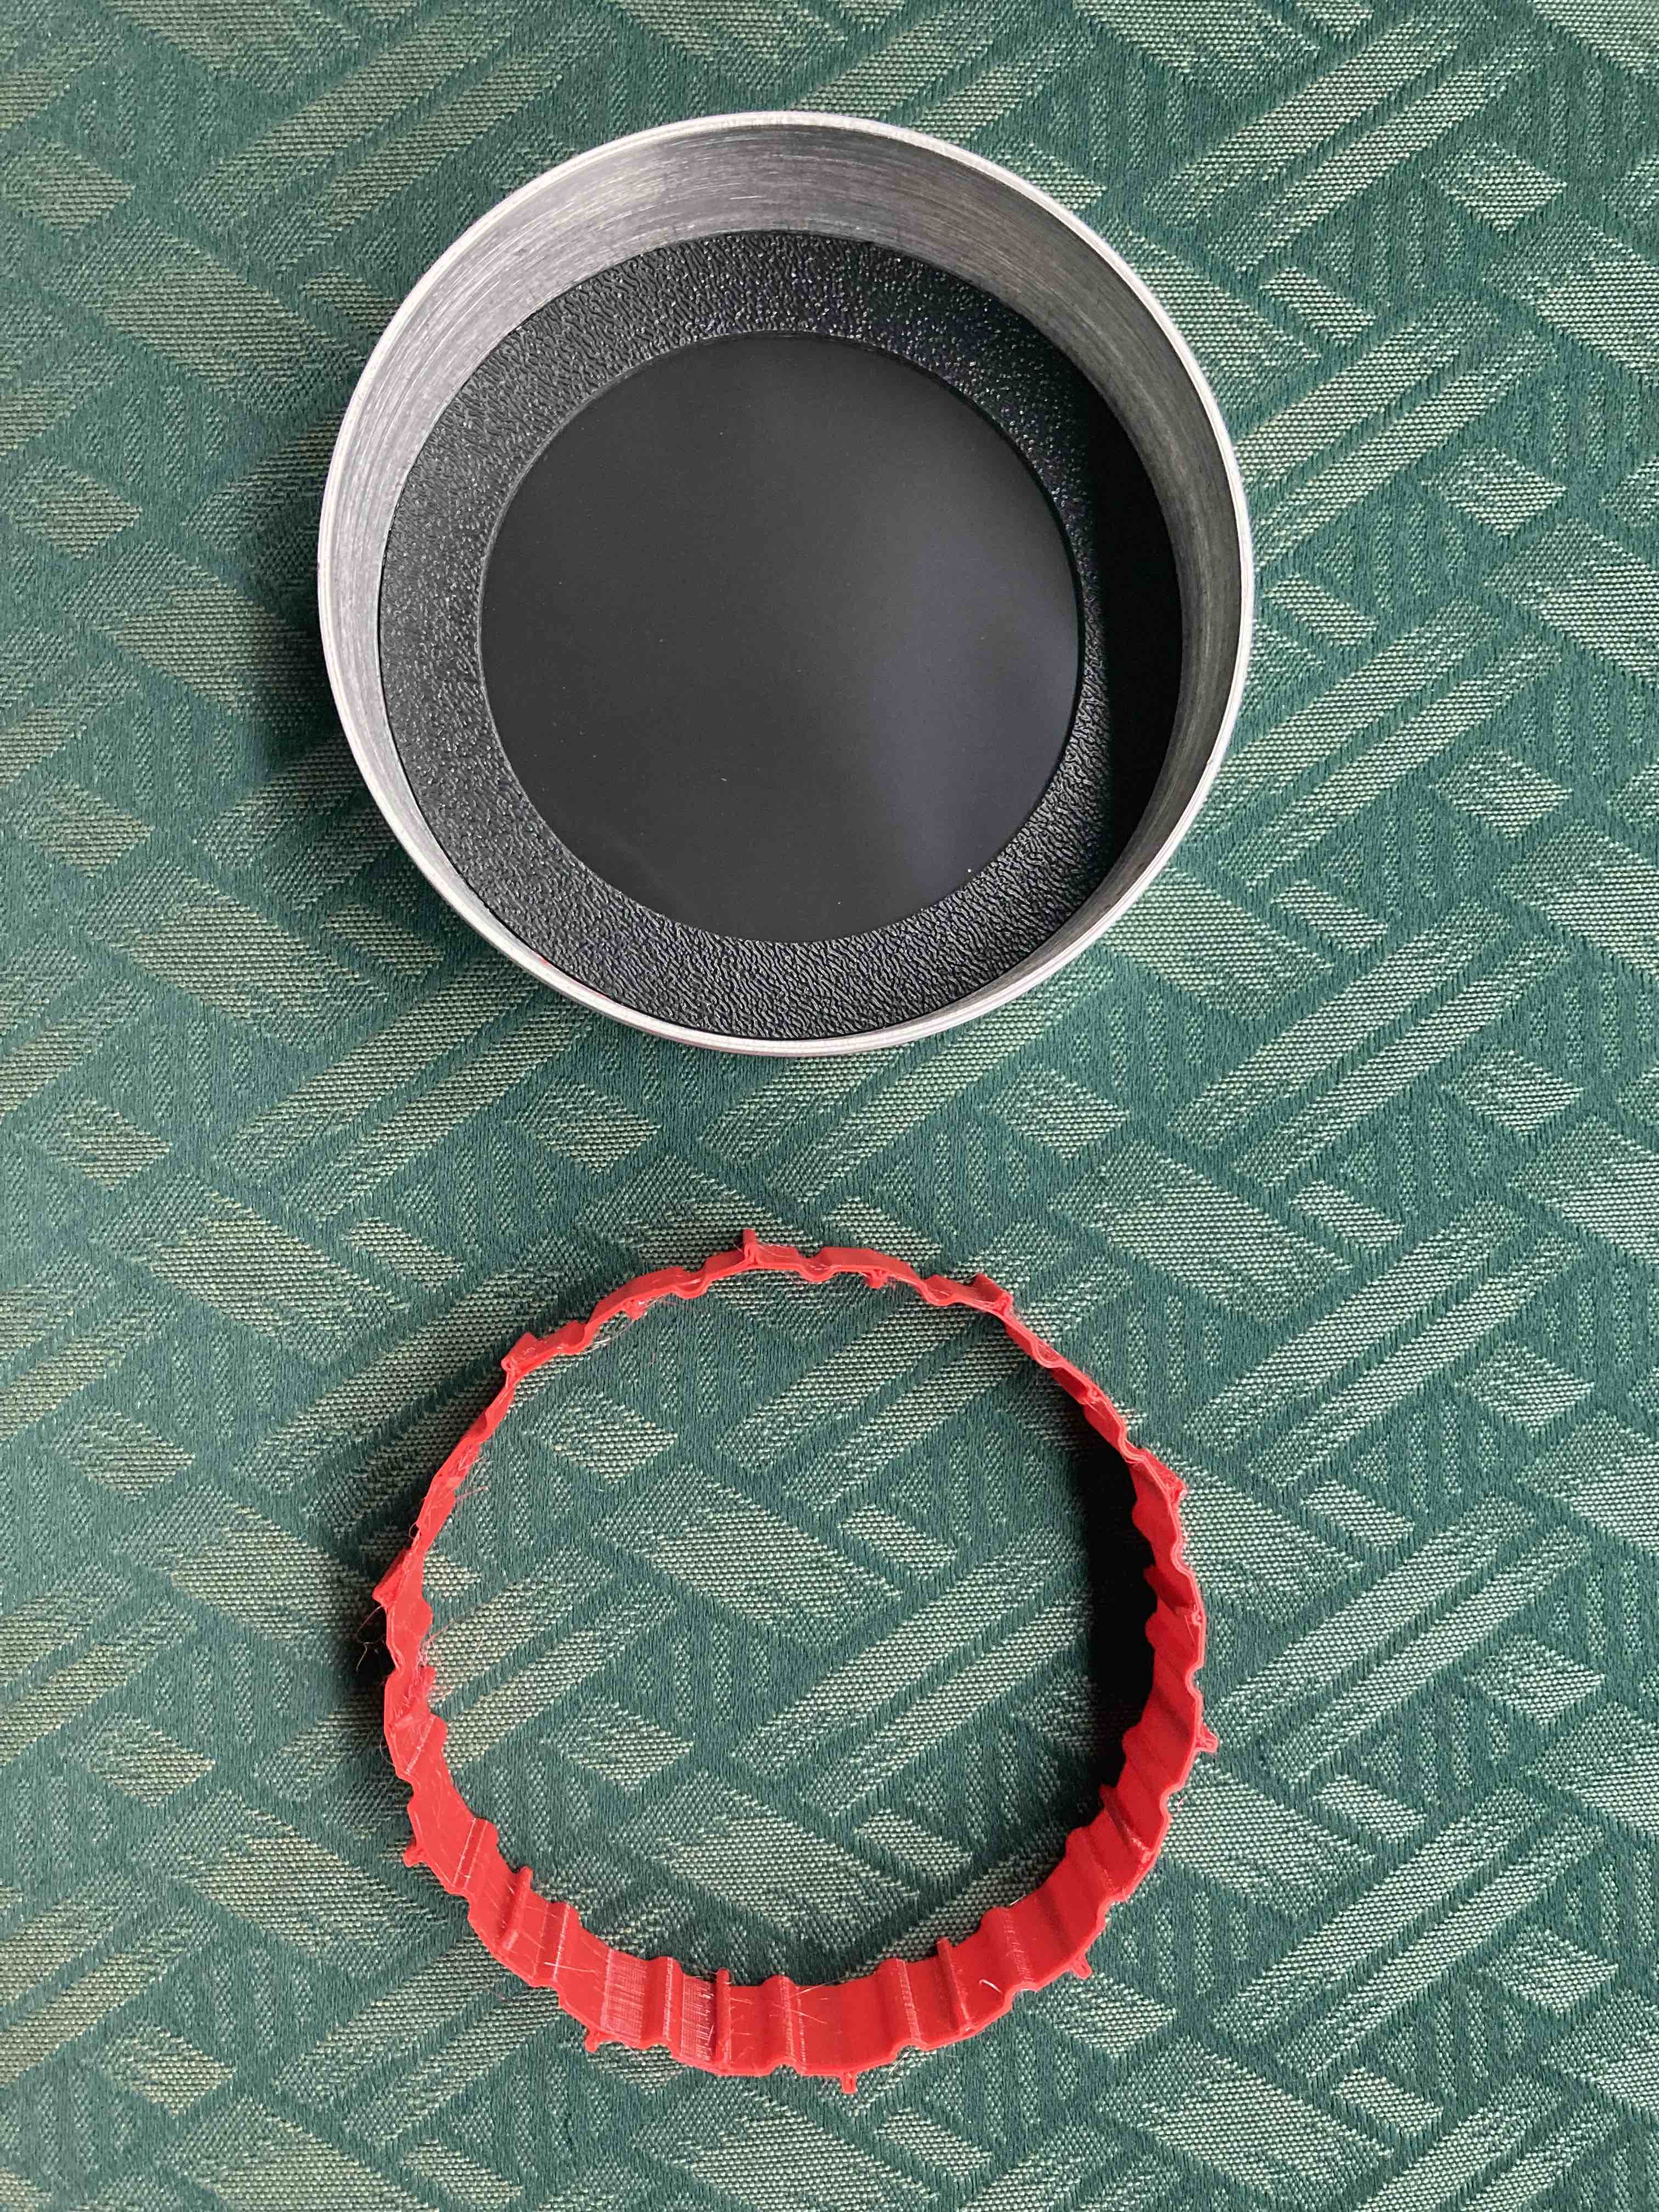
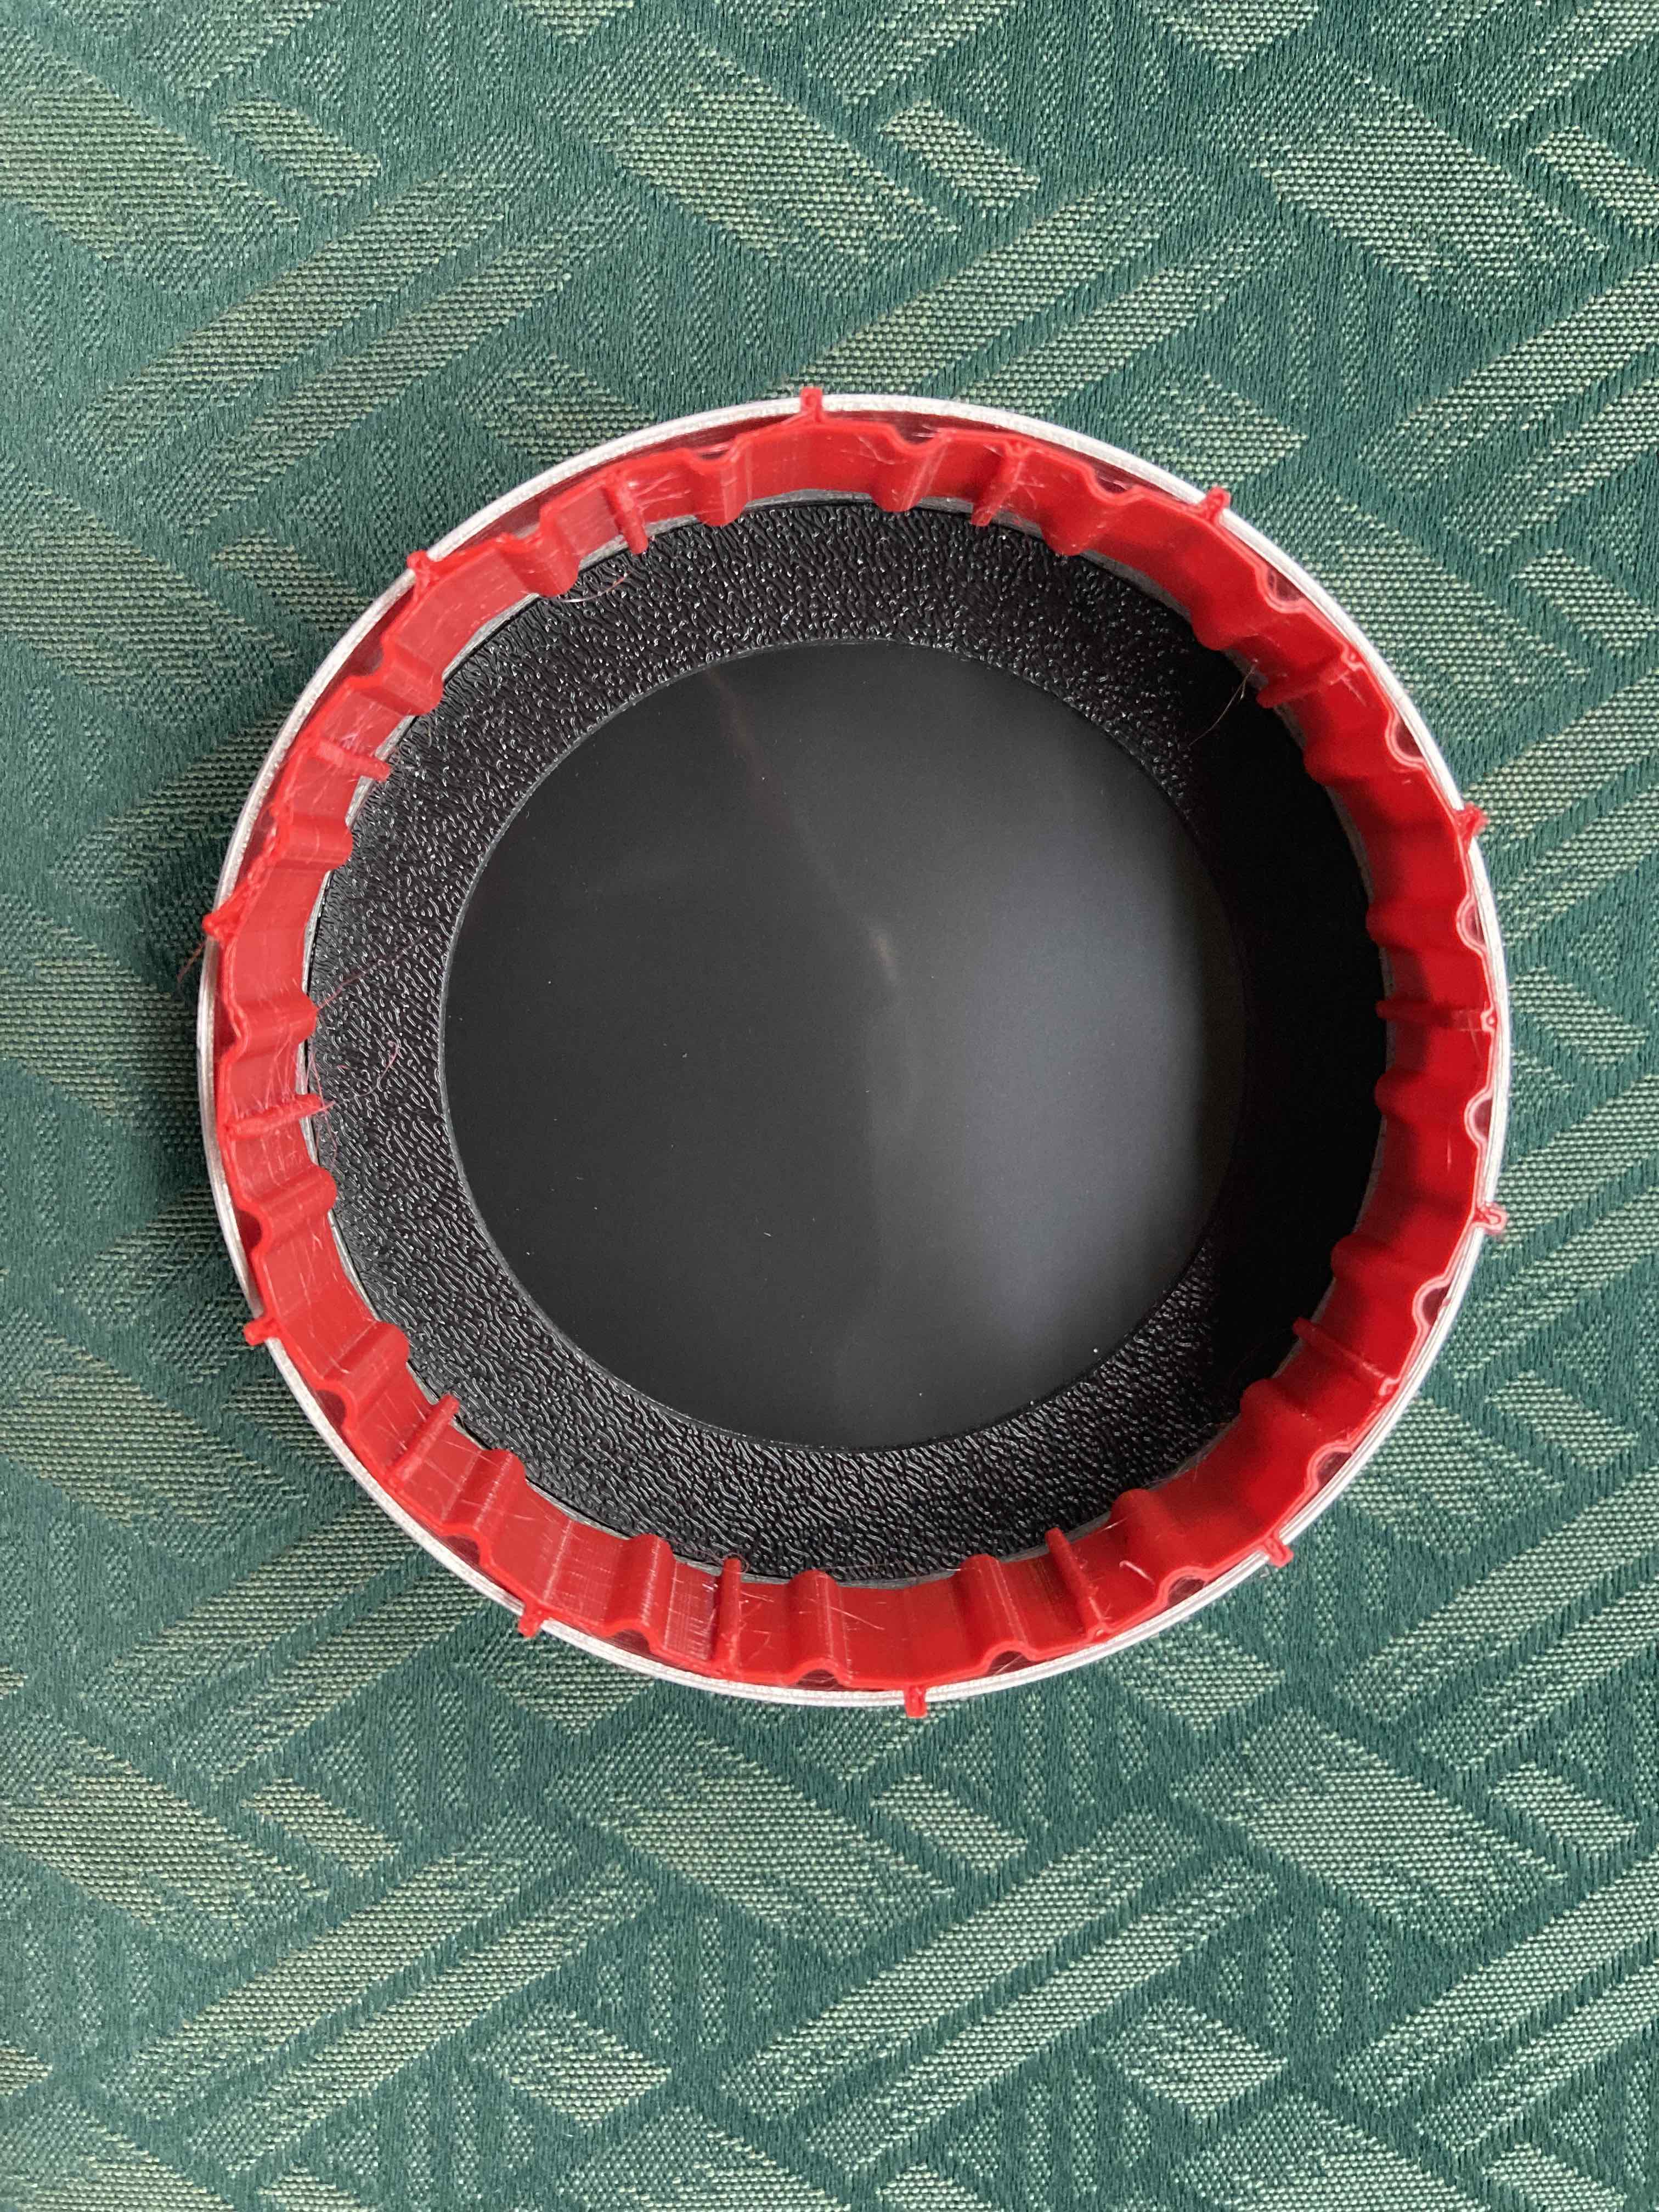
In preparation for the upcoming solar eclipse, I’ve gotten some new tools (toys). I got a solar tracking mount that tracks the sun so I don’t have to try to set up my tracking mount (which needs a view of the stars to align) in the daytime. And I got a solar filter for my telescope (this is not optional – eyeballs and optics can be destroyed without a proper solar filter). Solar filters have been hard to come by – I’ve had one the correct size on order for months – and this one was too big. But my awesome husband and his 3D printer came to the rescue! He made me a spacer to go between the solar filter and the telescope. It worked perfectly!
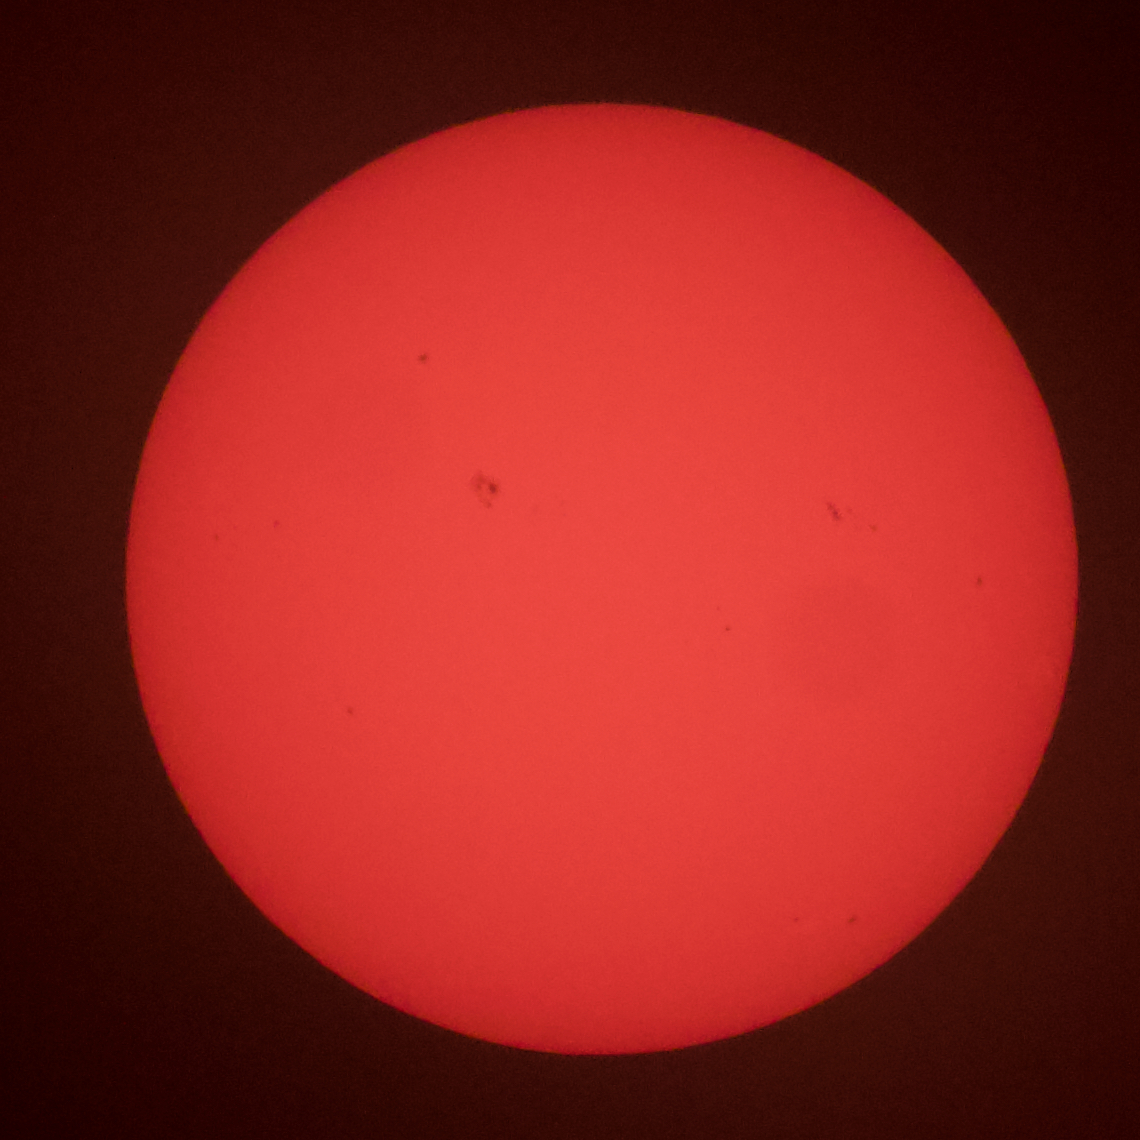
I tried a variety of settings for ISO and exposure length. This particular shot at ISO 800 with a 1/400 second exposure had the best sun spots on this particular day. It seemed like settings where ISO * exposure >= 1 worked the best.
Camera geek info:
Canon EOS 60D in manual mode, 1/400 second exposure, ISO 800
Intervalometer
Williams Optics Zenith Star 73 III APO telescope
Williams Optics Flat 73A
Thousand Oaks optical solar filter
Sky-Watcher SolarQuest HelioFind tracking mount and tripod
Unfortunately, I was only able to get to see Comet Nishimura twice before it got too close to the sun. But I thought it was interesting to see how much its tail had grown over a week!
Having learned how to process comets thanks to the excellent videos by Adam Block, I went back and finished processing my first image of Comet Nishimura from September 2, 2023. That morning we got up at 3:30 AM and drove over to Bacliff, Texas to get a good view to the East, and got set up. I found the comet, started taking pictures, and enjoyed watching the sunrise. As the sun rose over the flat water, we saw dolphins arcing out of the water – one of my favorite sights on the Texas Gulf Coast.
Because the September 2 images involved a compact comet with not much tail and a short range of locations and a rapidly brightening background, I modified the excellent instructions from Adam Block as follows:
Register and process images as normal (noting the reference image), then removing the comet using a circular mask that covered the first and last locations and PixelMath. I could get away with this because the comet didn’t have a large tail and hadn’t moved very far and there were no visible stars in the masked-out region. In this case, I integrated unweighted; if I were doing it again, I would use the weighting I determined below.
Run SubframeSelector to determine what parameter to weight the images with – PSF SNR seemed to best reflect the lower quality due to the sky brightening in the last images.
Run CometAlignment on the debayerd data to get comet-aligned images. Use PixelMath to make a mask to mask the comet core. Run StarXterminator to generate comet-only images. Integrate the images using PSF SNR weighting. Then post-process as normal. I could barely see the comet tail in these images and I tried a variety of stretches to try to pull it out. I ended up using STF and Histogram Transfer plus Curves.
Finally, put the stars image and the comet image back together using PixelMath.
Whew! Comet processing is a lot more complicated than galaxies and nebulae. Fun to see something new in the sky, though.
Camera geek info:
Canon EOS 60D in manual mode, 60 second exposures, ISO 800
Comet C/2023 P1 Nishimura with Airplane Photobomber on September 8, 2023
For the past two weekends, we’ve gotten up at 3:30 AM to drive to a spot with a long view to the East to go comet hunting. I had setup issues with my tracking mount both times – the GoTo tracking did not want to three star align. On both days, I managed to overcome that obstacle in time to capture some images of the comet. On September 8, the time frame between when the comet cleared the haze on the horizon and the time that the sky got bright pre-dawn was surprisingly short (about 20 minutes). Also on September 8, I had a funny picture where an airplane had photobombed my comet image and flew right in front of the comet.
Astrophotography is really two hobbies: capturing the images and processing them.
And I still haven’t mastered processing comets.
But thanks to the excellent videos from Adam Block and a software update on Russ Croman’s extremely useful StarXterminator program (where my Comet Nishimura data from September 2 appears in the releasenotes), I have finally managed to produce some decent comet pictures. I registered all the images with the one with the airplane photobomb so I could combine the final comet image with the airplane lights to make a photobomb picture.
It’s fun to find surprises in the night sky!
Camera geek info:
Canon EOS 60D in manual mode, 30 second exposures, ISO 800 for 4 frames, ISO 400 for the remainder