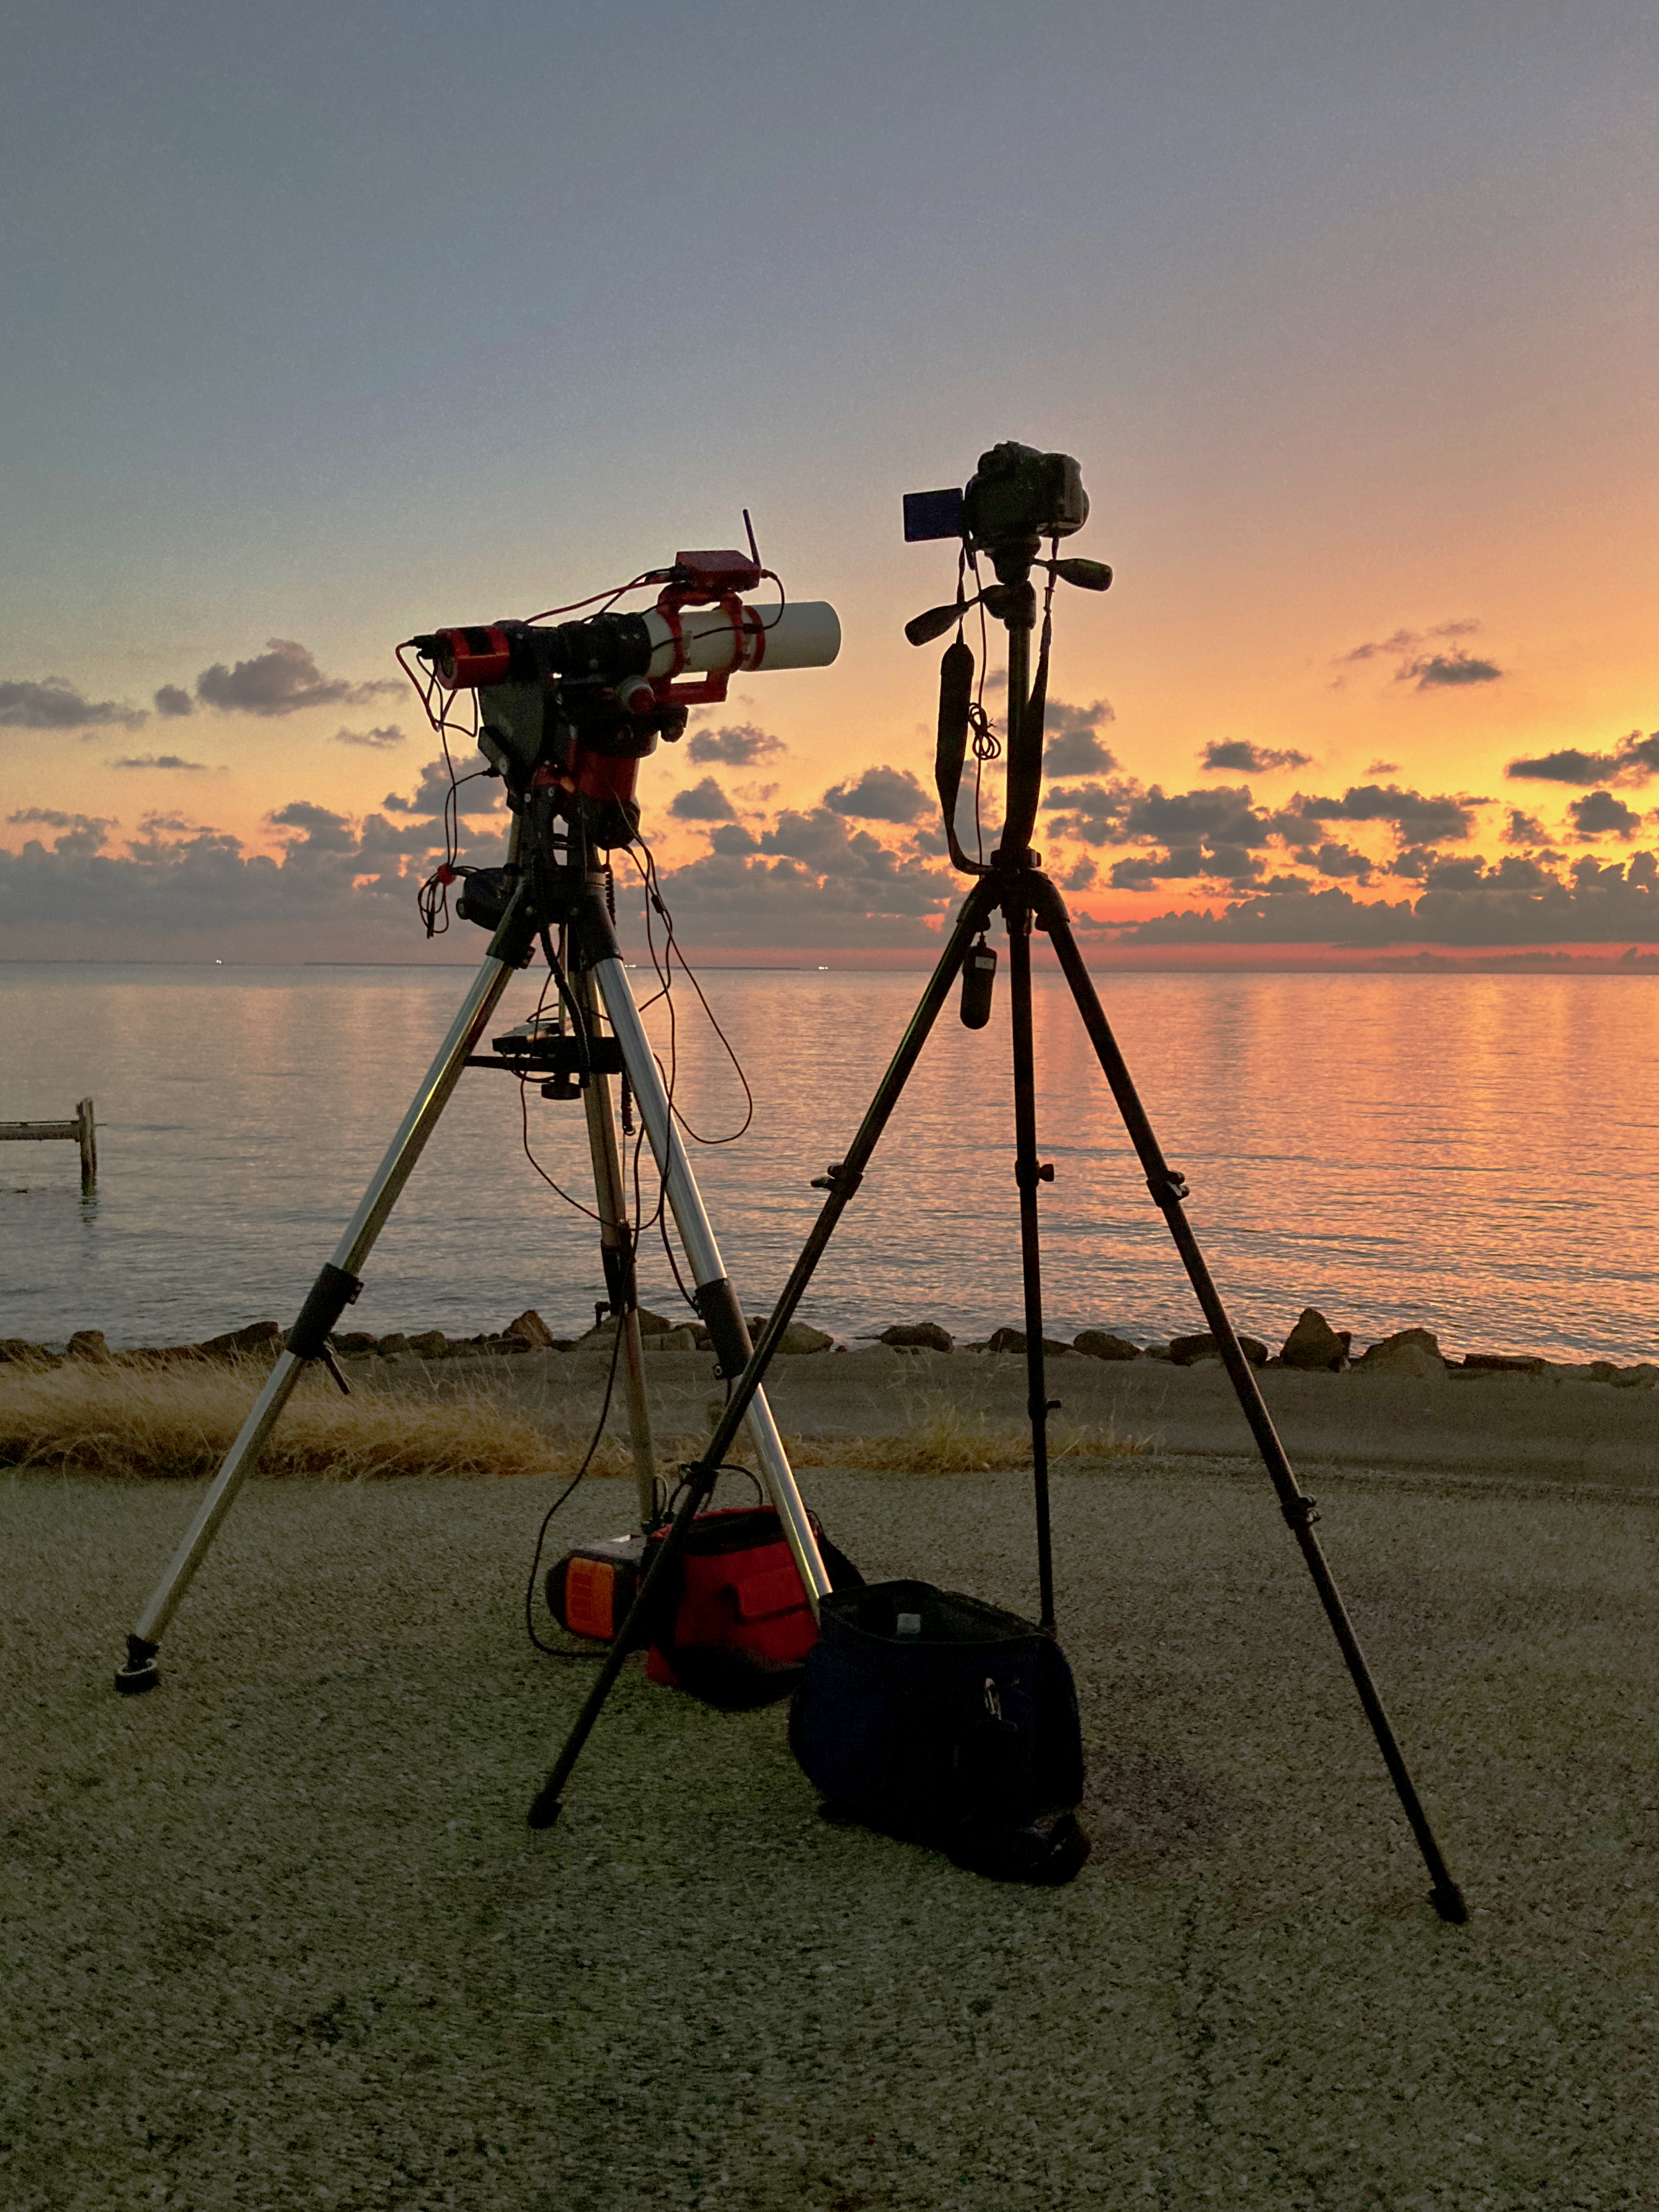
On Sunday morning, we got up at 4:00 AM to drive to a spot with a long view to the East to go comet hunting. I successfully got the telescope set up prior to the time when Comet Tsuchinshan-ATLAS C/2023 A3 was supposed to rise. However, when the comet did rise, the ASIAIR could find stars, but couldn’t plate solve to figure out if it was pointing exactly right. So I ended up starting imaging without having successfully scanned to the predicted comet location. Since I could see a tiny comet in the first shot, I let the system take an automated sequence of shots. 60 second shots were too bright, so I started with 10 second shots, and when they became too bright, I switched to 1 second shots.
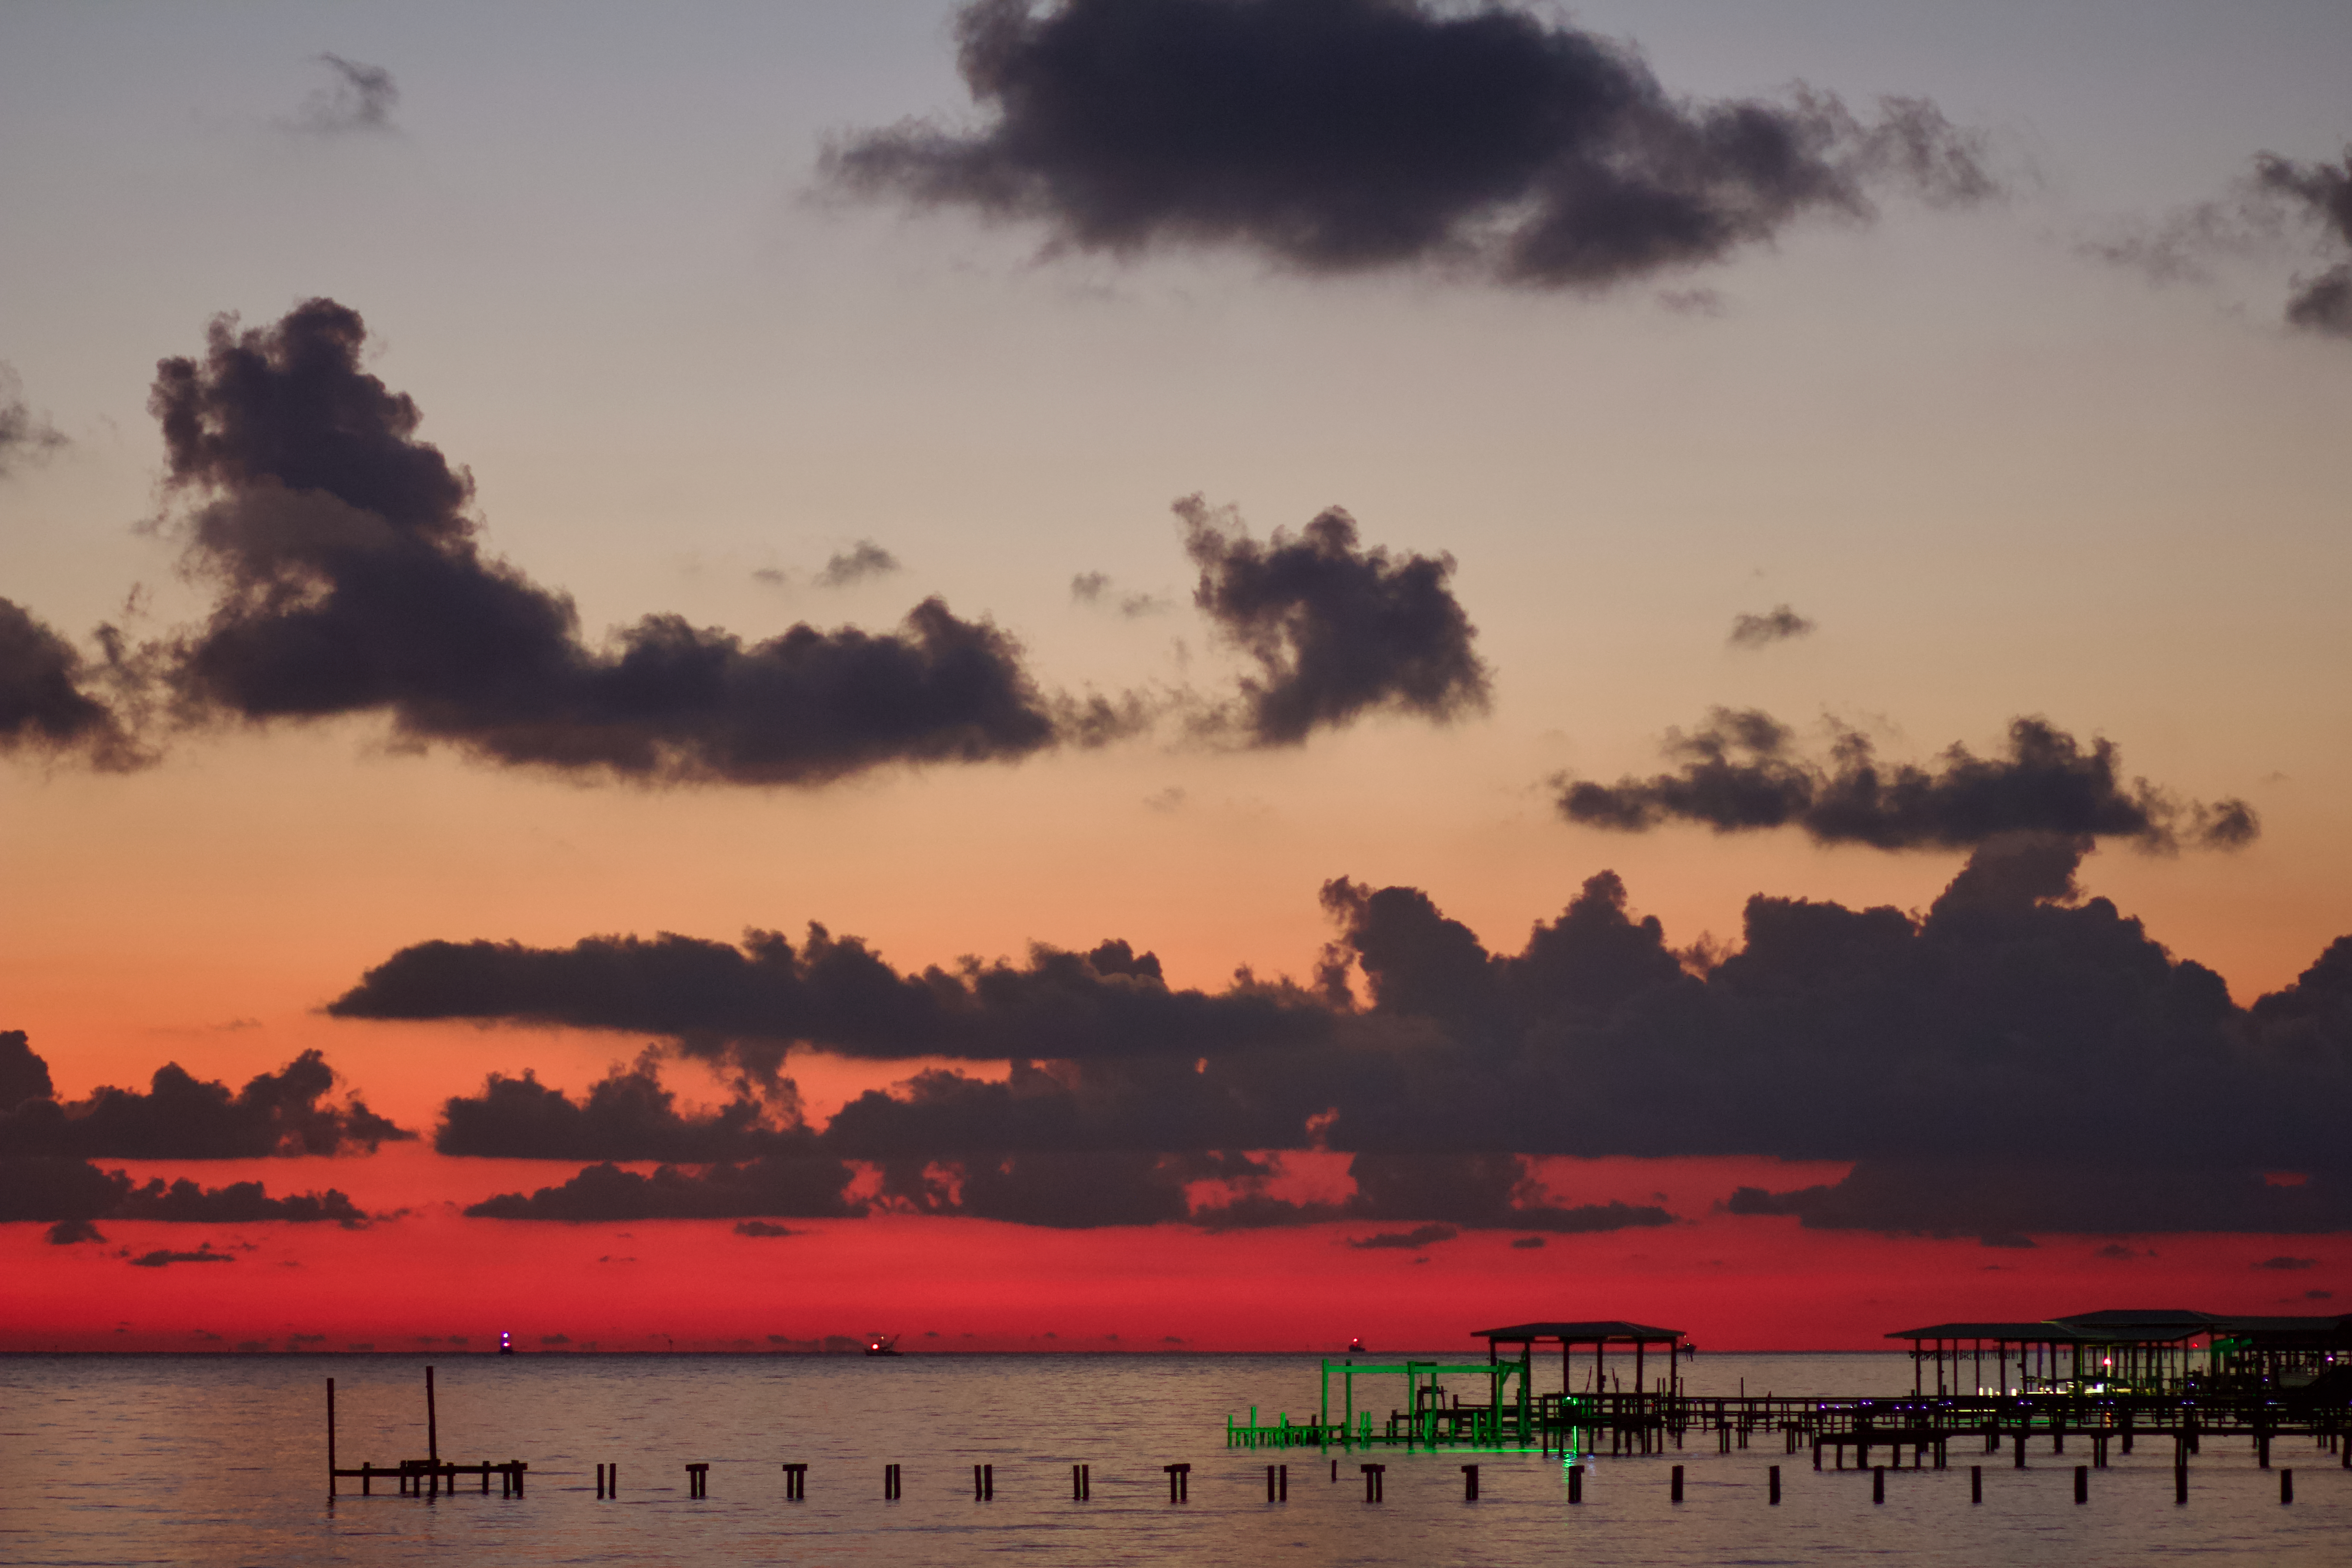
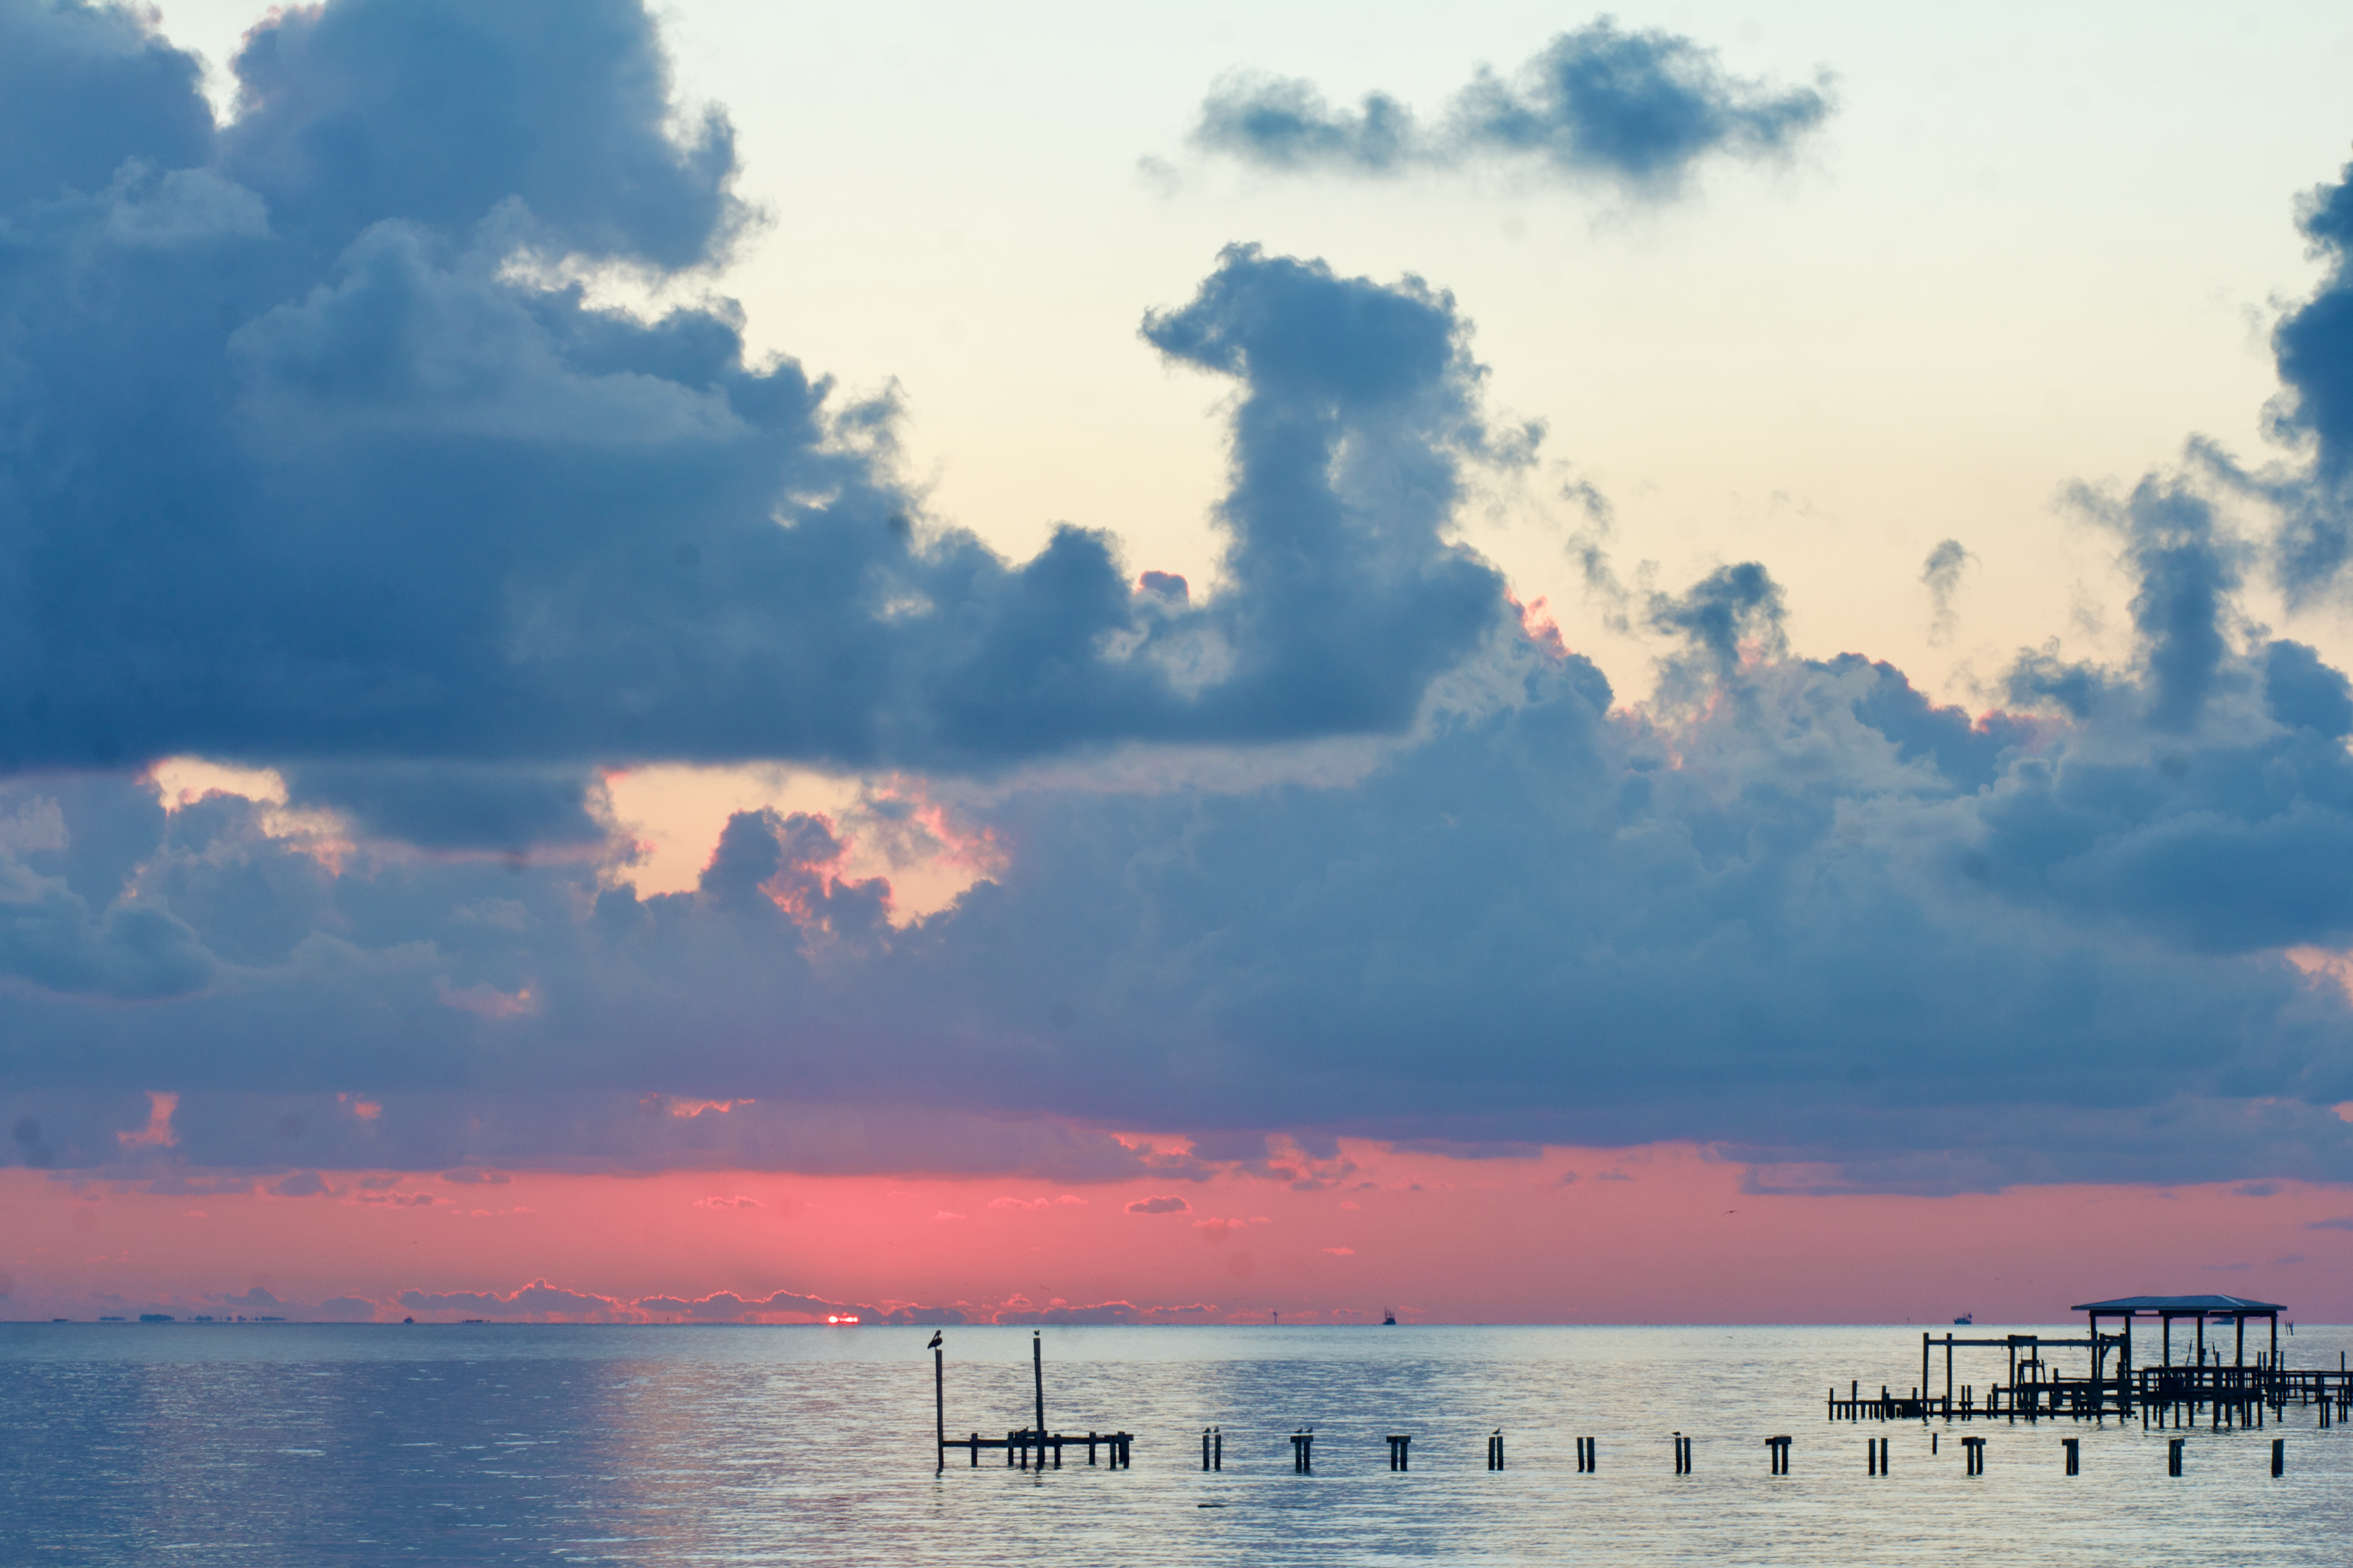
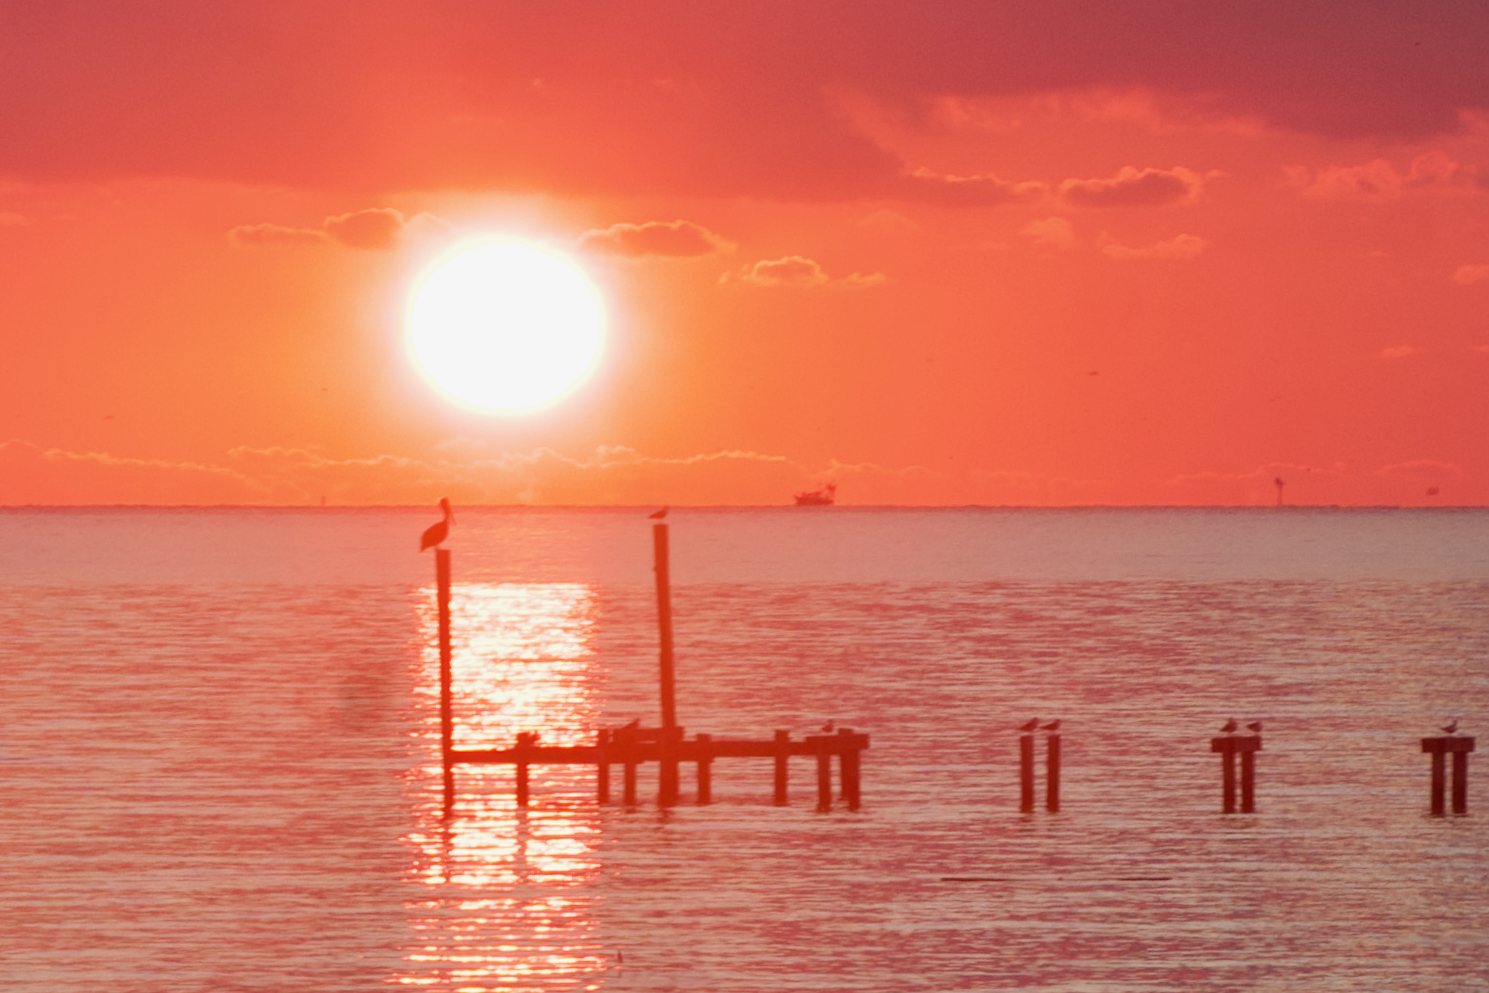
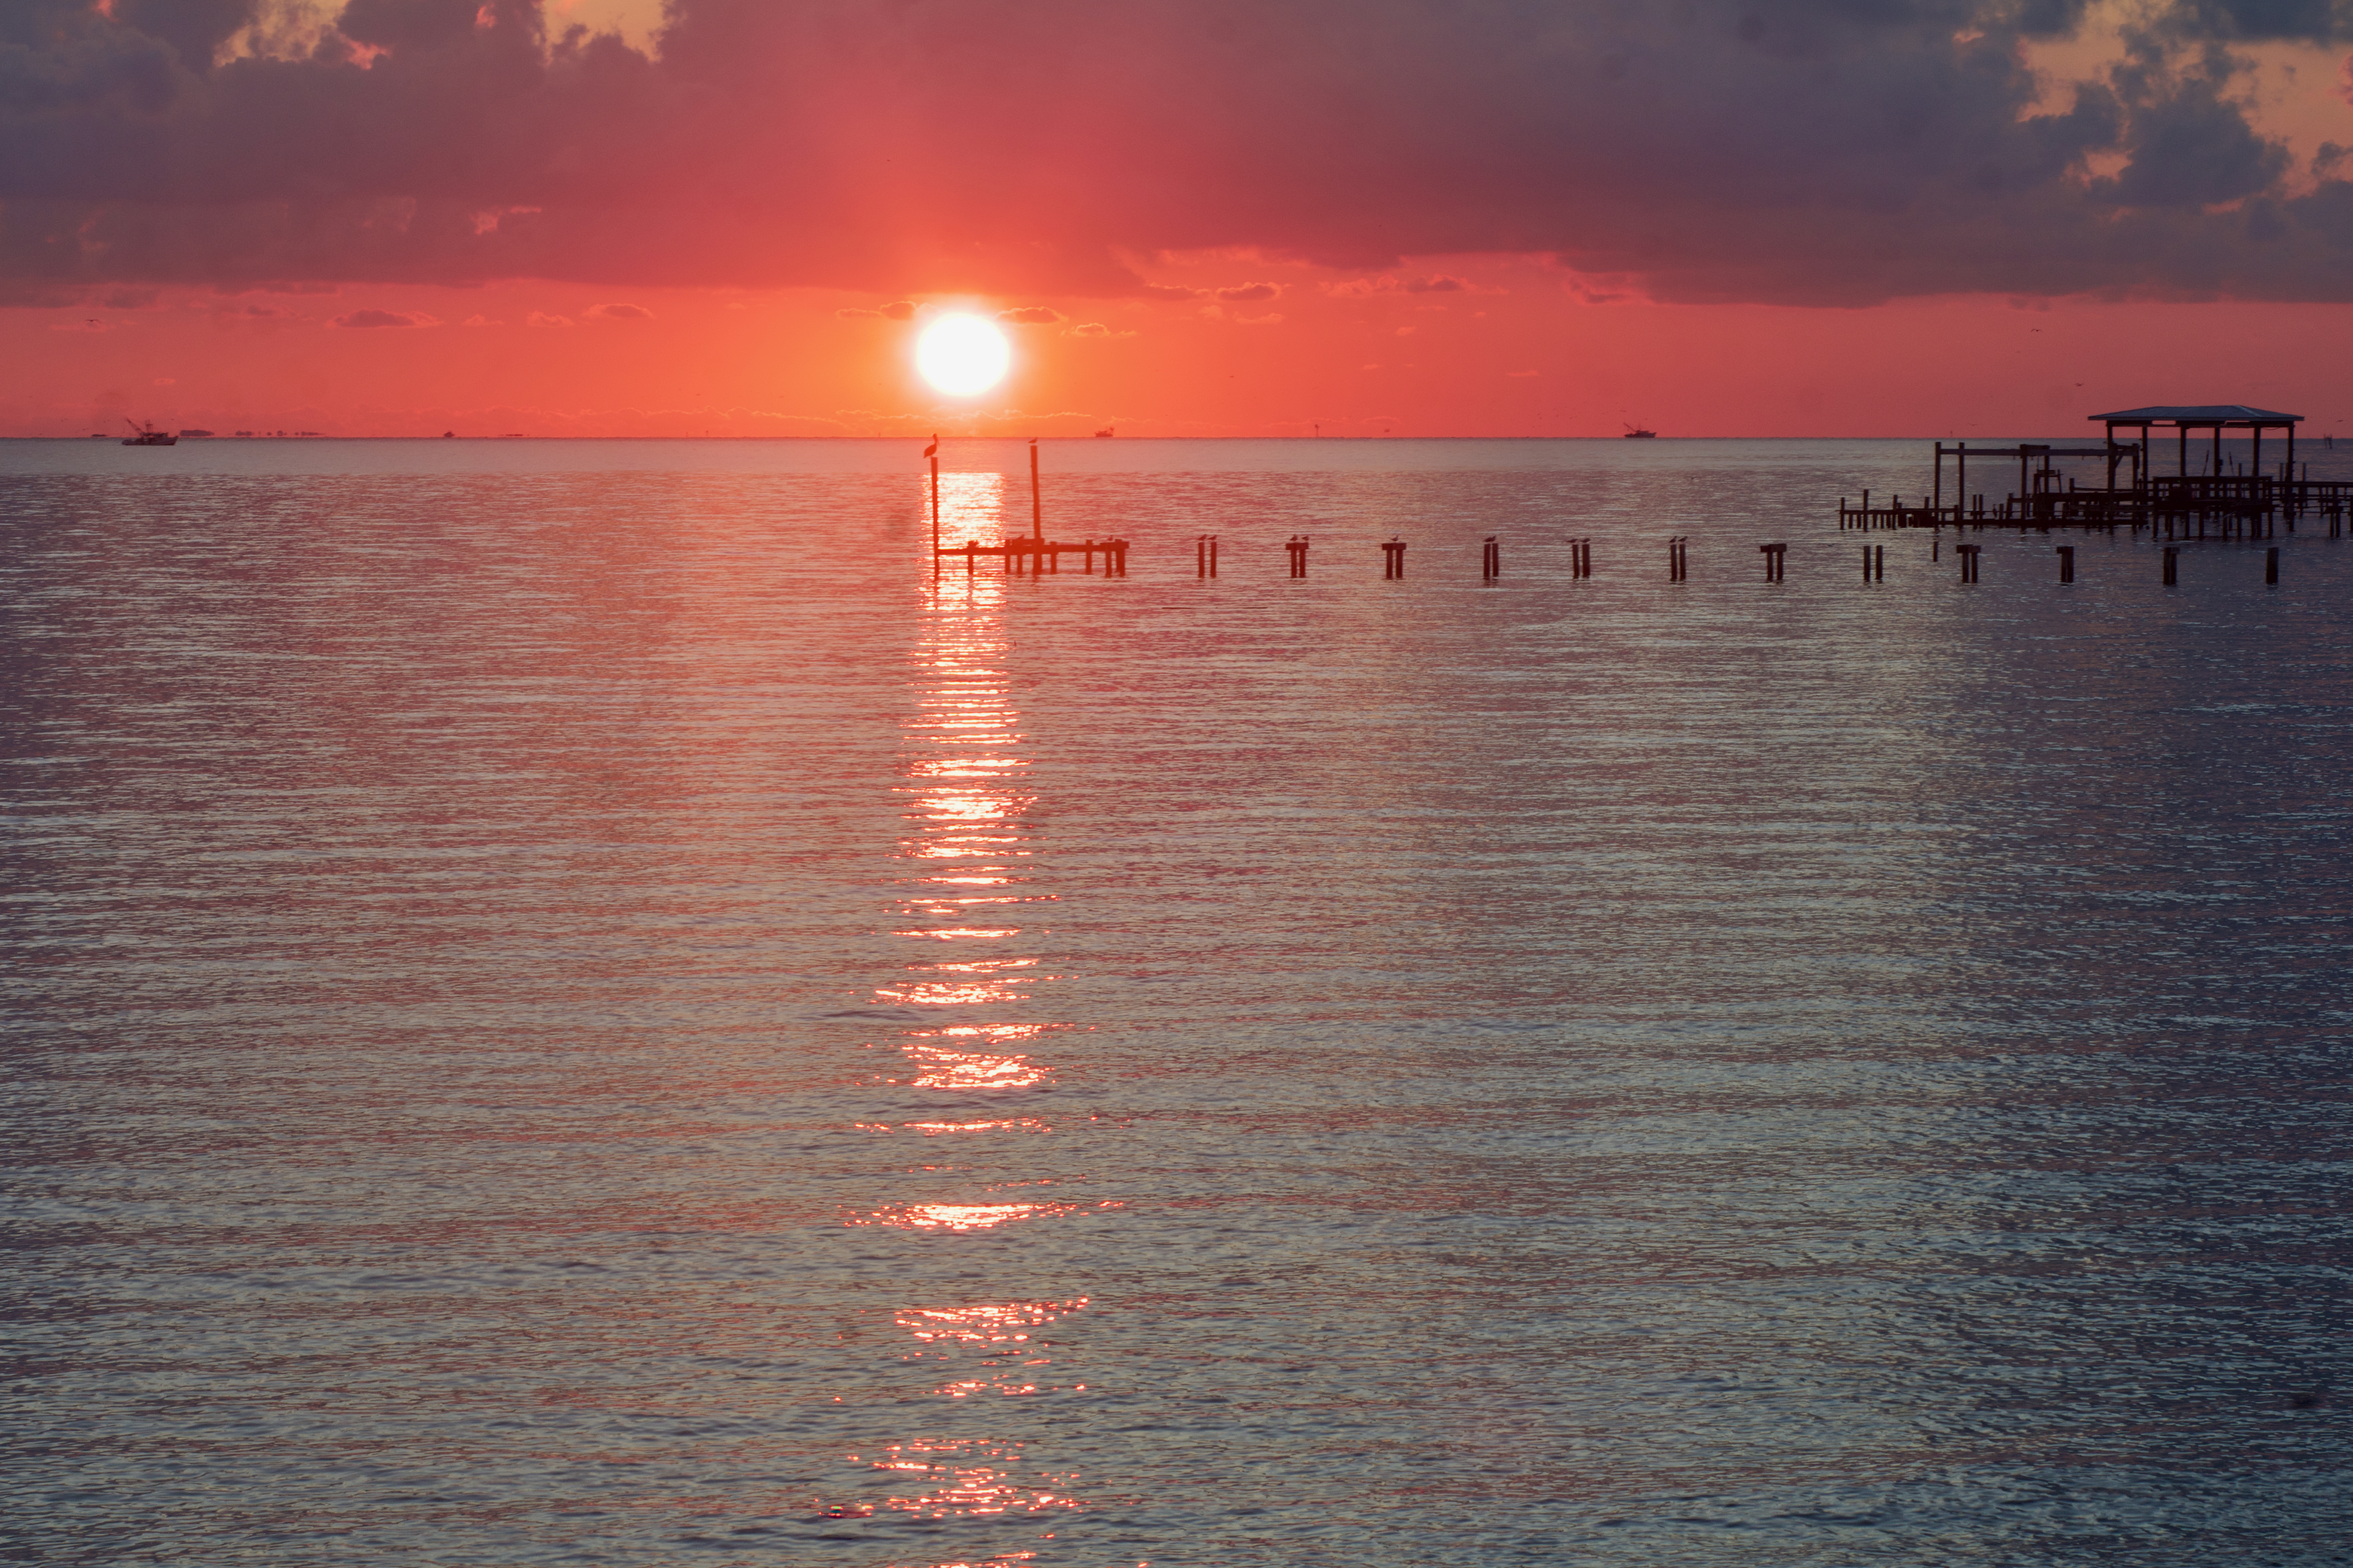
I also tried taking pictures with an 85 mm lens on my Canon EOS 60D, but that didn’t pick up the comet at all. What it did pick up was the reason I didn’t get very many good comet images … clouds! Of course, clouds are terrible for astrophotography, but they do lead to nice sunrise pictures.
We stayed for the sunrise, went out to breakfast, and then headed home.
Astrophotography is really two hobbies: capturing the images and processing them.
When we got home, I worked on processing the images I’d gotten. I could see the comet in the 10 second images and in the 1 second images, but the 1 second image ones were generally partially through the clouds. So I ended up using only the 10 second images. Because there weren’t any stars captured in these short images, I only needed to process for the comet and use Comet Alignment to align the frames.
I’m hoping that I’ll get some better images later this fall. Are you making plans to try to see this one?
M27, also called the Dumbbell Nebula or Apple Core Nebula, is a planetary nebula – the gases expelled from a red giant star before it becomes a white dwarf, lit up by that star. It’s located in the Milky Way, approximately 1250 light years away, and it has an apparent size of 8 arcmintues, making it 2.9 light years across. It’s estimated to be 12,700 years old.
Planetary nebulae do not last long on an astronomy time scale because the expelled gases grow dimmer as they expand away from the central star. I am glad I live in a time when we can observe them and they can be observed!
Planetary nebulae were originally called that because they looked like a round (like a planet) ball of fuzz by visual observers. However, now we know they have nothing to do with planets and are actually shell(s) of gas expelled from a red giant star. With astrophotography, we can pick up so much more detail than a fuzzball, and so we end up with interesting names. For this nebula, some thought the inner core of this nebula looked like a dumbbell; others thought it looked like an apple core. With the outer fringe, what do you think it looks like?
I used data from my driveway in Friendswood, Texas with suburban Bortle 7 – 8 brightness skies (lots of light pollution) to make this image. In order to capture the outer fringe I needed a lot of data: 12.2 hours of Ha data and 10.65 hours of Oiii data, taken over nine nights.
This is a narrowband image, mapping Oiii to blue and Ha to red. My goal was to capture both the details in the core and the outer fringe. It took three processing tries, but I think I was ultimately successful.
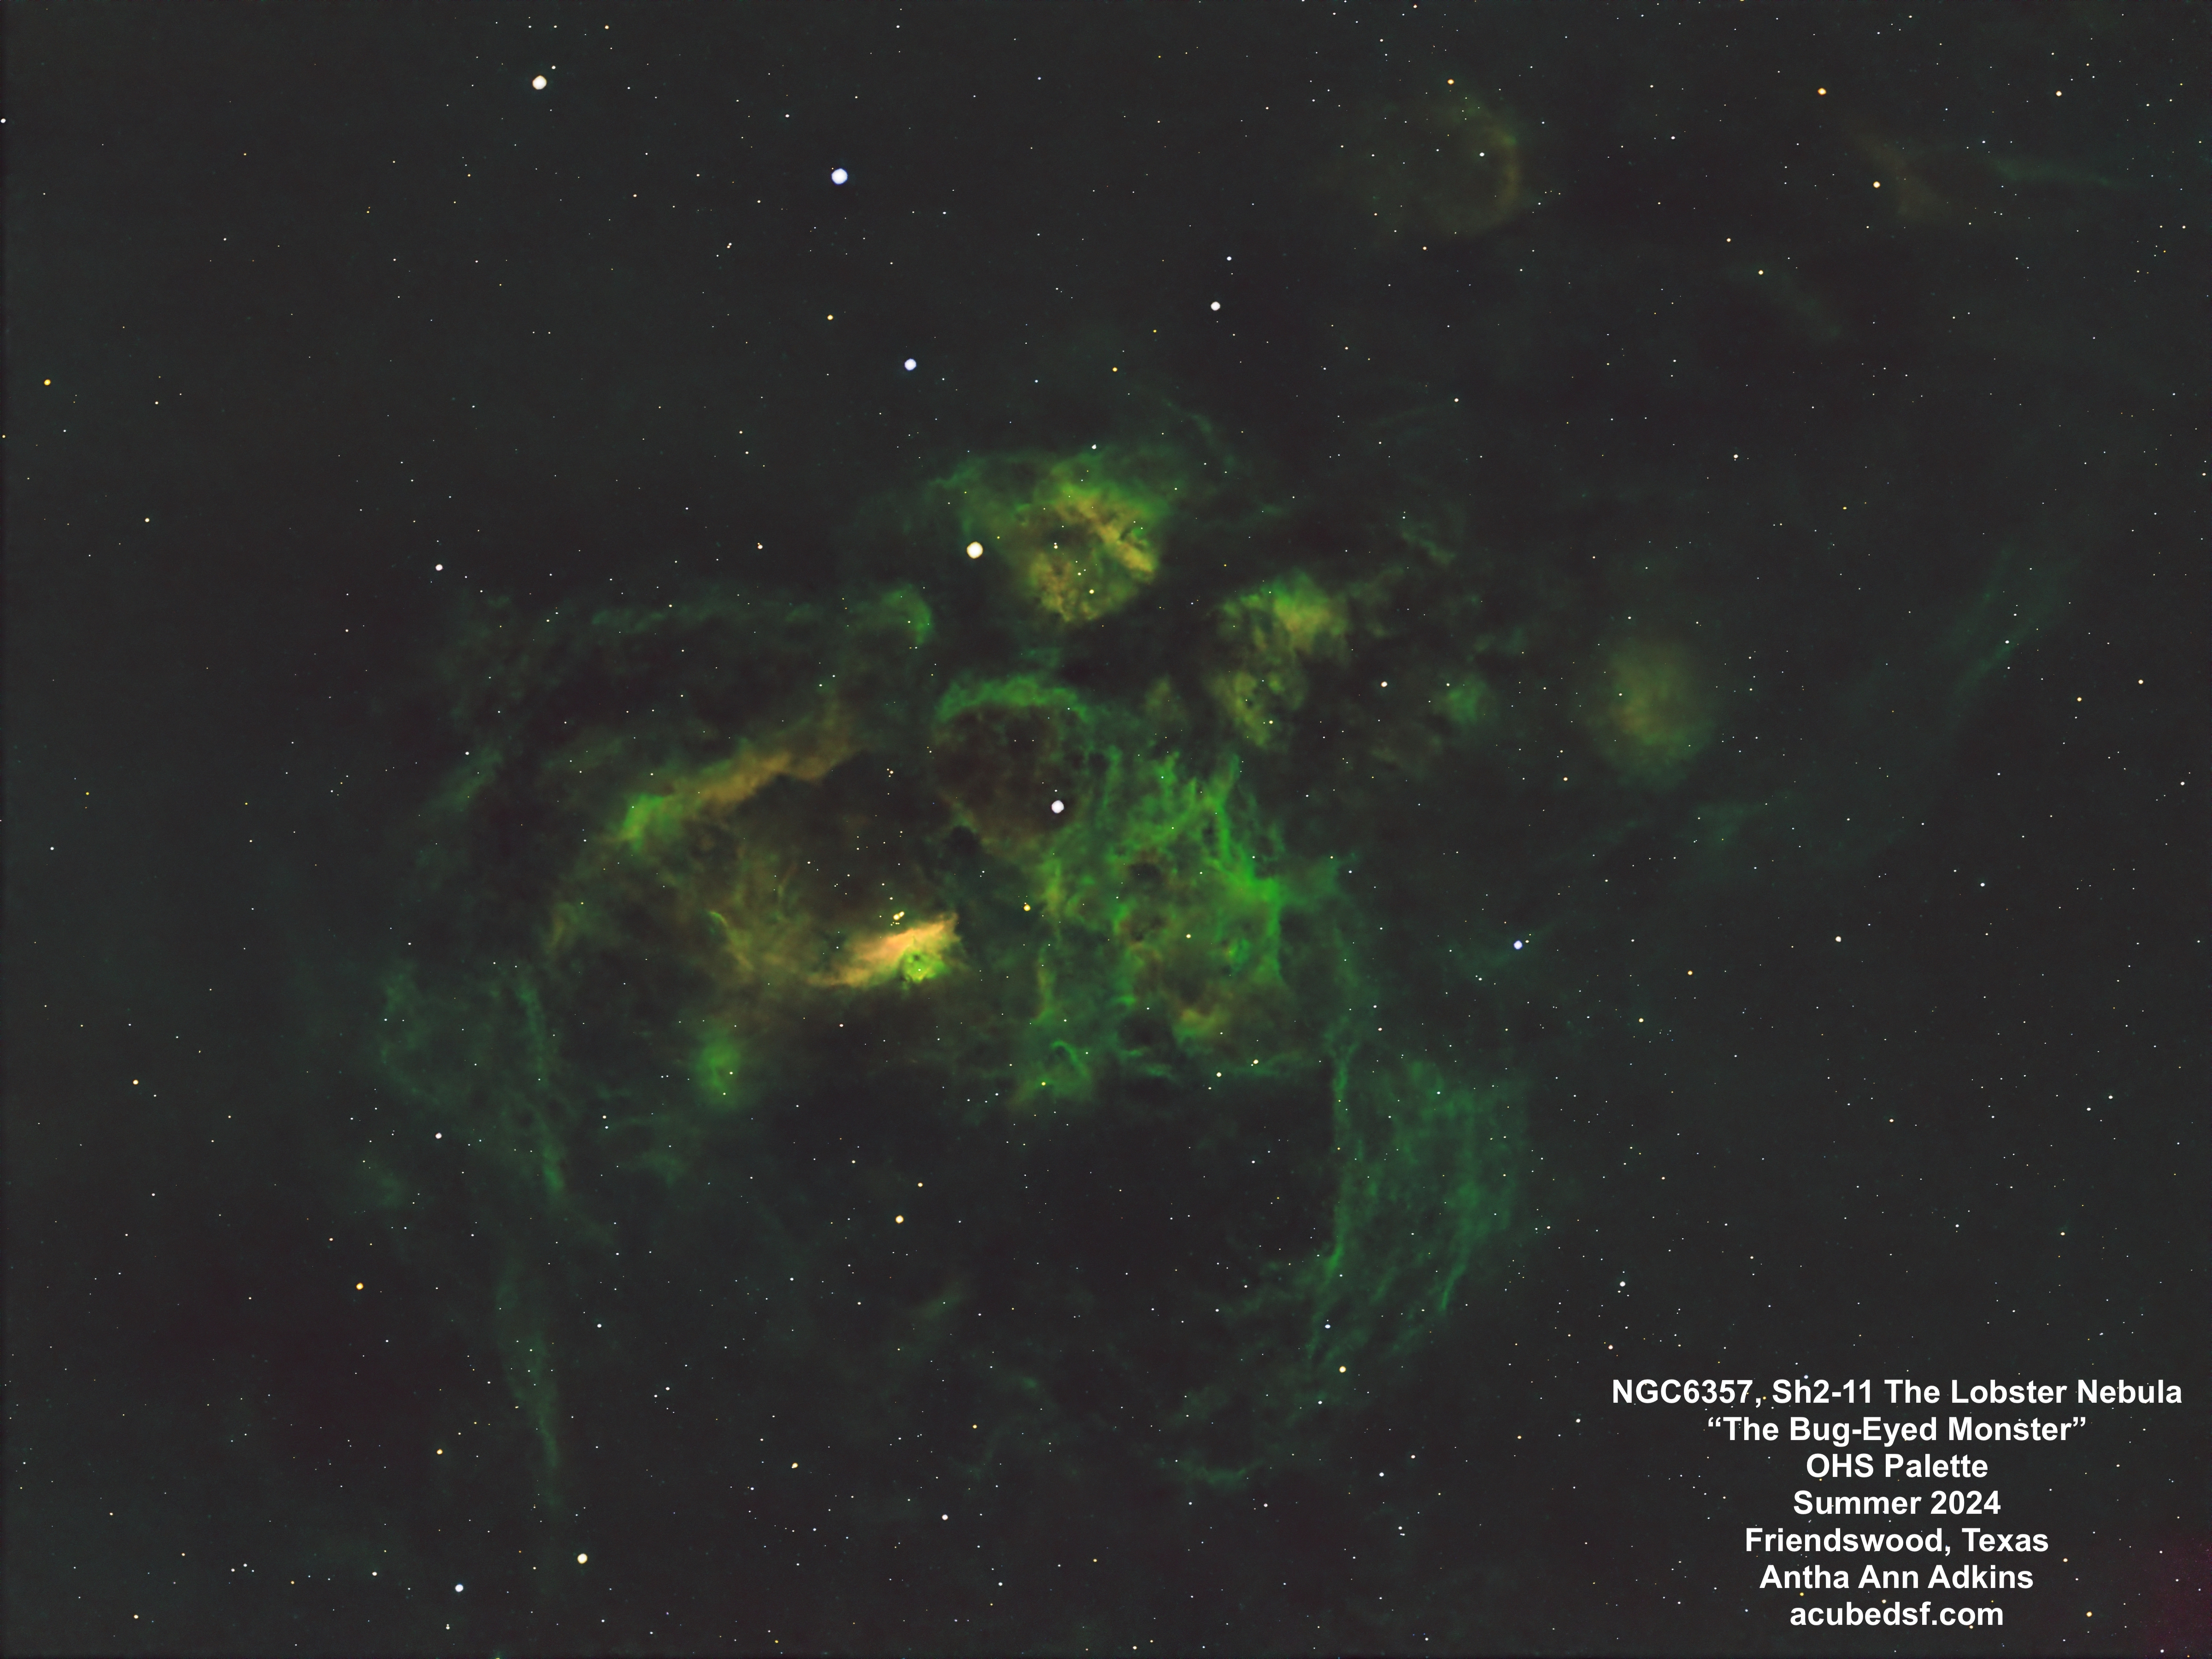
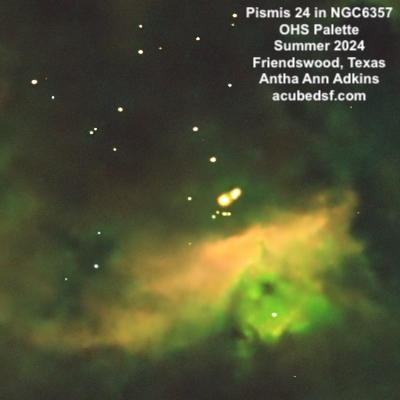
NGC6357, the Lobster Nebula, is an emission nebula. It is a large star-forming region containing three star clusters, many young stars, and some massive stars. One cluster is Pismis 24, located just above the bright blue core in this picture. The stars in this cluster are about 1 million years old and four are massive – 40 – 120x the mass of our sun, among the most massive stars in our galaxy. The Lobster Nebula is located in the Milky Way, approximately 5550 light years away, and it has an apparent size of 60 x 45 arc min, so it is approximately 97 x 73 light years across.
From my driveway, the Lobster Nebula is low to the South and is only visible for a short time from when it rises above my house to when it goes behind the pine tree. So it took many nights of data collection to get enough data to make this image – 12.2 hours of data collected over 13 nights. And it would still benefit from more! I may collect more data the next time we visit the dark skies of Dell City, Texas, where I have an unimpeded view to the South. But, until then, I have declared the end of Lobster season!
Although NGC6357 is traditionally named the Lobster Nebula, I think it looks like a bug-eyed monster. And a bug-eyed monster should be green with a red core and have red eyes. So in addition to the traditional Hubble SHO (Sii mapped to red, Ha to green, and Oiii to blue), I also made a version using a OHS (Oiii mapped to red, Ha to green, and Sii to blue) palette. I thought this version produced a nice contrast in the pillar in the core near the Pismis 24 cluster.
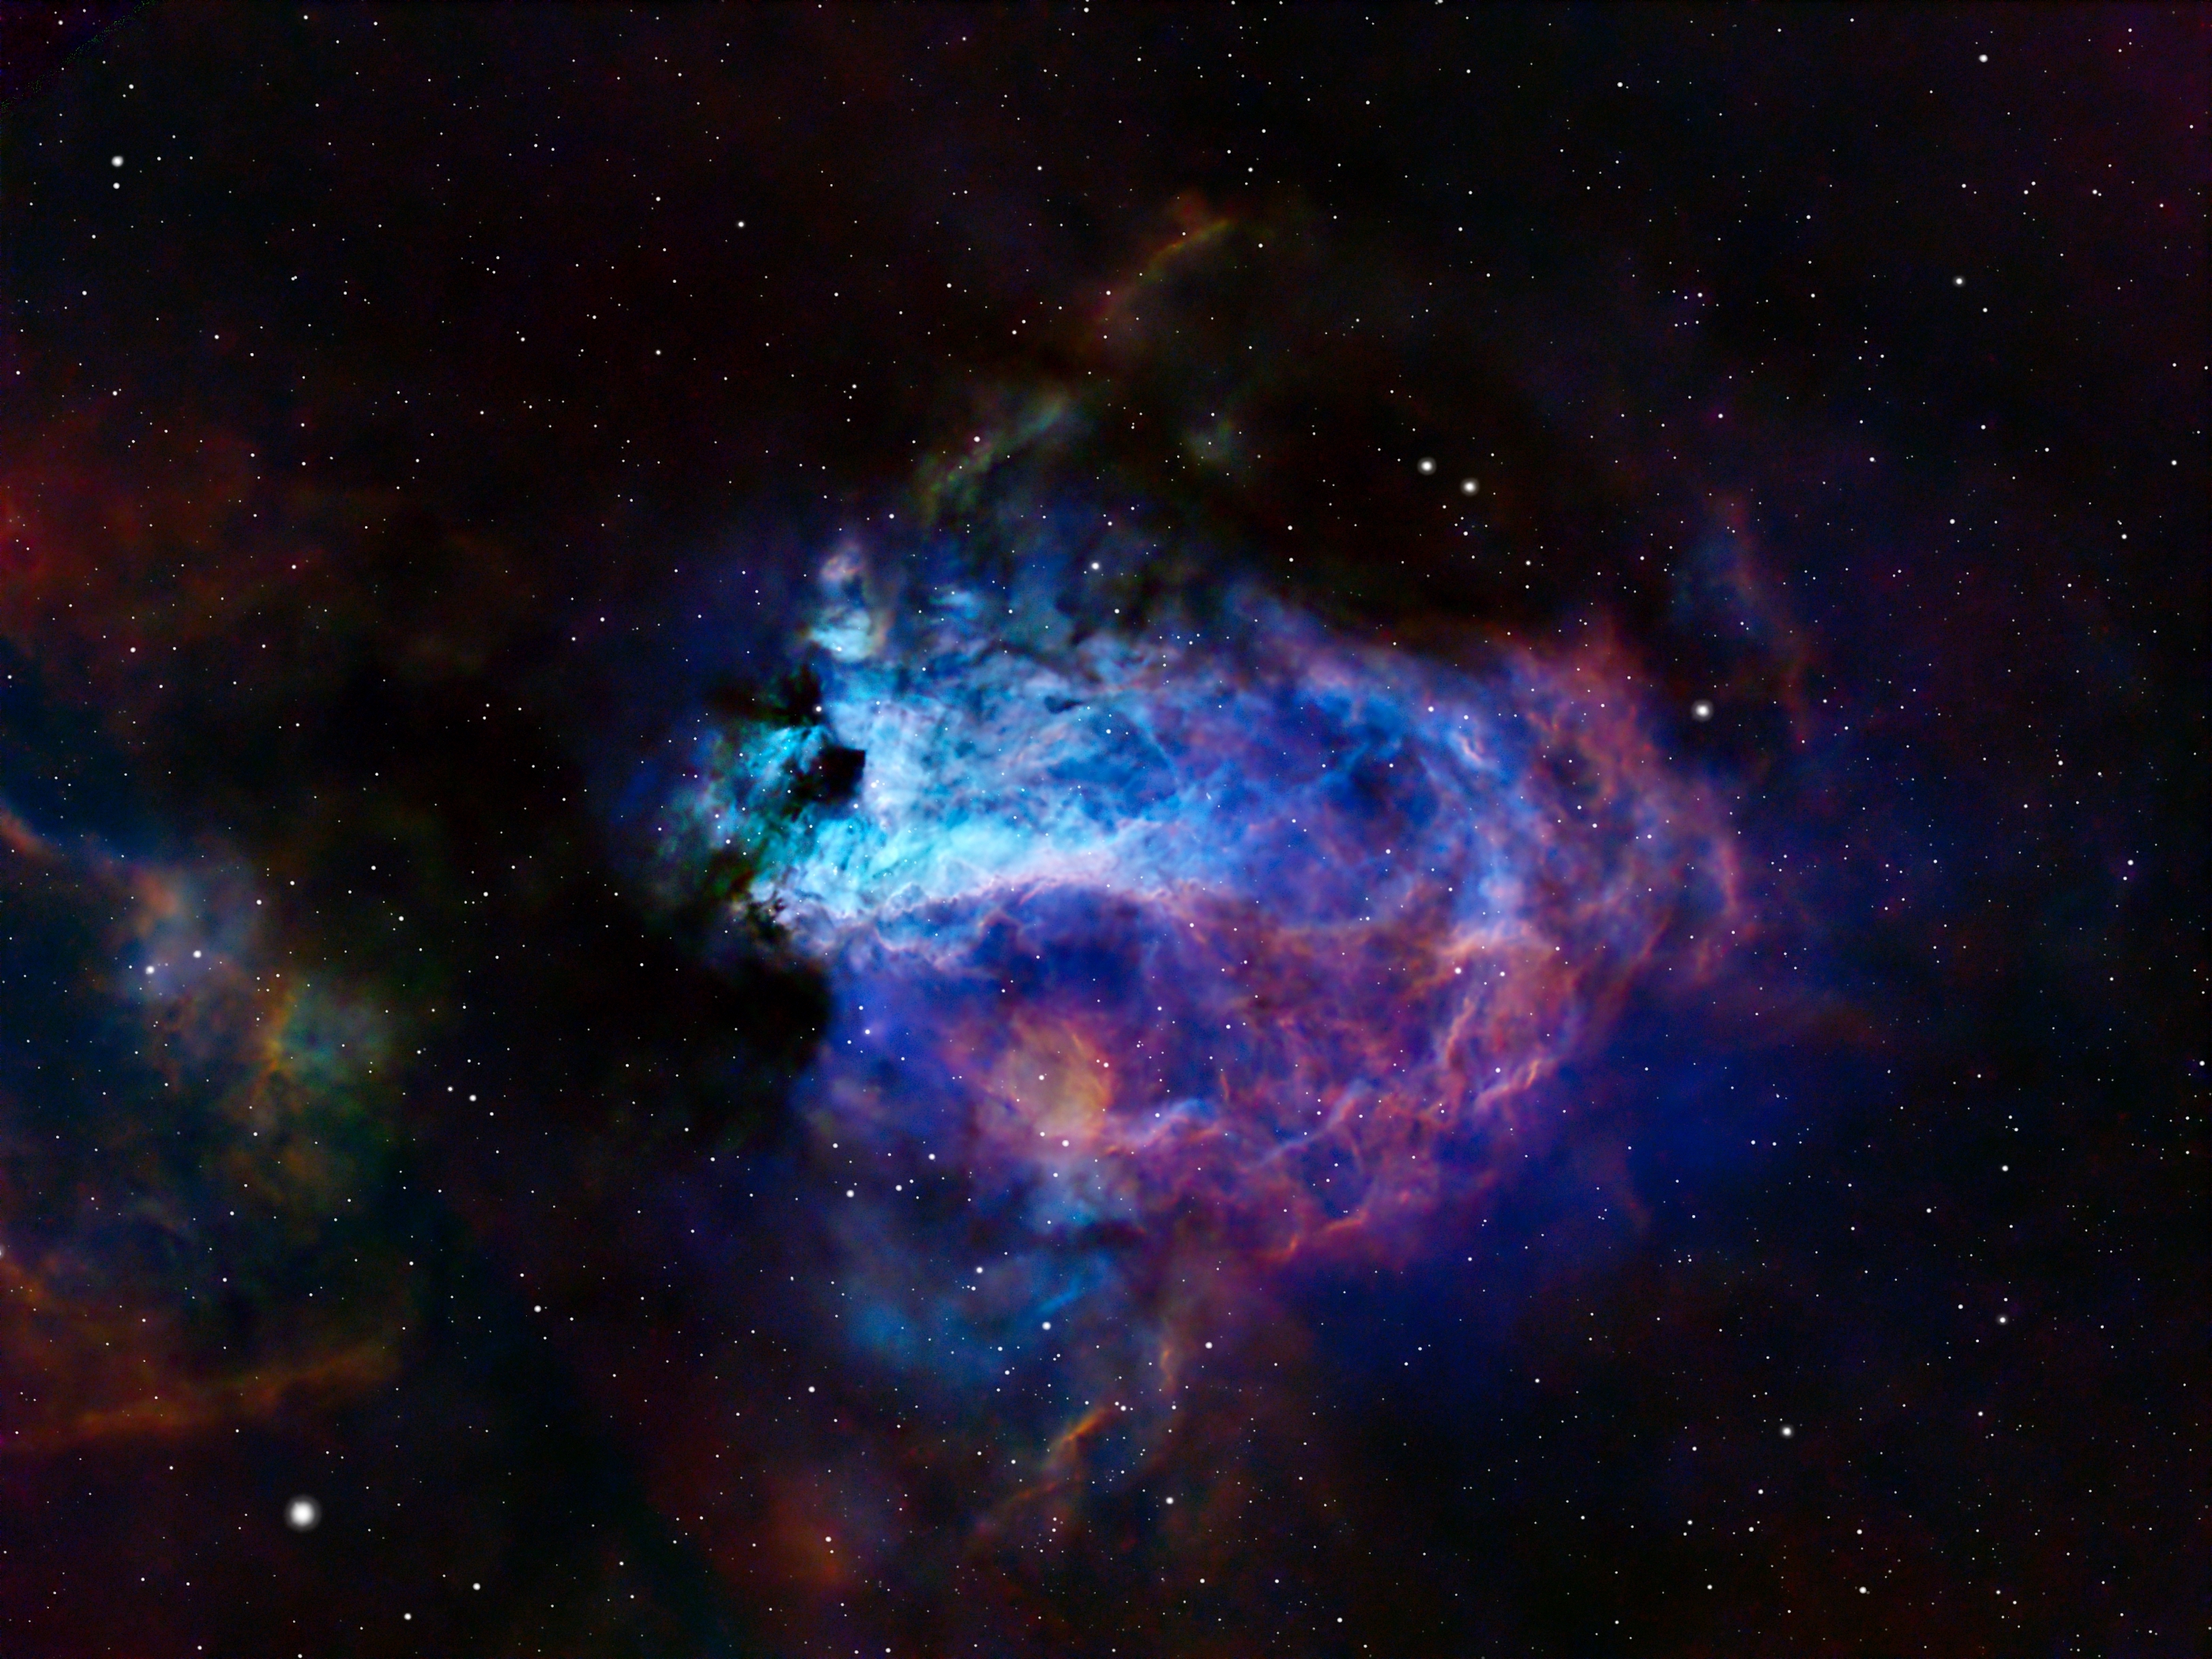
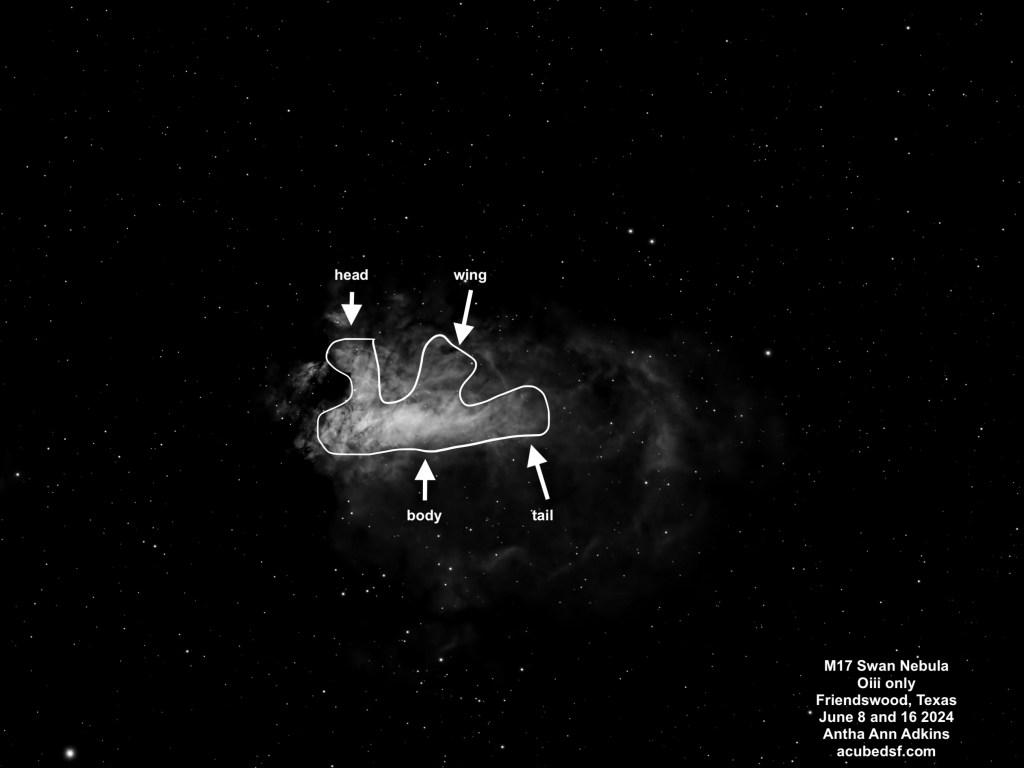
I call this image The Blue Swan with the Golden Egg. Can you see the blue swan sitting on a purple nest with a golden egg?
M17 is an emission nebula with many names, including the Swan Nebula. When I saw the Oiii narrowband images, I finally understood why it is called the Swan Nebula, and I’ve oriented this image so that the swan is “floating” with its head up. If you see the two dark spots near the center of the frame and the brightest part of the nebula, the lower one is the swan’s neck. The largest portion of the bright part of the nebula is the swan’s body, the neck comes up past the dark spot, and then the head is above it. I’ve included a single frame, below, where it the swan is more obvious because the rest of the nebulosity is hidden, and I’ve sketched in the swan on top of it. Howard Banich has some lovely hand-drawn sketches of this nebula in a Sky & Telescope article.
M17 is a large star-forming region. It’s been the home for three star-forming events, but the stars created are mostly hidden behind the molecular cloud. The massive stars it made emit UV radiation that excites the hydrogen gas to form the emission nebula. It’s located in the Milky Way, approximately 5500 light years away, and the brightest portion has an apparent size of 10 arc min, so it is approximately 15 light years across. The region of gas around it is larger, with an apparent size of about 30 arc min, so it is approximately 48 light years across.
I have learned a lot about narrowband processing while working on this image, and I’ve gotten a lot of useful pointers from the folks at the astrobin forums.
I initially made four different color maps using NBColourMapper, with the following color assignments and results:
Palette Name
Natural
Hubble (SHO)
Canada France Hawaii Telescope (HOS)
Extra
H-alpha color mapping
Red (0)
Green (120)
Red (0)
Red (0)
Oiii color mapping
Turquoise (180)
Blue (240)
Green (120)
Blue (240)
Sii color mapping
Orange (20)
Red (0)
Blue (240)
Green (120)
Result
Mostly red, not much color contrast
Blue Swan with Green/Yellow nebula, more color contrast
Yellow Swan with Pink/Purple Nebula, more color contrast
Pink/Purple Swan with Yellow/Purple nebula, more color contrast
My Hubble SHO pallet was extremely green and looked nothing like the classic Hubble images which tend to be very blue and yellow/red. Apparently mostly green images are not considered attractive (it’s not easy being green) and don’t have the desired contrast. After getting feedback on the astrobin forum and watching a lot of videos, I learned that the general technique for narrowband color mapping is to first normalize the images using LinearFit so the different bands are all equally bright. This loses the relative signal strengths of the different bands, but means that the dimmer bands aren’t overwhelmed by the stronger ones.
After color mapping the three linear fit data sets and running NBColourMapper, I used Dynamic Background Extraction to remove the background color bias. I liked what it did with the background more than Background Neutralization, which I also tried.
For color calibration, I tried using SPCC in narrowband mode. This seemed to want to push the nebula back to the original colors – very green for SHO and red and gold for HOS (which I actually liked). This makes sense, but I didn’t end up using the resulting images. I tried using ColorCalibration. This brought out the reds and golds in the SHO image, but it ended up with extreme colors in the nebula.
I got more astrobin advice and watched some Adam Block videos. Not only does Adam provide excellent explanations of the effects of various tool settings (the “why” as well as the “what”), but he also talks about his image processing philosophy, which in this case was eye-opening for me. He shared his philosophy of thinking about how he wanted the image to look when it was done before he started processing it which I found extremely useful. He gave me a different and better way to think about narrowband astrophotography image processing. I looked at my original narrowband data and decided what I’d like to try to do is bring out the details that are in the Sii data. Following a similar philosophy to what he did in his example, I used PixelMath to map the narrowband data to RGB, emphasizing the red and the blue and dialing back the blue and the green when there was red to emphasize the red Sii details with the following settings:
R = 2*S
G = 0.4*H+0.6*H*(1-S)
B = O+2*(1-S)*O
I finally achieved the blue I’d been looking for!
After narrowband mapping, I stretched the nebula using ScreenTransferFunction and the HistogramTransformation, then used a new to me tool, High Dynamic Range Multiscale Transform (HDRMT), which “flattened” the image so that I could see details in both the nebula core and in the surrounding faint nebula. I finished by using Curves, working on the c curve to emphasize the reds a little more (after the PixelMath mapping, I didn’t need to do much in Curves).
With this color mapping, the stars turn out over-blue. I processed them separately and converted them to be only white, then added them back in.
This has taken me a couple of weeks of learning and experimenting, and I think it was worth it. I ended up with an image that makes me think “isn’t the universe beautiful?”
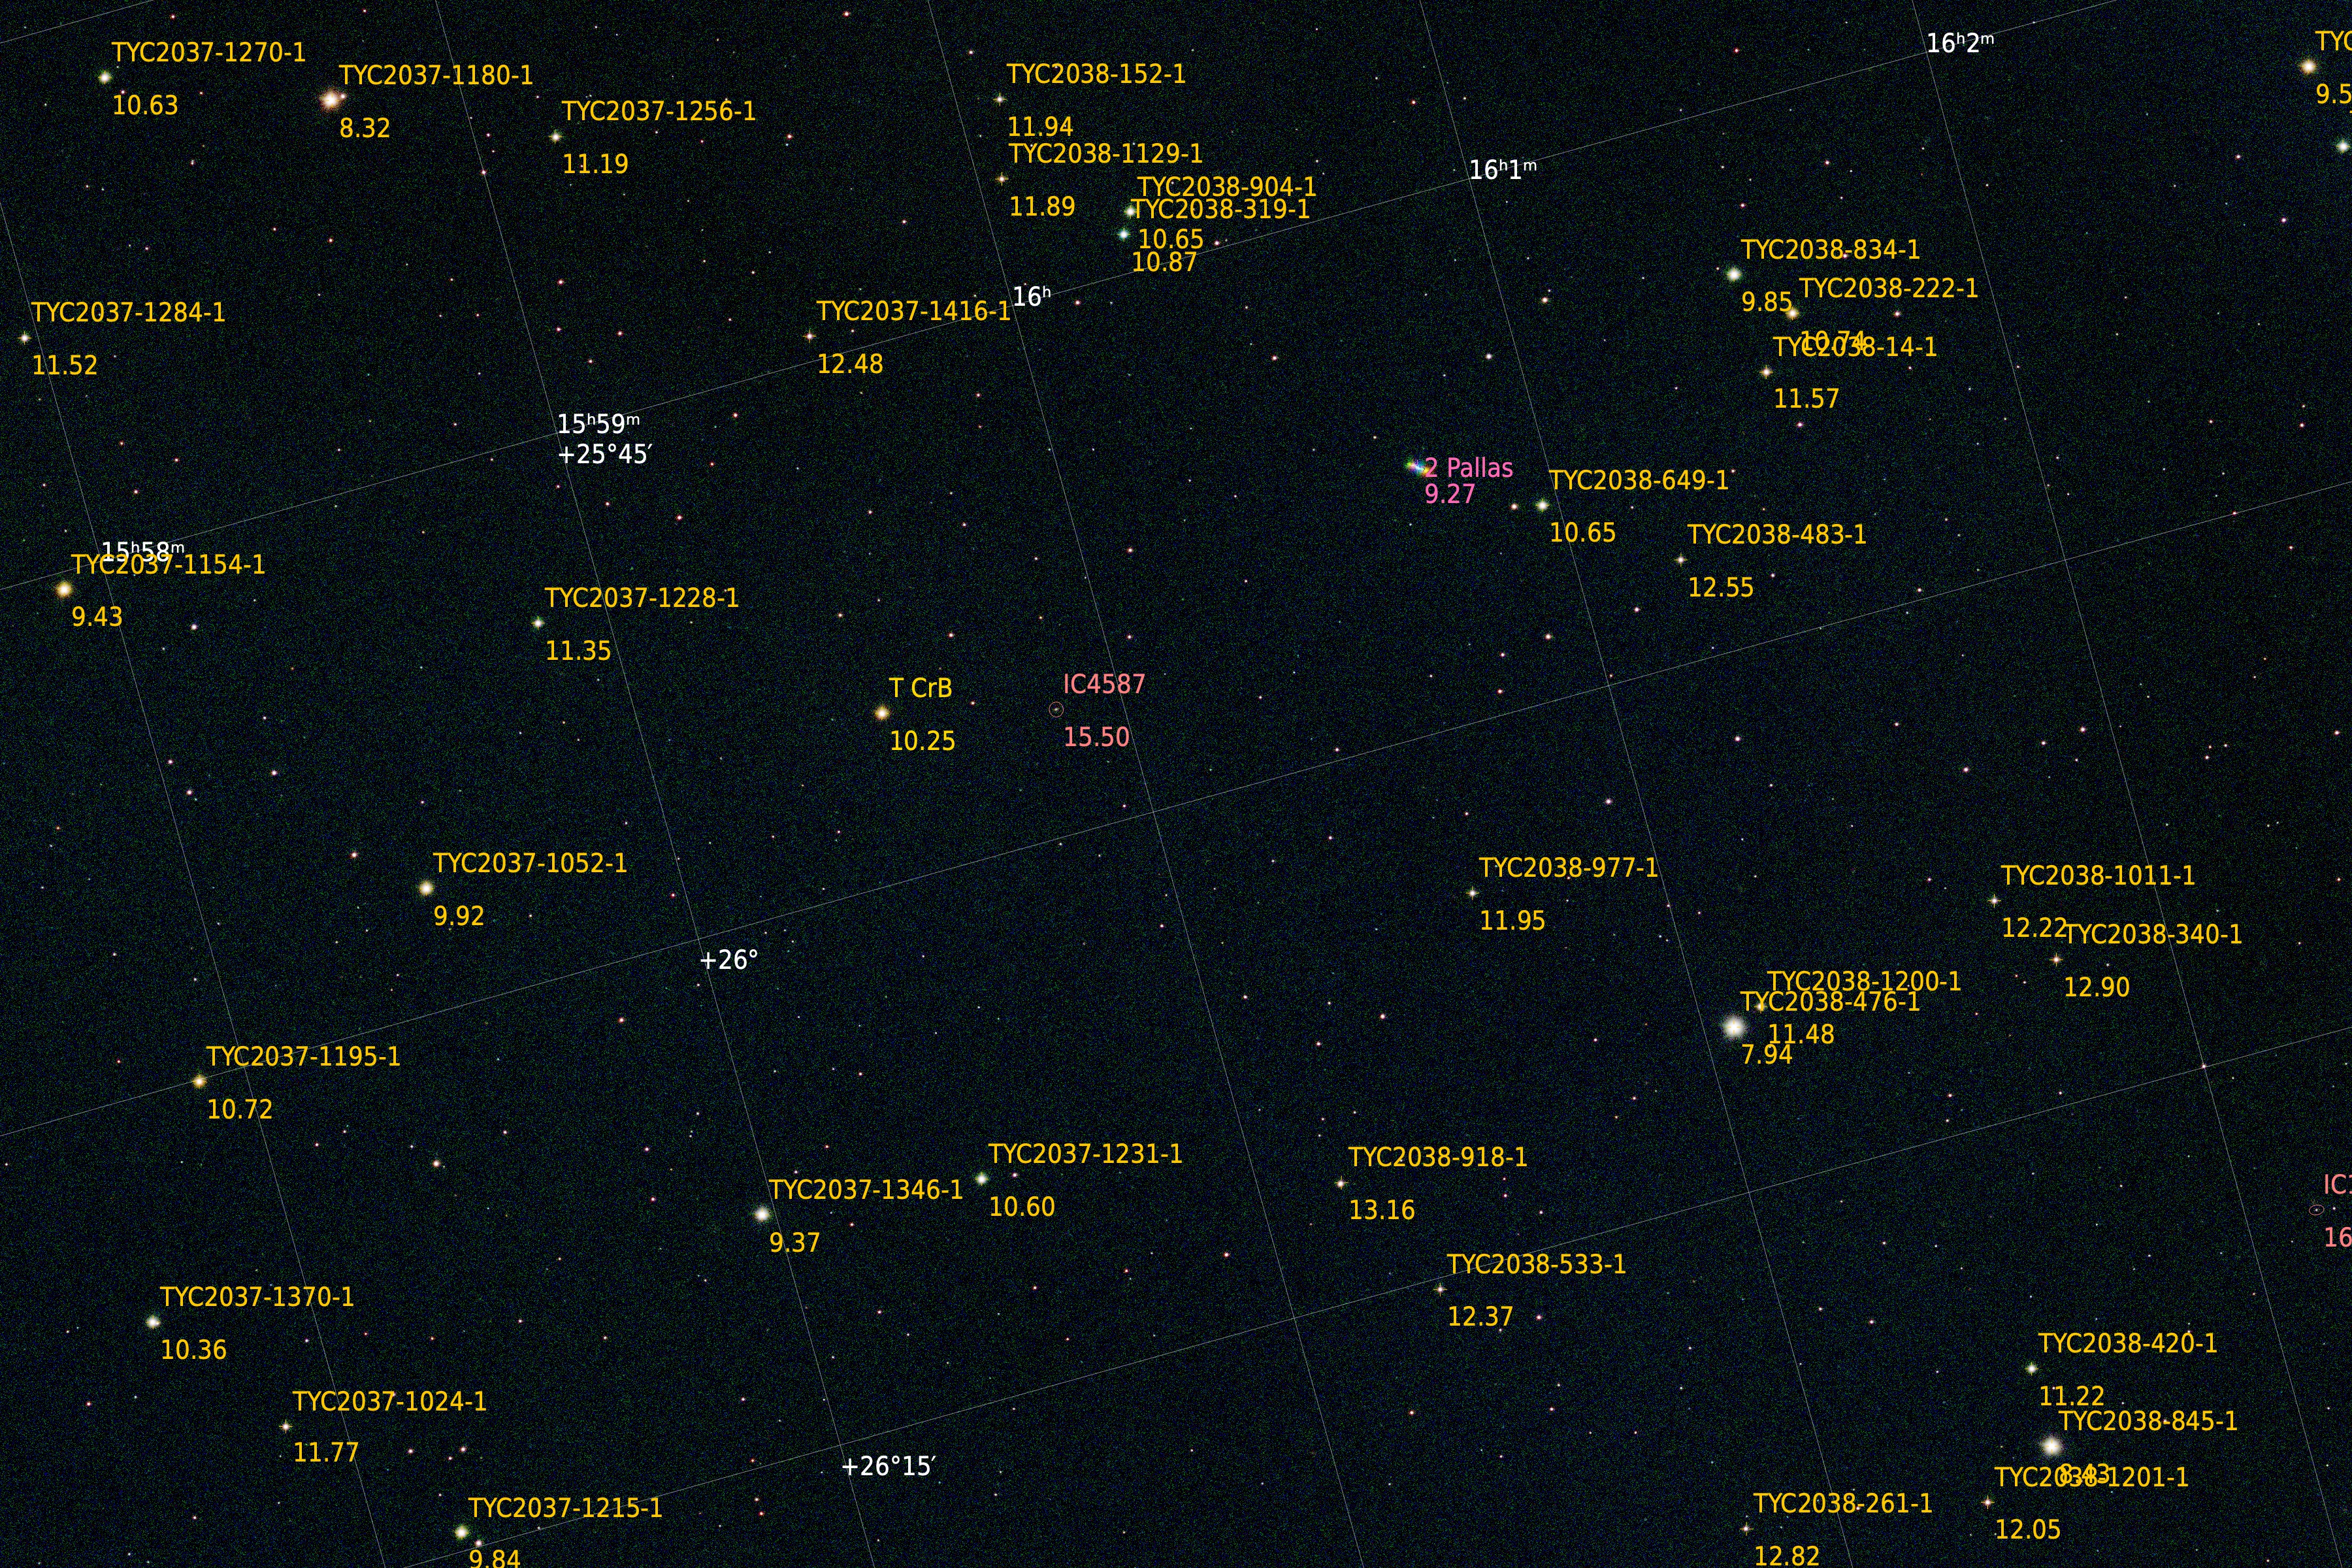
T Coronae Borealis (T CrB) (left of center in the image) is nicknamed “the Blaze Star” because it is a recurrent nova. It consists of two stars: a white dwarf and a red giant. Most of the time, the visible star is the red giant. However, over time, matter from the red giant is transferred to the atmosphere of the white dwarf, and, periodically, the white dwarf heats the matter hot enough to cause runaway fusion, rapidly making the white dwarf brighten, causing a nova event.
The last two times this star went nova were May 12, 1866 and February 9, 1946. It is expected to go nova again soon, possibly this summer.
T CrB is located in the Milky Way, approximately 2,630 light years away, so many cycles of novas may have occurred that we have not seen yet because the light hasn’t reached us! But it’s on the way!
My husband suggested that I should capture a “before” picture to compare with a picture during the nova.
I used PixInsight to annotate the image with the star magnitudes, so you can see that the magnitude for T CrB is consistent with its non-nova state (magnitude 10.25 vs its expected nova magnitude of 2 – 4).
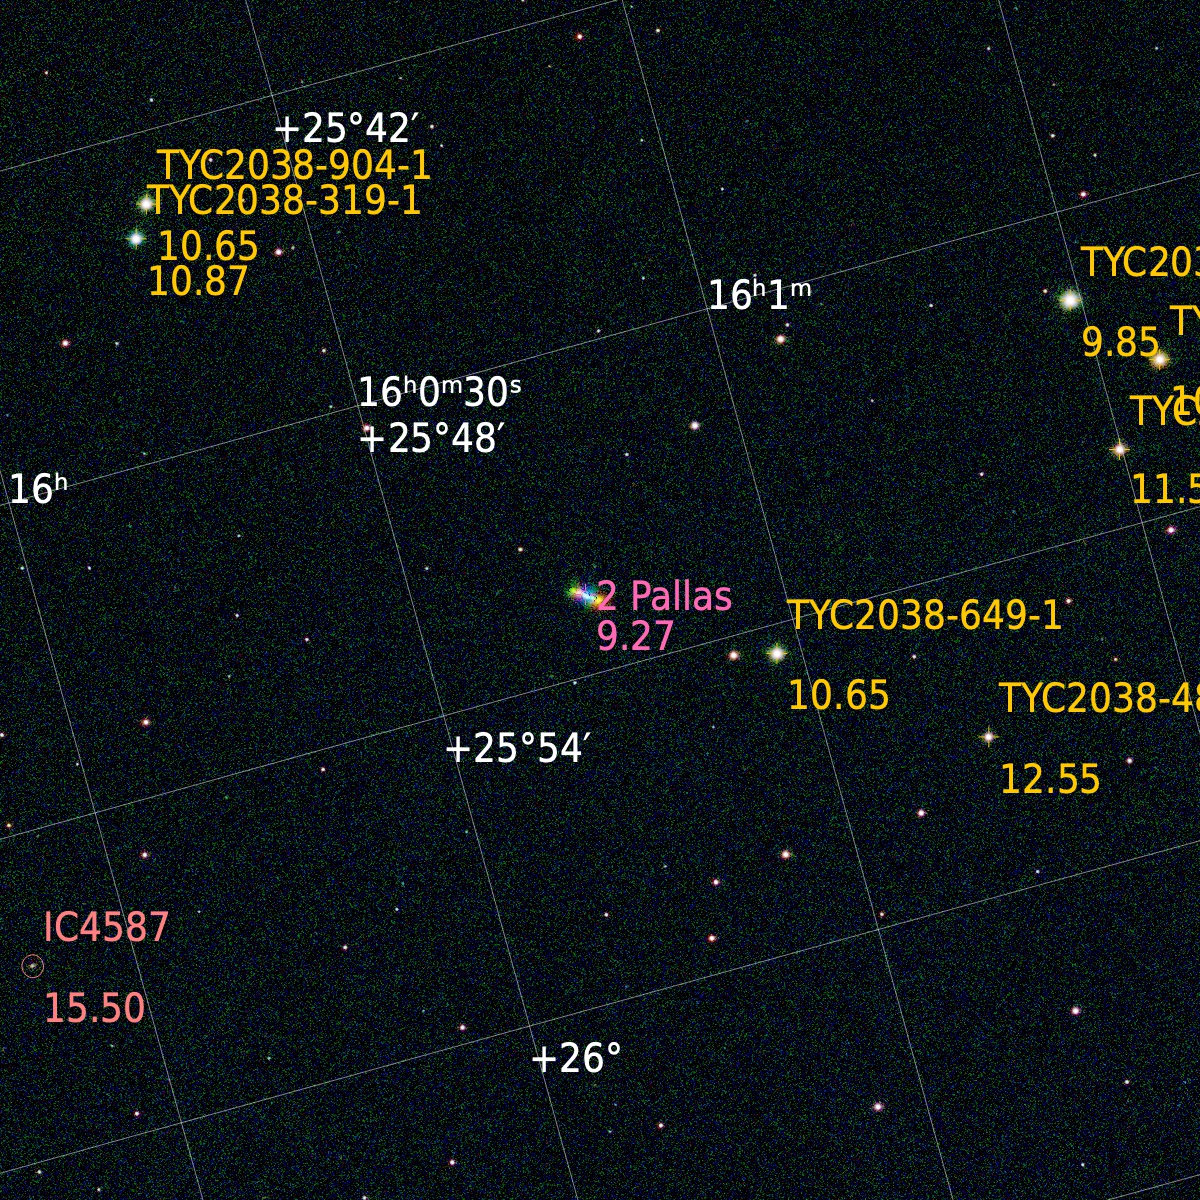
When I annotated the image, I noticed that there was a bright visible line that was not marked. I suspected, given it was a line, indicating something moving slowly across the frame, that it was an asteroid, so I added annotation for asteroids to discover that it is the asteroid 2 Pallas. The “2” in its name means it was the second asteroid to be discovered. 2 Pallas is a main belt asteroid, orbiting between Mars and Jupiter, in an unusually highly inclined (angle of orbital plane relative to the invariable plane) (Pallas’s inclination is 34.43 degrees; Vesta’s is 5.58 degrees; Earth’s is 1.58 degrees) and highly eccentric (more elliptical) orbit (Pallas’ eccentricity is 0.28; Vesta’s is 0.089; Earth’s is 0.017; 0 eccentricity is a circular orbit).
Because I am now using a monochrome camera, I have to cycle between filters to get color. I was cycling in 20 minute intervals, so the color of 2 Pallas looks like a rainbow, shifting between colors. This is not a feature of the asteroid but rather a feature of my processing, but I think it is rather fetching.
This is the first time I’ve captured an asteroid! How cool is that?
Are you looking forward to spotting the nova when it comes?
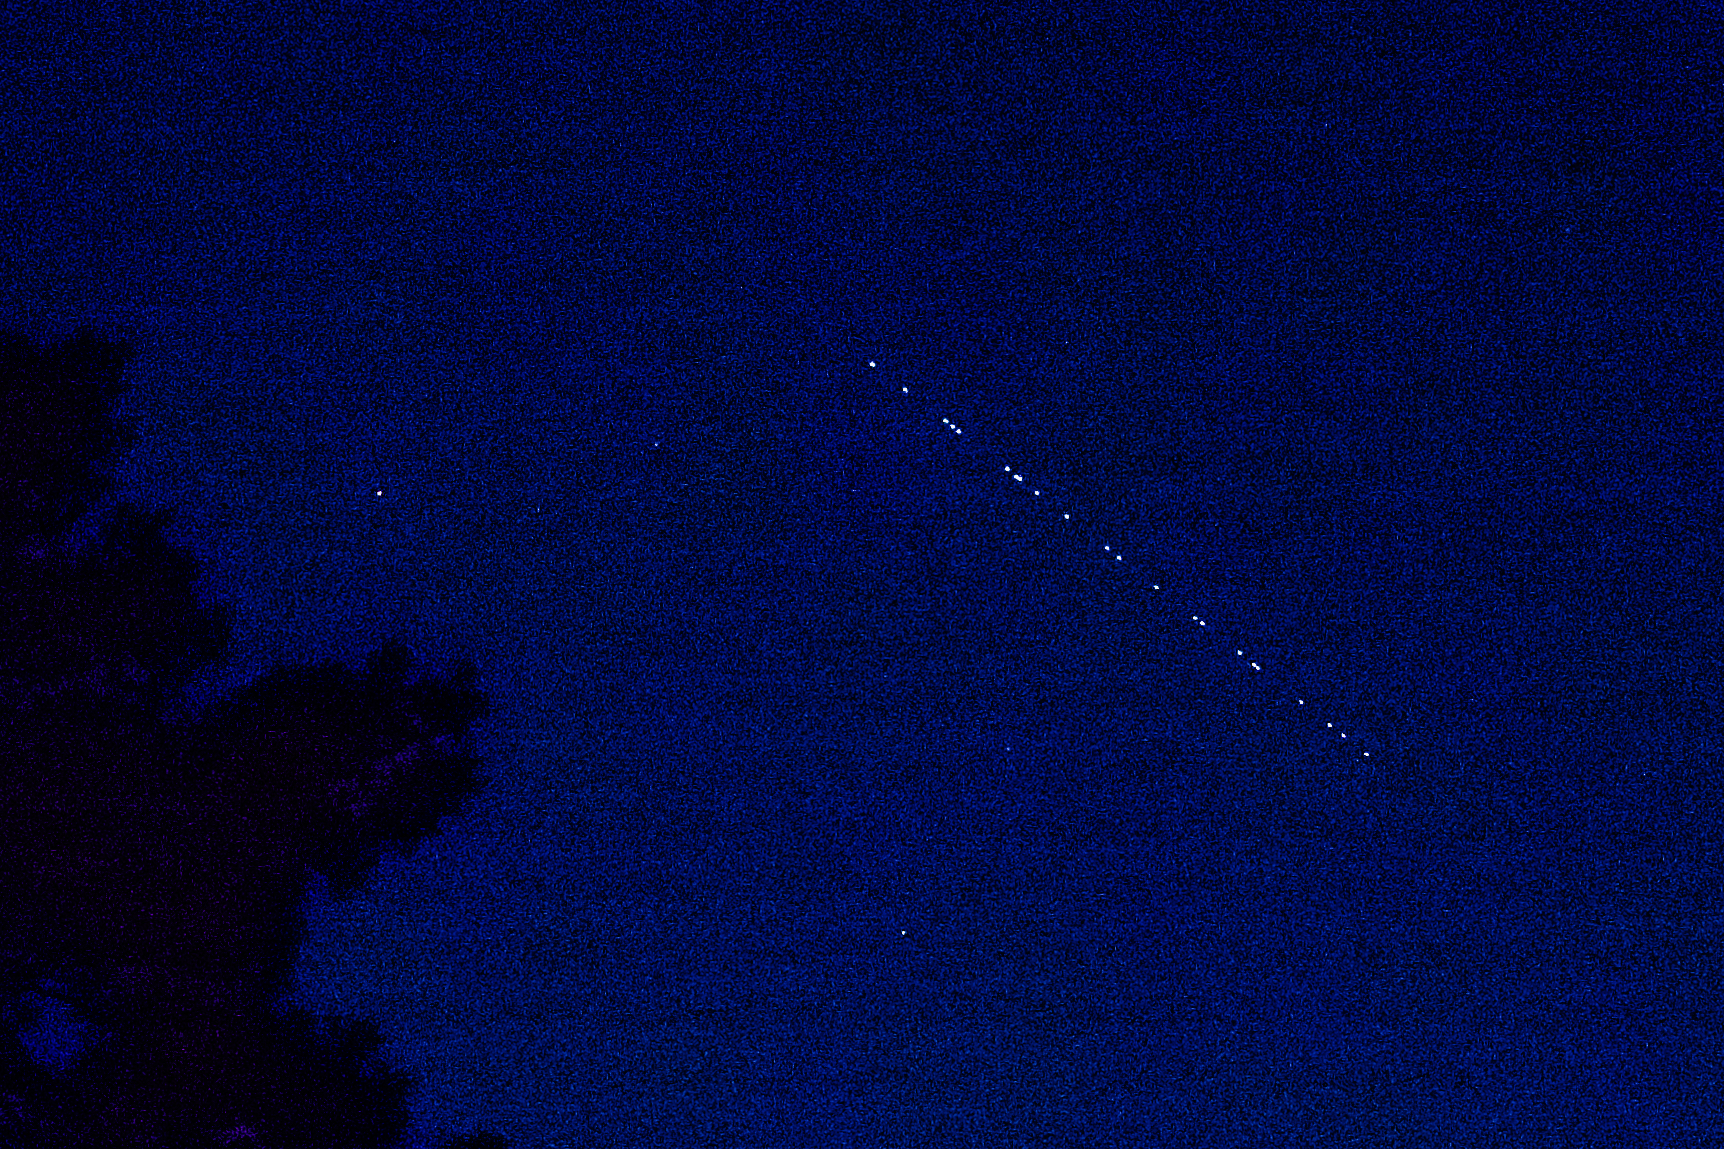
Starlink is SpaceX’s megaconstellation of satellites, which provides global mobile broadband communication. It currently consists of over 6000 satellites. The satellites have recently been launched in sets of 20 – 23 satellites on a single Falcon 9 rocket that are initially released one after another into the same orbit, so they appear to follow one another across the sky in a “train”.
Starlink satellites are visible when the sky is dark but they are still sunlit, so just after sunset/before sunrise. They are easiest to see within a couple of days of launch, when they are in the orbit raising phase and are closer together and lower. Once they reach their final orbit, they are harder to see. Because of concerns raised by astronomers over the effect of such a large number of satellites on astronomical observations (satellites create streaks of photobombing light on astrophotos), SpaceX has implemented two things to reduce their brightness: 1) made the satellites invisible to the naked eye within a week of launch by changing their attitude during orbit raising so the solar arrays won’t reflect sunlight down to the Earth and 2) made them less bright on orbit by deploying sun visors on the satellites so the chassis won’t reflect sunlight down to the Earth.
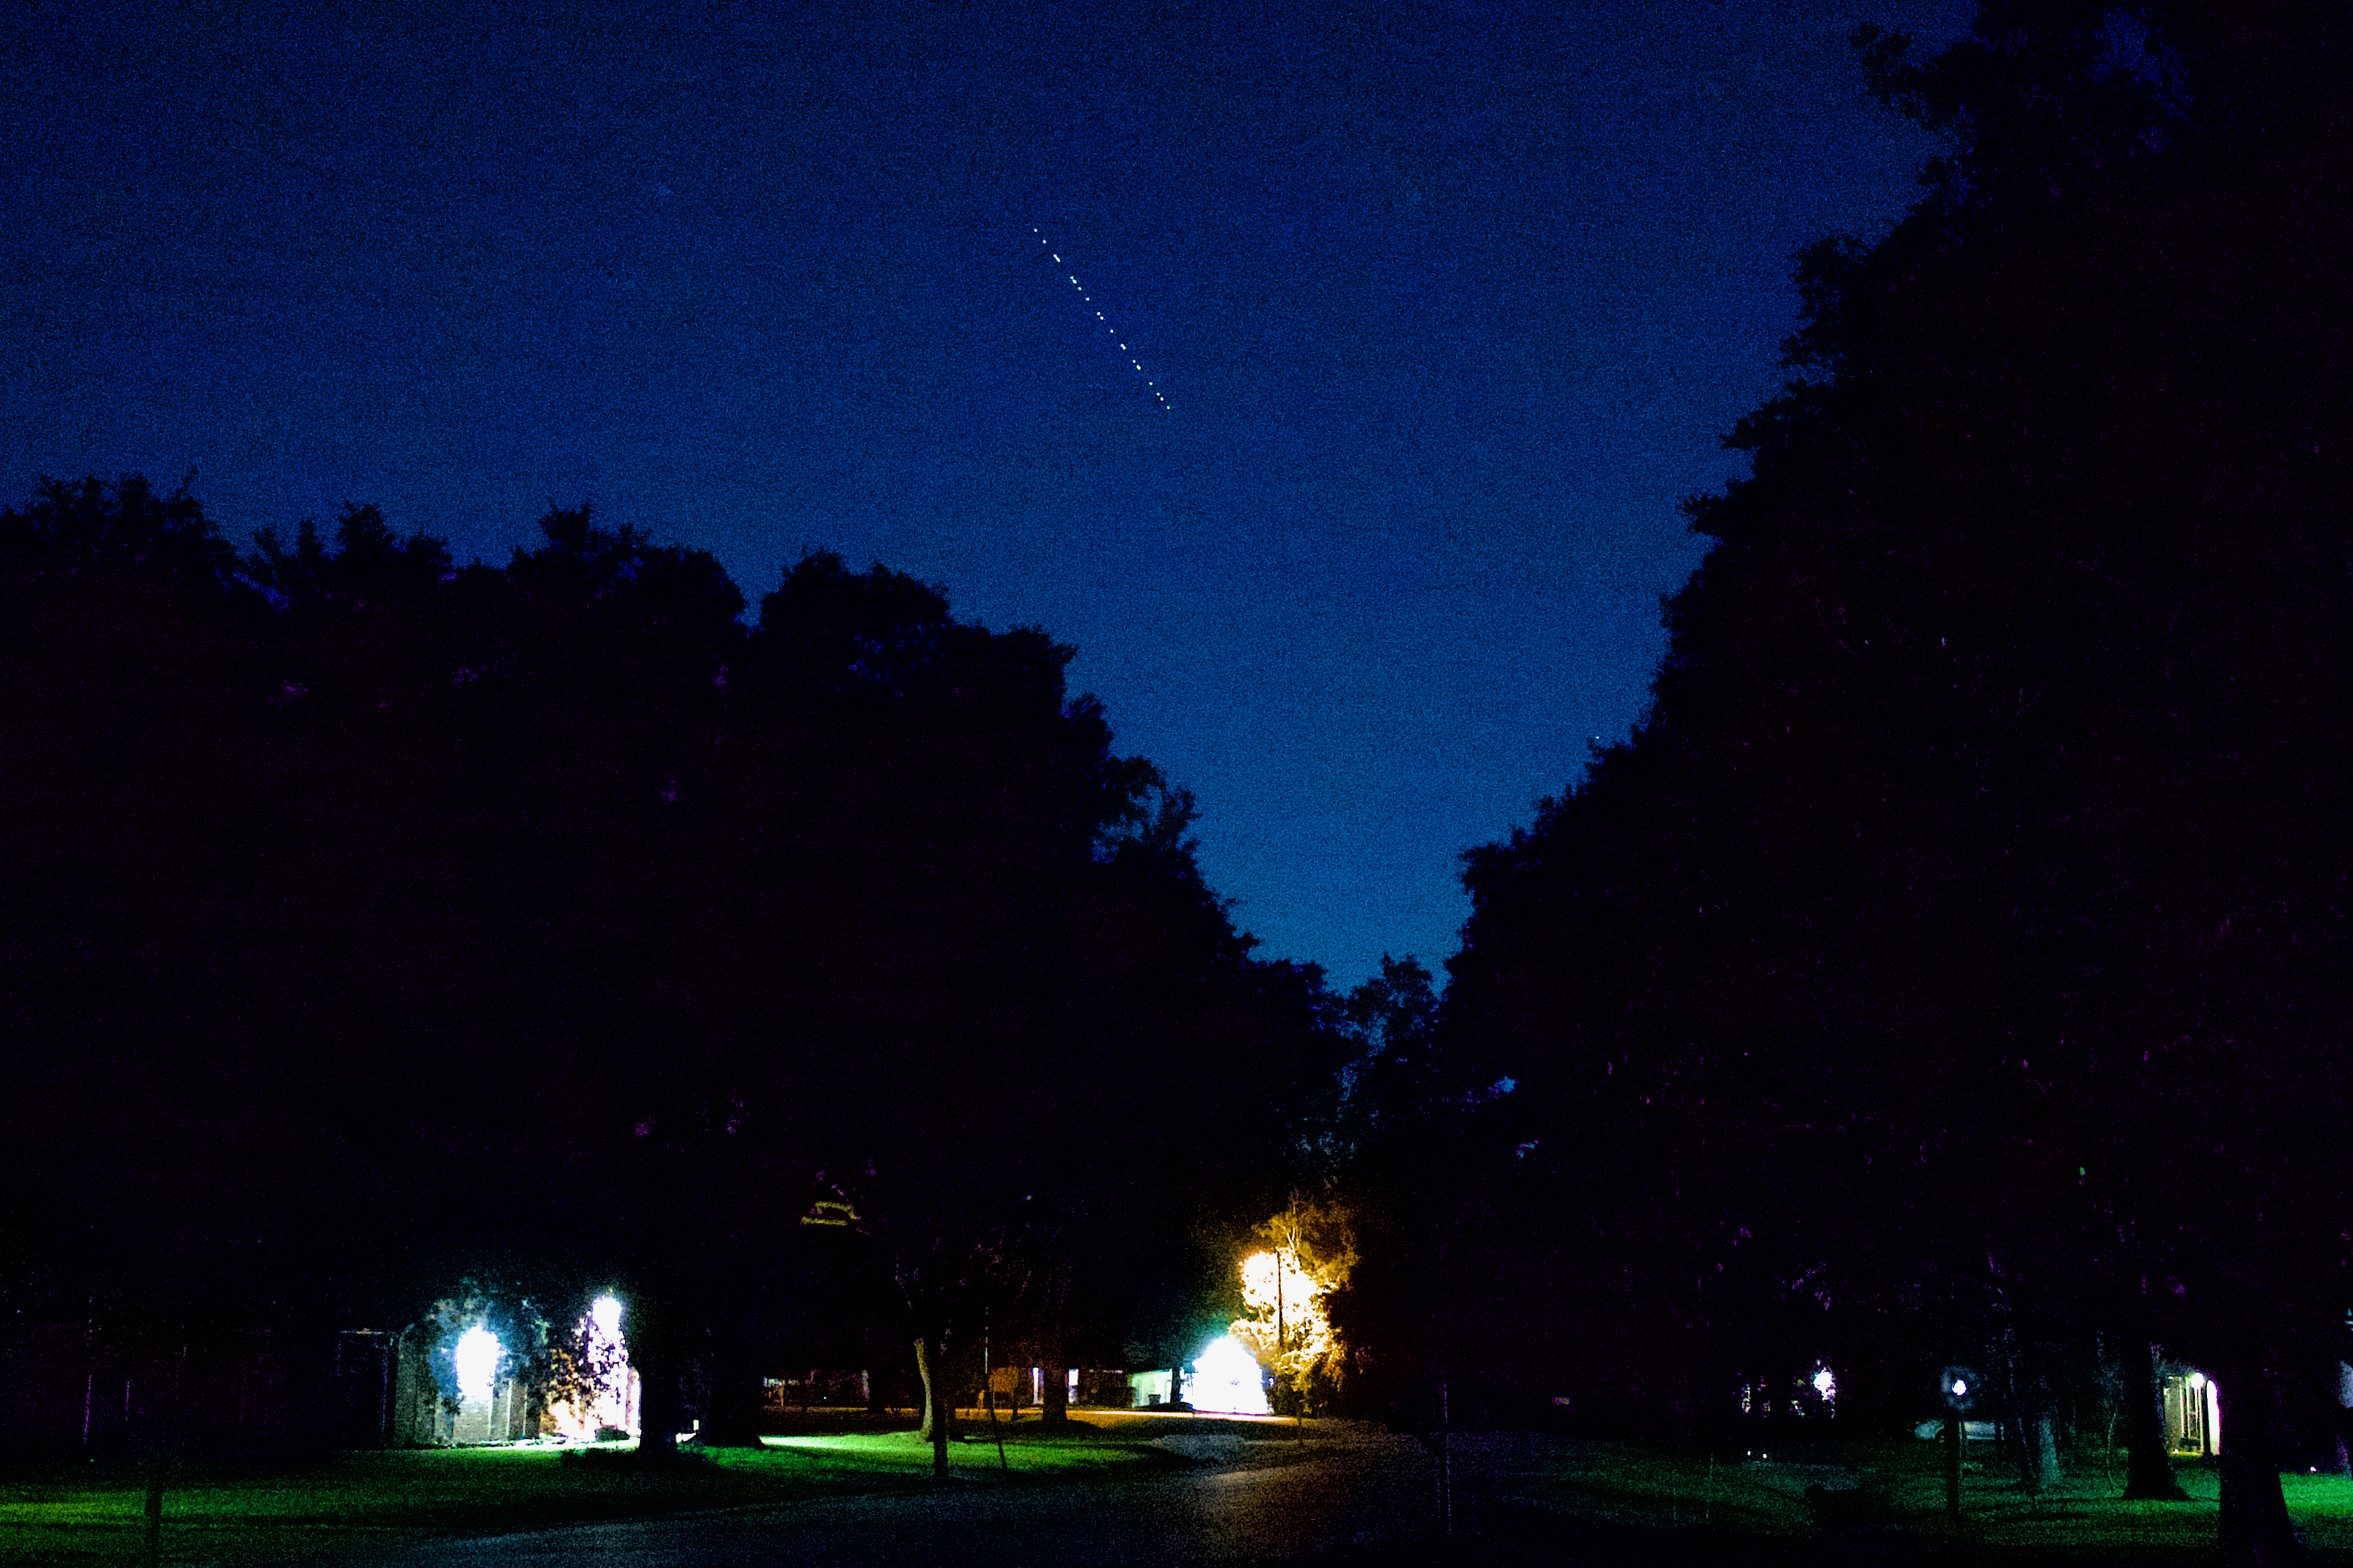
On Monday, June 24, the FindStarlink app/website predicted we’d have good visibility for a Starlink train, so we went outside to check it out. The “train” of satellites was really striking as it rose at the end of our street and traveled in a line across the sky, then went into the Earth’s shadow and disappeared just as the satellites “reached” a bright star (it could have been Pacmac gobbling up dots). Given the date and that 22 satellites were visible in the train, I think this was Starlink Group 10-2 (the FindStarlink site says what train is visible, but I forgot to record that on Monday).
I thought they were a really cool thing to see, but I am also glad that SpaceX is working on making them less of a nuisance to astronomers.
Camera geek info:
Panasonic DC-GX9 set at f/2.5, 15 second exposure, ISO 3200
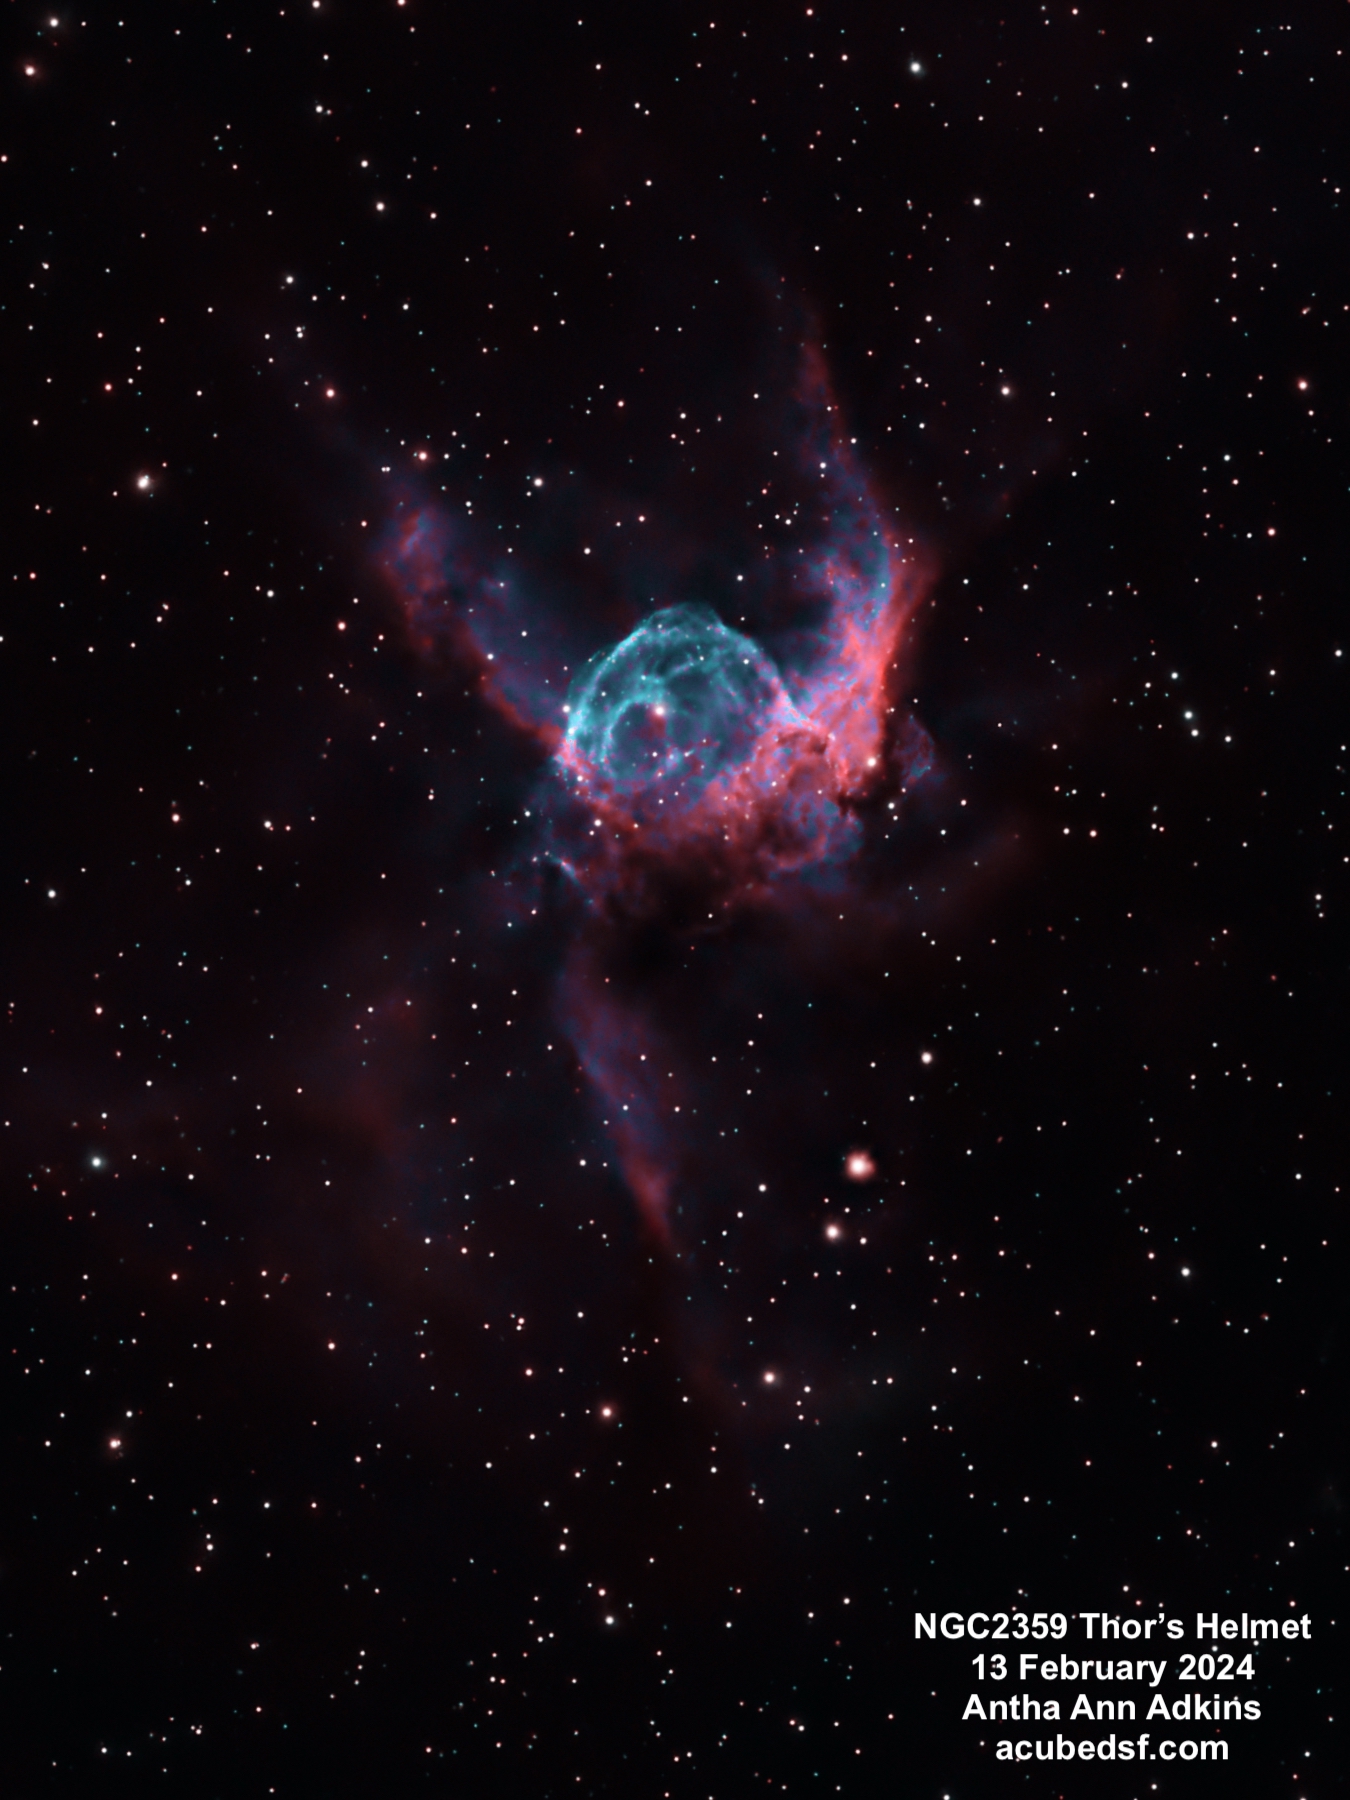
NGC 2359, also called Thor’s Helmet, is an emission nebula – in this case a planetary nebula of ionized gas around a hot central star, Wolf-Rayet WR7. WR7 is a massive star which has shed matter, and then its stellar wind has blown and compressed that matter into a bubble, and its UV radiation has ionized it to make the beautiful nebula we see. This planetary nebula has a very complex shape, likely due to interactions with a nearby molecular cloud. It’s located in the Milky Way, approximately 12,900 light years away, and it’s approximately 30 light years across, giving it an apparent size of 16 x 8 arc min.
In our early 2024 trip to the fantastic dark skies of Dell City, Texas, I took the images used to make the picture above using two narrow band filters – H-alpha (assigned to red) and Oiii (assigned to blue). These color assignments are close to, but not exactly, true to color.
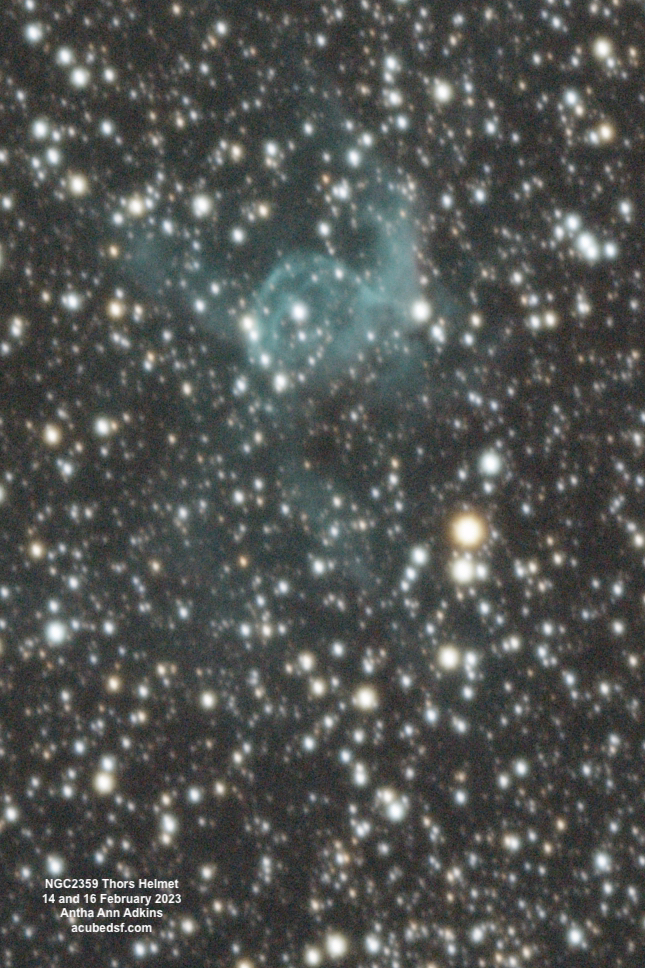
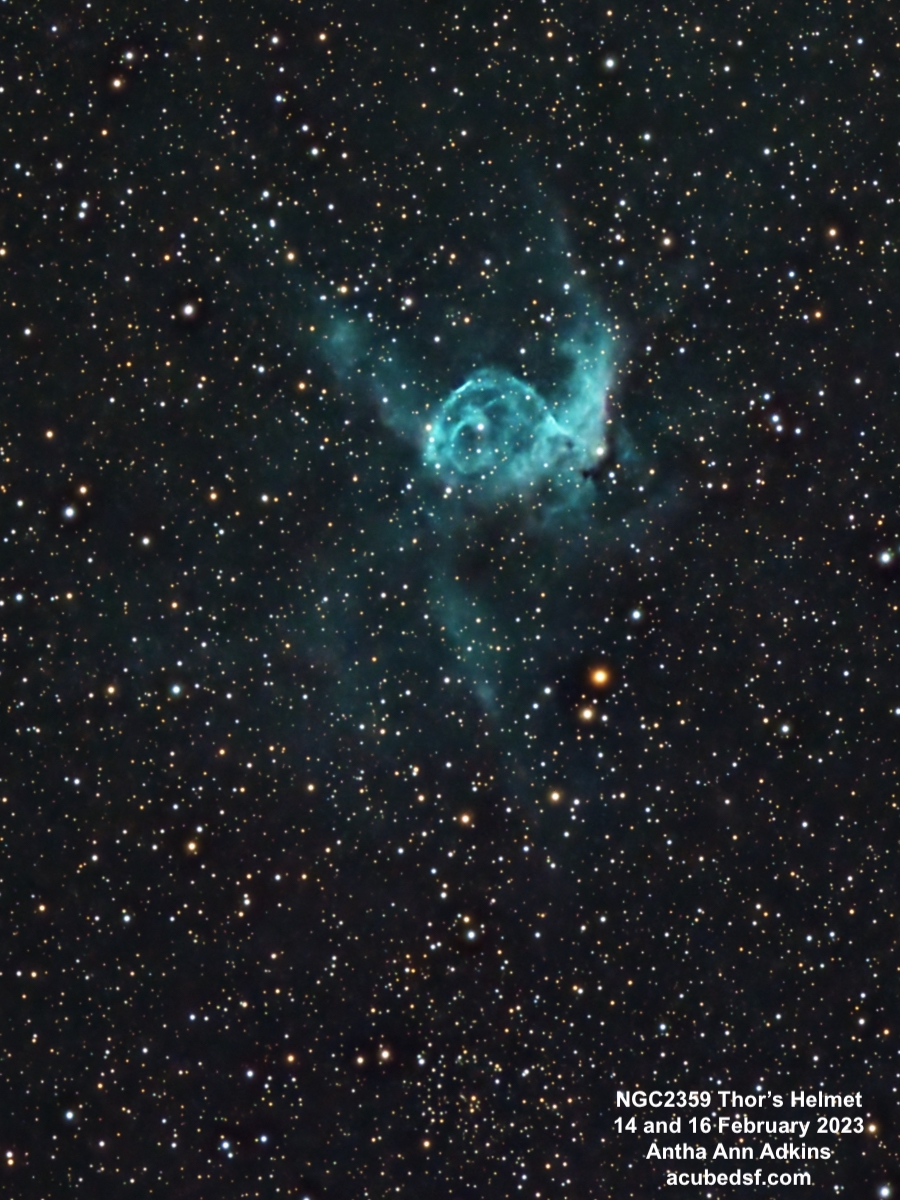
In our early 2023 trip to the fantastic dark skies of Dell City, Texas, I used a DSLR to make an RGB image of the nebula. When I processed it last year, I hadn’t learned many of the processing techniques I use today, so I decided to reprocess it. I was absolutely amazed at the difference processing can make (try the slider bar to see the difference!).
I love both the narrowband version and the new RGB version. Which do you like better?
Camera geek info – Narrowband:
Williams Optics Zenith Star 73 III APO telescope
Williams Optics Flat 73A
ZWO 2” Electronic Filter Wheel
Antila SHO filters
ZWO ASI183MM-Pro-Mono camera
ZWO ASiair Plus
iOptron CEM40
Dell City, Texas Bortle 2-3 dark skies
Frames:
February 13, 2024
HO lights
45 120 second Gain 150 Ha lights
35 120 second Gain 150 Oiii lights
30 0.05 second Gain 150 H flats
29 0.05 second Gain 150 O flats
30 0.05 second flat darks
30 120 second darks
Processing geek info:
PixInsight
BlurXterminator
NoiseXterminator
StarXTerminator
Generalized Hyperbolic Stretch
NBColourMapper
Camera geek info – RGB:
Canon EOS 60D in manual mode, 179 second exposure, ISO 2000, custom white balance 3500K
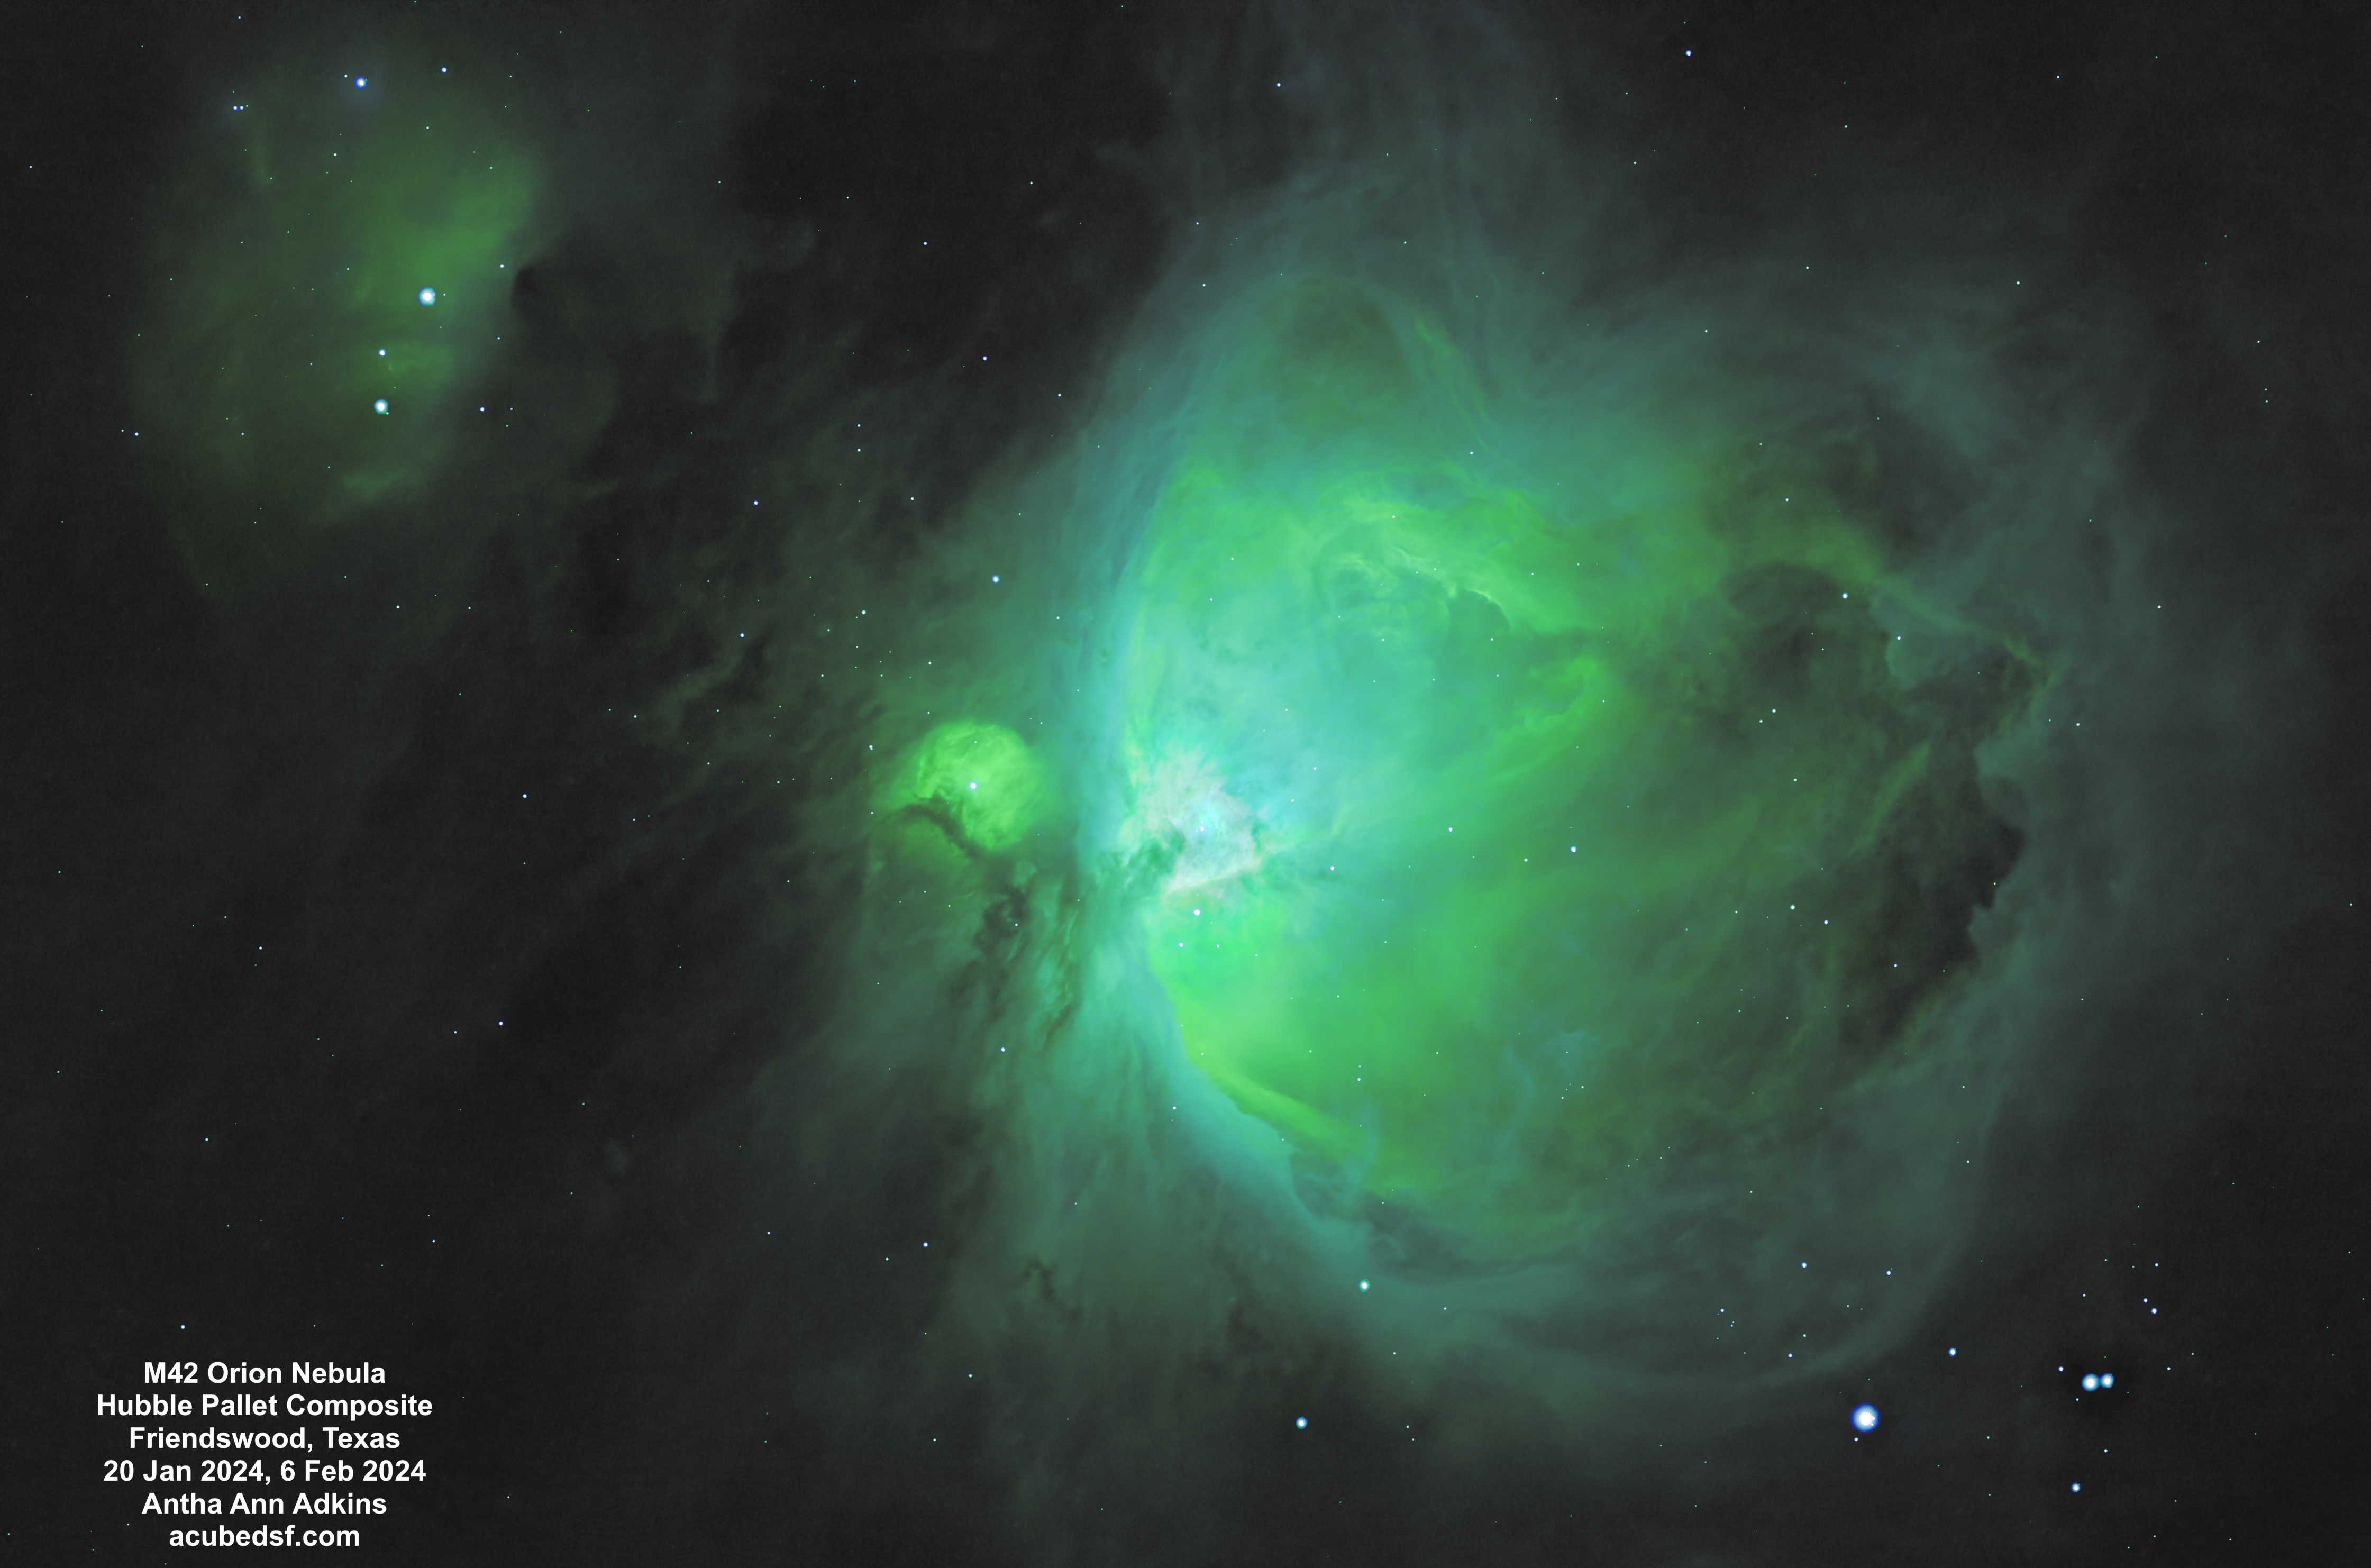
Just as I used M42 the Orion Nebula as the target for first light with my new RGB filters, I also used M42 the Orion Nebula as the target for first light with my new narrowband filters.
Not only did generating these images involve learning how to use my new hardware, but it also involved learning new processing, both processing narrowband data and making a composite image.
For narrowband imaging, each filter needs to be assigned a color to map it to an RGB image. The figure below shows how colors map to wavelengths, and the table below shows what colors the three narrowband filters map to. If a natural mapping is used, the final image will use red and turquoise only. So a false color mapping is often used to better bring out details. One common pallet is the Hubble pallet, where Hα is assigned to green, Oiii is assigned to blue, and Sii is assigned to red. PixInsight has a new tool, NBColourMapper, which can make these color mappings – or any other assignment. For these images, I only had a limited amount of Sii data, so they are limited in the color that Sii is mapped to. For these images, I tried both a “natural” mapping and a “Hubble” mapping. Which do you like better?
Element
Emission line
Wavelength
Color
Hydrogen
Hα
656.3 nm
Red
Oxygen
Oiii
500.7 nm
Turquoise
Sulfur
Sii
671.6 nm
Red
The Orion Nebula has an enormous amount of dynamic range – more than can be captured in a single setting. If the image is exposed to bring out the detail in the core of the nebula, the edges are too faint. If the image is exposed to bring out the edges of the nebula, the core is blown out. For these images, I made three versions of the image from two different sets of exposures: a version optimized for the core from the 60 second data, a version optimized for the middle zone from the 180 second data, and a version optimized for the outer edges from the 180 second data.
I tried a number of different processing flows to try to make a good composite from the three images using the new PixInsight tool BlendImage. What I thought ended up working was the following process:
Make mask for core area from bright area of mid version
Apply core mask to core image as protecting
Use core image as base image in ImageBlend
Use mid image as blend image in ImageBlend
Blend using lighten/mask
Set opacity so edges look good
Make mid mask for mid area from bright area of outer version
Apply mid mask to mid_core image as protecting
Use mid_core image as base image in ImageBlend
Use outer image as blend image in ImageBlend
Blend using lighten/mask
Set opacity so edges look good
Astrophotography often extends what the human eye can see by taking (or integrating to) long exposure times, much longer than the human eye and brain can combine. To me, narrowband mapping and composite imagery (as long as it’s labeled as such), is just another extension. What do you think?
I made a (time lapse) movie to try to capture the 2024 total solar eclipse we experienced in Granbury, Texas.
The movie doesn’t capture the planning and replanning needed to capture this event. Months ago, looking at the predicted weather, the weather across most of Texas was expected to be favorable for viewing the eclipse. I chose to stay in Temple, Texas which was within the band of totality, not too far from the centerline, and had a reasonably priced place for my husband, daughter, and I to stay. It turned out to be a great place to stay – we could pick up our daughter from an airport in Dallas and travel to Austin to see the Lady Bird Johnson Wildflower Center (which given the combination of the weekend, eclipse tourists, and peak wildflower season was quite crowded). Even along the side of the road, the bluebonnets were plentiful, so I got my iconic Texas bluebonnet picture on this eclipse trip.
By the night before the eclipse, it was clear that Temple was going to have a lot of cloud cover for eclipse day. We were rained on (twice) the last time we tried to see a total solar eclipse, and we did not want to repeat that experience! So I used the Astropheric app on my phone (with four different cloud cover models) to look south to Austin/San Antonio (did not look promising) and north to Dallas/Fort Worth (looked better), and I settled on going to Hillsboro, Texas (which had temporarily re-named itself Eclipseboro), which was an easy drive up I35 and right on the centerline.
But Monday morning when I got up, the cloud odds were not looking good for Hillsboro either. So I looked at the options again and decided to trade time in totality for better cloud odds and decided to drive northwest to Granbury, Texas. We picked up breakfast and started driving.
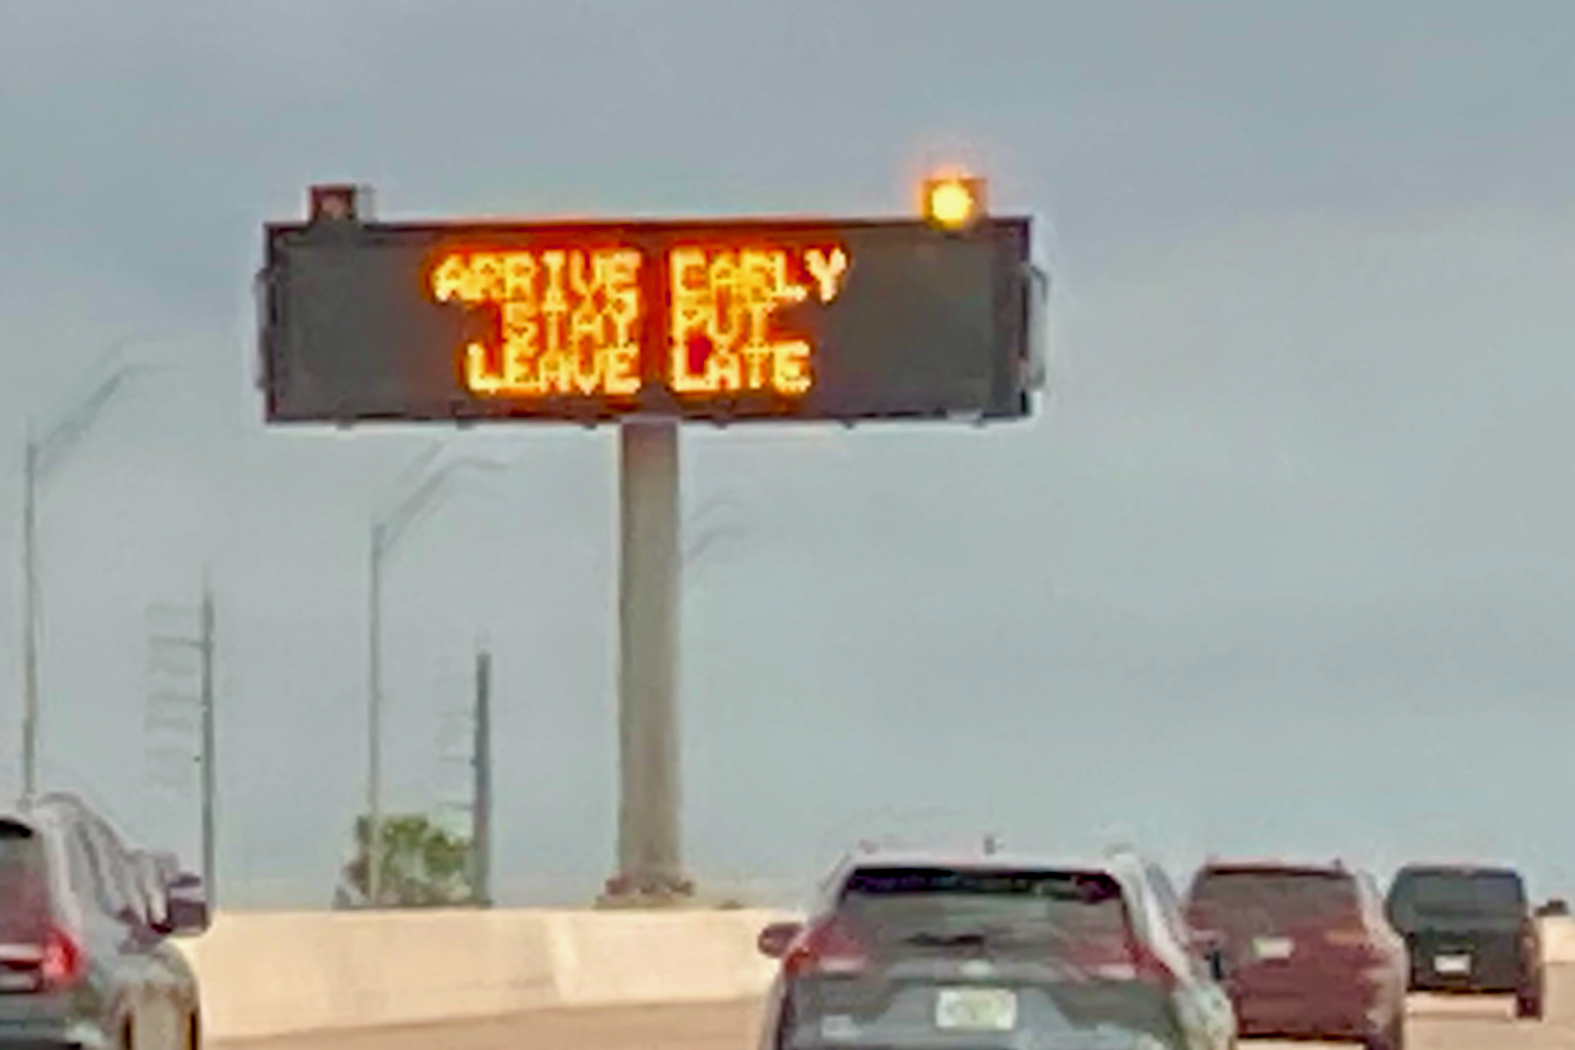
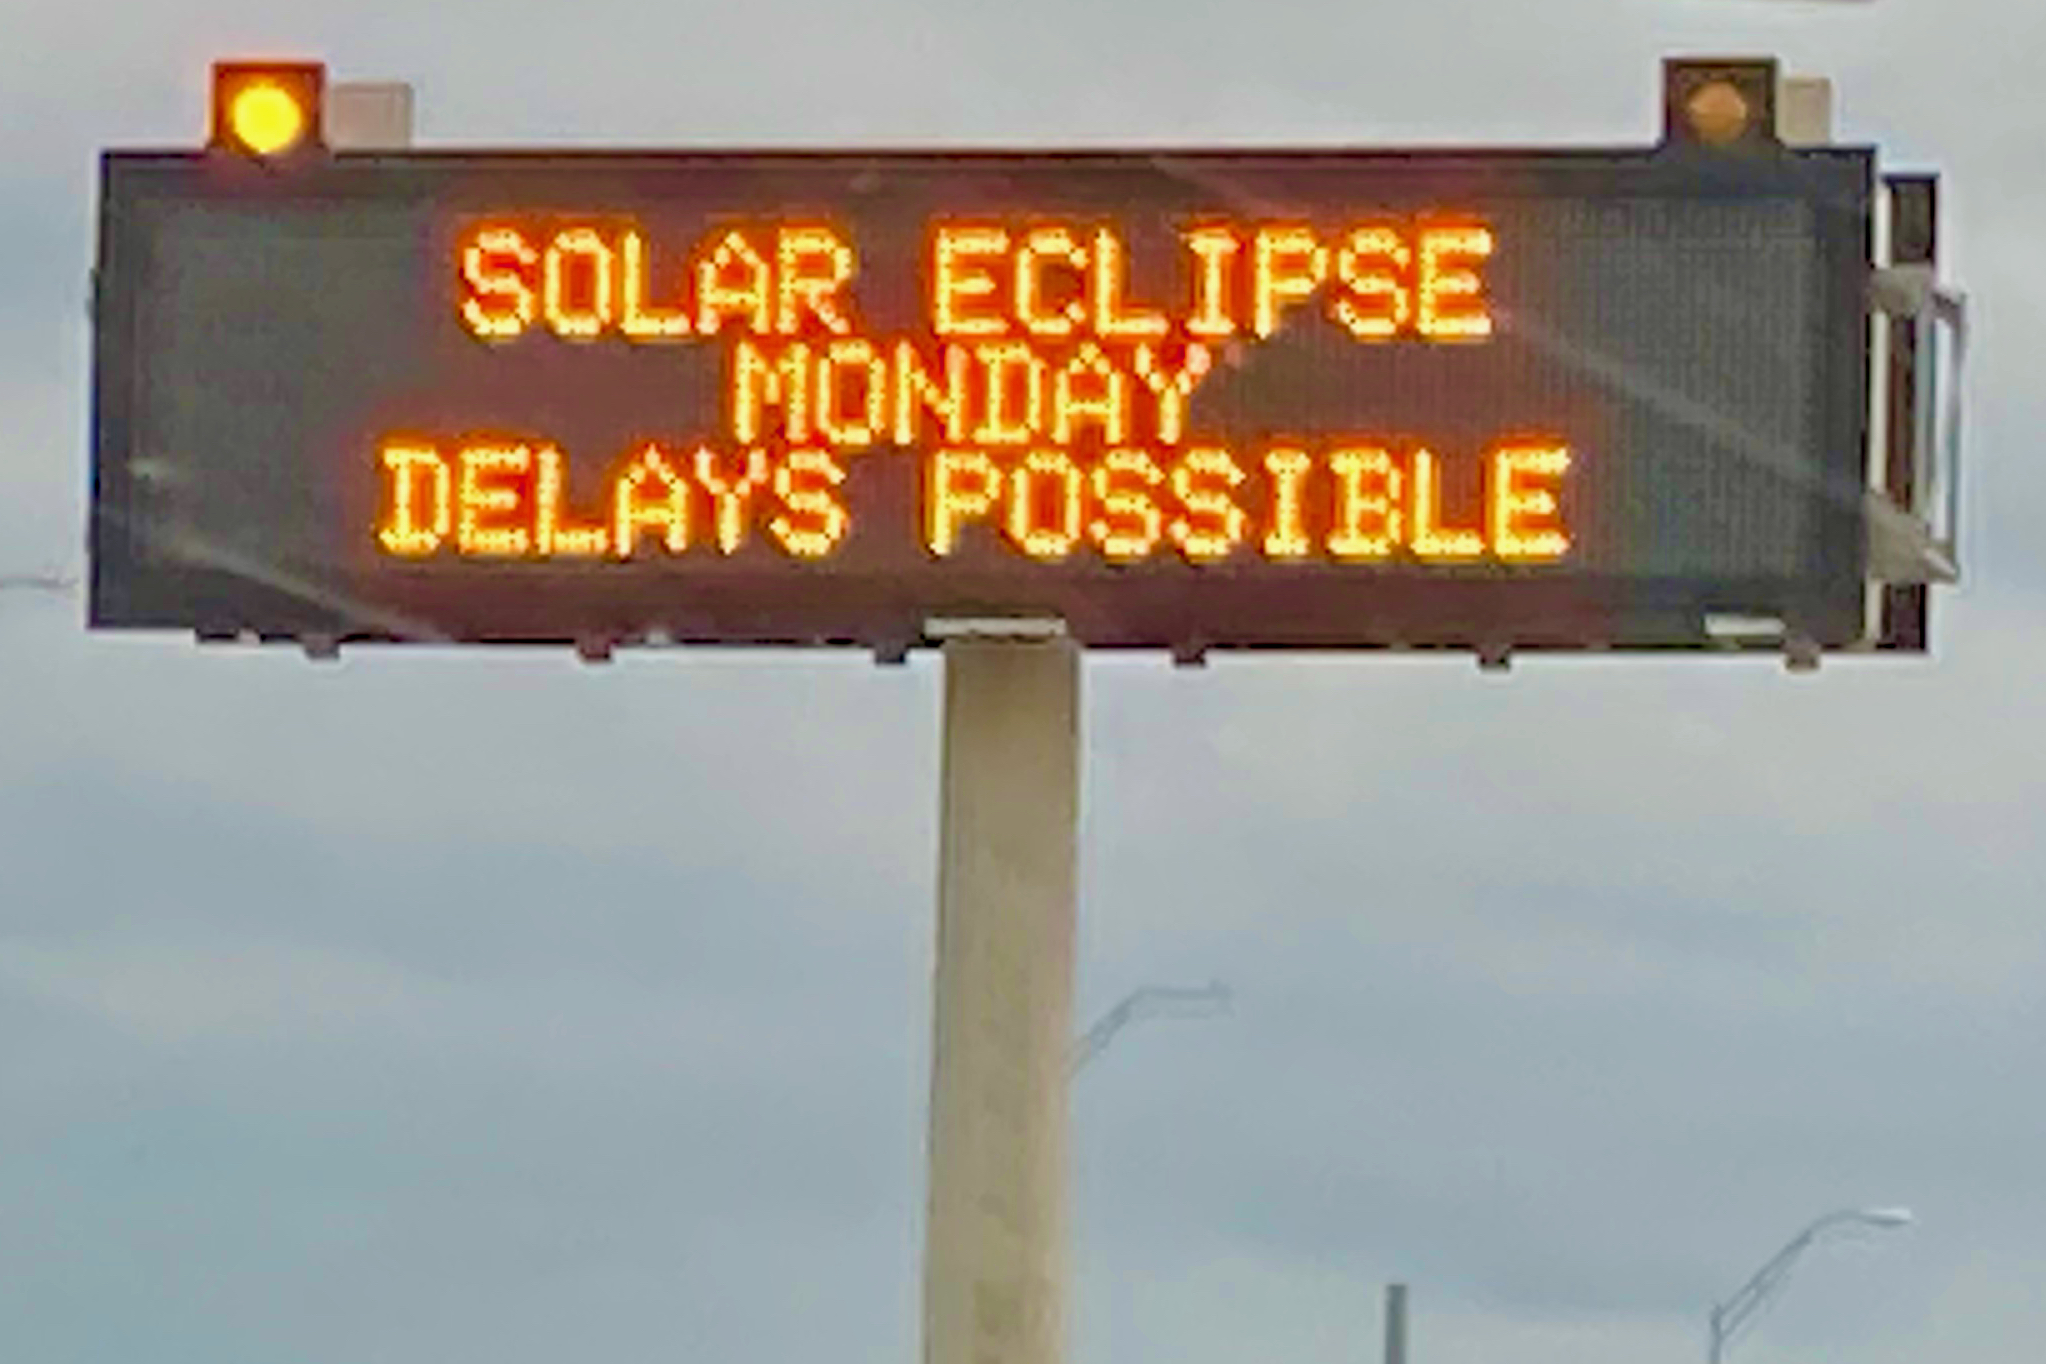
Some had predicted massive traffic, difficulty getting gas, and difficulty getting food. There were even road signs to warn of the upcoming traffic.
We didn’t experience any of that. No traffic, no difficulty getting gas, no difficulty getting food. And, best of all, we drove out from under the heavy clouds and saw the sun shining in a blue sky with white puffy clouds.
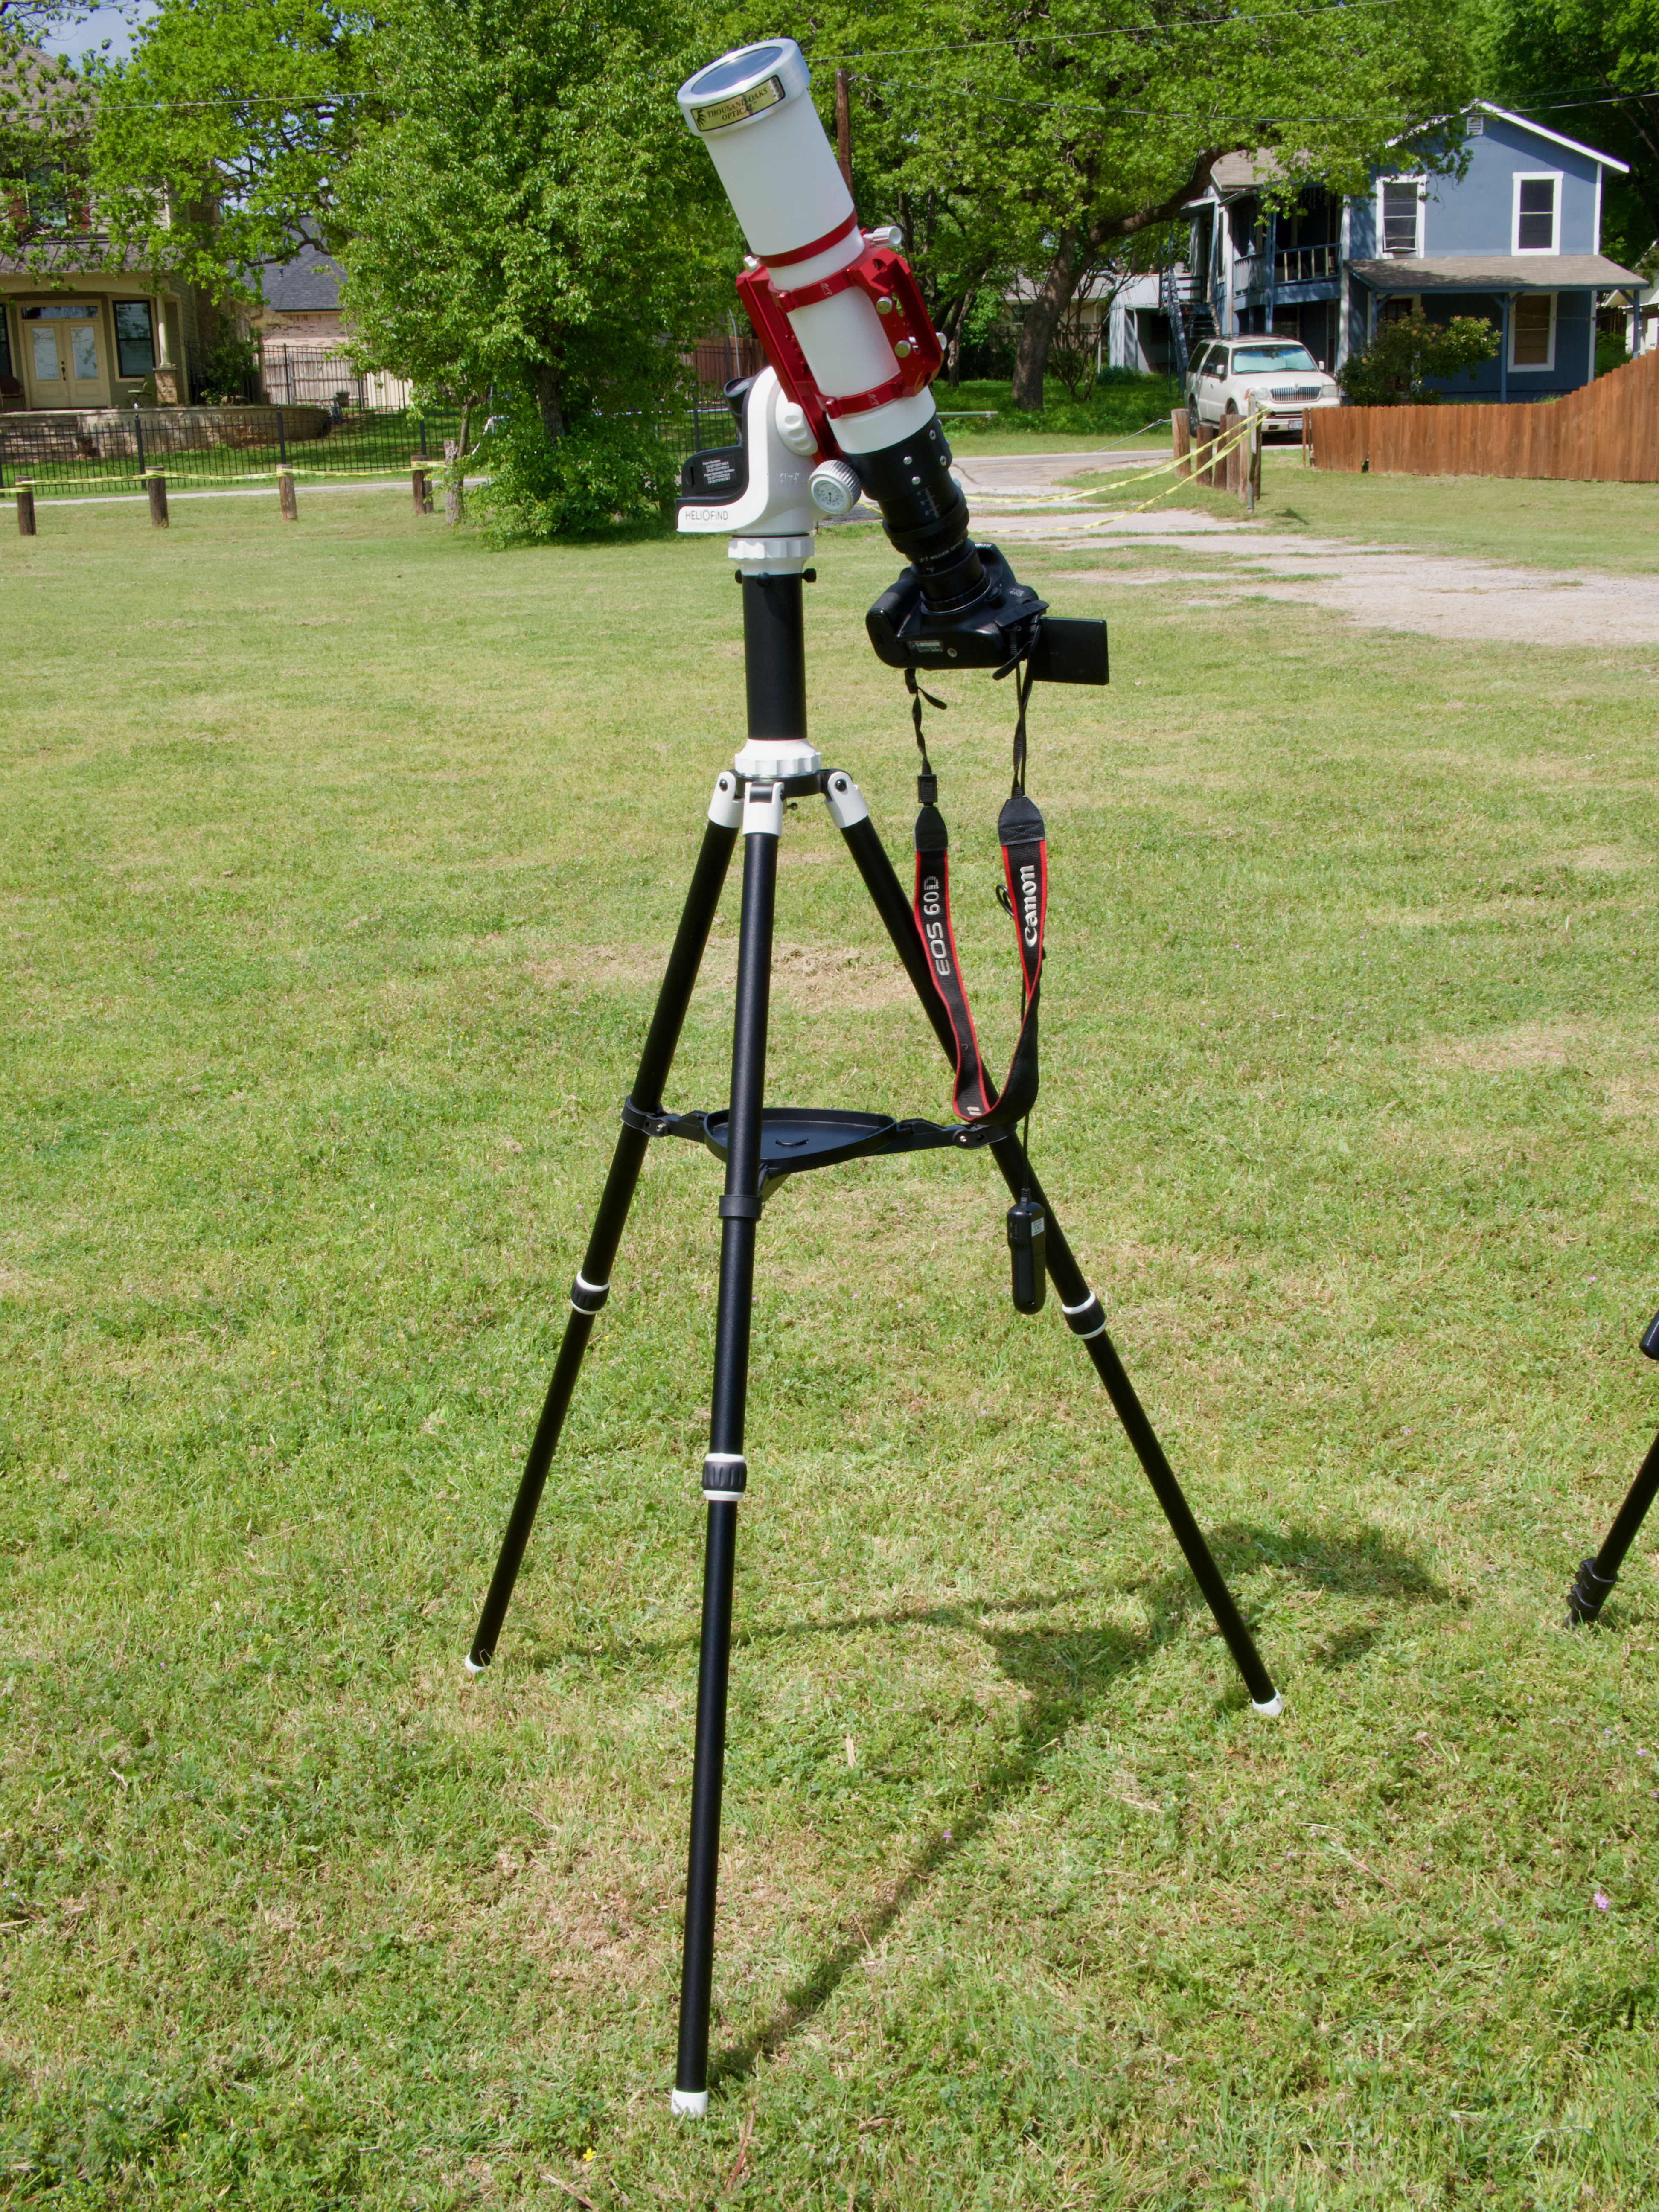
We decided to view the eclipse from Hewlett Park. A group from New Mexico State University were set up there, doing an experiment with weather balloons. They allowed us to set up at the periphery of their launch area. I got my telescope set up well in advance of the eclipse start, so I was able to capture a time lapse of the entire thing.
I was able to see sunspots and use them to focus my telescope. A few minutes before the eclipse, I started my intervalometer to capture a picture a minute.
Once the time lapse started, we had some clouds pass in front of the sun, which was worrisome. But I had noticed in Astropheric that pretty much every prediction had shown fewer clouds during the actual eclipse. And a book I had bought on this trip, Totality: The Great North American Eclipse of 2024, by Mark LIttmann and Fred Espenak explained why. The Sun heats the Earth and pulls water from lakes and plants into the sky, where it cools and forms clouds. But when the Moon starts to block the Sun, this heating process stops, water stops being pulled up, and the clouds dissipate. This effect won’t help with the heavy cloud cover of a front, but does eliminate fluffy white clouds. And we saw the clouds dissipate and the sky grow clearer.
We also saw the folks from New Mexico State University release their weather balloons.
We walked around looking for cool crescent shadows, but didn’t spot any. Nor did we spot any changes in color.
But we did see it get really dark. The sign on the hotel across the street came on as did the streetlights.
I had wanted to take some wide angle pictures with my smaller camera, but I did not get it set up in time. When we reached totality, I decided not to mess with it and just enjoy the experience and take pictures with my telescope.
It was the weirdest alien sky I have ever seen. It was dark. But there was this elliptical bright white glowing spot in the sky, with a perfect black circle in the middle. I could see the two brightest planets – Venus and Jupiter – on either side. It. Was. Awesome.
I took the solar filter off my telescope, reaimed the solar tracking mount (either it lost track or I bumped it in my excitement), and manually took pictures.
I looked for the comet, but did not spot it.
I alternated between taking pictures and looking at the sky.
One of the things that I could see naked eye was a bright pink spot on the lower edge of the Moon. I thought maybe it was the diamond ring effect, but it lasted for too long. Later I found out it was a solar prominence. Amazing!
I saw the edge getting brighter and took a set of pictures to try to capture Bailey’s beads and the diamond ring effect – I got the diamond ring for sure.
When the picture got super bright, I put the solar filter back on the telescope and returned to letting it take a picture a minute.
By now the clouds were gone, and we laid on our picnic blanket with our solar glasses and watched the Sun come back out.
We watched until the Sun had fully emerged from behind the Moon.
Friends, before this eclipse, I said that I would rather photograph an annular eclipse because it was a more exciting subject. I. Was. Wrong. There is nothing like a total solar eclipse.
And so I’m left asking: When can I see this again?
Stay tuned!!
Camera geek info for solar pictures:
Canon EOS 60D in manual mode, 1/200 second exposure, ISO 100
Intervalometer
Williams Optics Zenith Star 73 III APO telescope
Williams Optics Flat 73A
Thousand Oaks optical solar filter
Sky-Watcher SolarQuest HelioFind tracking mount and tripod
Camera geek info for corona pictures:
Canon EOS 60D in manual mode, 1/200 second exposure, ISO 100
Williams Optics Zenith Star 73 III APO telescope
Williams Optics Flat 73A
Sky-Watcher SolarQuest HelioFind tracking mount and tripod
One of the things that surprised and amazed me during totality of the solar eclipse was a bright pink spot on the lower edge of the Moon that I could see naked eye. At first, I thought maybe it was the diamond ring effect, but it was not – it was a solar prominence! And when I looked at my pictures, I discovered that it was one of several.
Solar prominences are loops of plasma that are anchored to the sun’s surface and extend out into the sun’s corona, following the local magnetic field. The plasma is made of electrically charged hydrogen and helium. Hot hydrogen emits red light, which is why they appear pink.
Since we are close to the maximum of the solar sunspot cycle (solar max is expected to occur within the next year), there happened to be a lot of prominences for this eclipse. So cool!
These pictures show the solar prominences during totality and the diamond ring effect where the sun emerges at the end of totality.
Camera geek info for corona pictures:
Canon EOS 60D in manual mode, 1/200 second exposure, ISO 100
Intervalometer
Williams Optics Zenith Star 73 III APO telescope
Williams Optics Flat 73A
Sky-Watcher SolarQuest HelioFind tracking mount and tripod